- Home›
- faq test
faq test
We also offer a premium pre-12 service - available in the checkout as well as Saturday and Sunday deliveries (additional charges apply)
For Example:
Item codes for till rolls:
- TH0003
- TH0001
- TH0014
- PDQROLLS
What you will notice on your invoice on the specific codes is what we call a ‘parent’ selling code. So for example TH0014 is a selling code which is using a physical item directly below of 5750T. This is the same on the other codes above. Any items on the invoice with a grey background are parent items (not physical items) with their physical items directly below.
Example invoice:

Please note - if you have ordered programming services on cash registers, scales or EPOS - we cannot ship the goods until the programming information has been sent back from you.
Who is responsible for WEEE compliance?
Businesses that:
- manufacture and sell EEE under their own brand in the UK
- resell equipment made by someone else under their own brand (if the maker’s brand appears on the equipment, it is the producer)
- import EEE on a commercial basis into the UK
- are established outside of the UK and supply EEE directly to the UK market by distance selling (for example online, mail order, by phone)
How do I comply?
You don’t have to!
As a distributor, Euro Cash Limited T/A Cash Register Group is responsible for complying with WEEE regulations.
Our obligations are:
- to join a producer compliance scheme (PCS) that takes on the obligations to finance the collection, treatment, recovery and environmentally sound disposal of household WEEE collected in the UK
- ensure a ‘crossed out wheelie bin’ symbol is displayed on relevant products as per the BSI EN50419 standard (which includes additional info including positioning, visibility, dimensions, location, and referenced documents)
- complete a mandatory WEEE return to the Environment Agency
Cash Register Group WEEE Registration number which is :- WEE/MM2078AA
We also work with PayPal and via the PayPal checkout option, you can 3 ways via Paypal
- Instant payment
- Pay in 3. This is 3 interest-free payments*
- Paypal Credit. Get 0% interest for 4 months*
When it comes to vat rounding some people are slightly confused with their Z report figures because they calculate the VAT on the entire sales in a Department / PLU or total – however they think its not accurate because VAT is calculated and accounting for at a transaction level – and if VAT on any transaction comes to less than 0.5 of a penny it should be rounded down and if it comes to 0.5 of a penny or more – it should be round up.
For example - if you made 2 seperate sales
| INC VAT TOTAL | EX VAT AMOUNT | VAT AMOUNT |
|---|---|---|
| £10.00 | £8.33 | £1.67 |
| £9.89 | £8.24 | £1.65 |
| TOTAL | TOTAL | TOTAL |
| £19.89 | £16.57 | £3.32 |
However if you had just made 1 transaction of £19.89 inc vat - the amount would be different due to round
| INC VAT TOTAL | EX VAT AMOUNT | VAT AMOUNT |
|---|---|---|
| £19.89 | 16.58 | £3.31 |
Please note - we are not accountants / tax advisers so please seek independent professional advice when it comes to VAT
- The printer header is dirty and requires cleaning
- You are using poor quality thermal till rolls - these are usually cheap, imported, poor quality rolls
- The thermal printer head is coming to the end of life - a lot of the machines you can replace the printer quite easily.
- You are using non-thermal rolls OR
- you have the thermal paper the wrong way round
- The printer has failed - please note that it is literally unheard of for a printer to suddenly stop printing; it would generally start to lose performance over time.
Please see our parts section for the make and model you have to see if replacement parts are available.
If you perform an action where the drawer should open (ie, a sale or NO SALE for example) and you hear the noise (we refer this to a KICK) of the drawer attempting to open but it doesn't - this usually points to a couple of things to check, and possibly means there isn't a fault
1) Check to see if the drawer is in the locked position
2) Is there anything stuck in the runners or inside the drawer that is restricting the drawer from opening? Ideally, remove the drawer from the unit and double-check for anything stuck
3) The final thing is to look for a pattern and whether it's catching on either side of the drawer - ie, is the drawer shifted over to one side or the other, which means it catches when it's being opened.
See image below, where the drawer is left shifted and catching
Drawer Left Shifted.jpg

Video showing it
Demo.MOV
Image of the drawer casing where you can see some minor damage where it is catching.
Also Please note the drawer wheel (WHITE)
Draw Removed and Marks on side. Drawer Wheel.jpg
To resolve, if you loosen the white wheel by a couple of turns, it will slightly move the drawer over to the opposite direction to allow it to freely open
and you will see below the drawer moved over slightly.
Drawer Adjusted.jpg
- The thermal paper is in the wrong way round.
- The paper should bend away from you, not towards you, when it feeds out of the printer.
- The paper is not thermal.
- Scratch the paper with your nail, if it stays white then it is not thermal paper.
- The printer has failed and needs replacing
- If feeding but blank - especially after a till roll change - this is almost always, the till roll is the wrong way around or you are using non-thermal rolls.
- If the print quality has faded over a period of time - then this would imply the printer head requires changing. Most printers can be changed fairly easily. Please see the spare part section of the cash registers to see if the printer is available in the first place.
- If not feeding at all - but no error message - automatic receipt printing might be turned off.
All tills require a cashier/clerk to be signed to perform any action (sale, reports, programming). If you see any kind of message like this, you just need to type your clerk number (on the 0-9 keypad) followed by the CLERK button (sometimes called CLK). If you do not use clerks – then just press [1] [CLERK/CLK].
If you require integrated payments, you would need to consider the EPOS system - we sell Loyverse Software which allows integration with Teya, Zettle, and Sumup. Then our premium EPOS software called REGISTER offers various other payment integrations.
- PGM Mode
- [1] [sub total]
- type in the price on the keypad
- press the physical plu button on the keyboard
- repeat from step 3 if required
- when finished press [sub total]
- PGM mode
- [2] [sub total]
- enter the name using the querty keyboard
- press the physical button on the keyboard to update the name
- repeat from step 3 if required to edit others.
- [sub total] to finish

[1] [% / CLK] to sign on as clerk 1
to turn it back on:
- PGM mode > system settings > [cash]
- [3] [subtotal] [0] [6] [2] [2] [subtotal] [0] [0] [0] [0] [4] [0] [0] [0] [0] [0] [cash] [subtotal]
- turn to PGM mode
- [3] [subtotal]
- [0] [5] [2] [2] [subtotal]
- press either [0] for receipt or [1] for journal followed by [0] [0] [0] [cash /amt tend] [subtotal]
- remove AA batteries
- unplug from mains power
- turn key to PGM mode
- press and hold [FEED]
- turn on power while still hold the key above
- release the key
- type in [0] [1] [2] [5] [0] [0]
- press [SUB TOTAL]
- wait for the machine to complete the process.
Printing other tax rates on reports (in the last bank of numbers these are tax1- tax 10 – so if this sequence prints tax-3 – if you want to print tax4 – replace the rather than entering 7 enter 4 as the fourth input)
The default print only shows tax1 & tax2. To make the change to the report please follow:
PGM mode > system settings > [3] [SUB TOTAL] > [0] [9][2][2] > [4][4][4][7][7] [7] [7] [7] [7] [7] [CASH AMT TENDER] [SUB TOTAL] - return the key to REG mode.
As default the post receipt is disabled as standard, to enable the function
- PGM MODE > SYSTEM SETTINGS > CASH/AMT TEND
- 3 > SUBTOTAL > 0622 > SUBTOTAL
- 0000400000 > CASH > SUBTOTAL
How to set up clerk training mode
Firstly, ensure you have clerk enabled by
PGM > GENERAL SETTING > ENABLE CLERK > CASH > YES.
The below code is setting up clerk 50 as training mode (to select a different clerk please swap the 50 to the clerk number you require, i.e., for clerk 4 it would be 0407
- PGM mode > system settings
- CASH > 3 > SUBTOTAL > 5007 > SUBTOTAL > 67 SUBTOTAL > 100000 > CASH > SUB TOTAL
To test its working, please then key in 50 then CLERK, the top left with say C50 and in the middle will show TRG. Receipts will print, but you will see there are lots of *** over the receipt and the sales data will not be recorded in X or Z reports
Lock up – i.e., machine hibernates:
If you make a mistake in operation, the machine may lock up to avoid damage to the programs.
- Power off machine
- Insert key and move to PGM mode.
- Press down and hold FEED button while turning the machine back on
- Machine should show 0.00 on screen, release the FEED button.
- Hit SUBTOTAL and a receipt should print.
How to turn on custom receipt header message:
- PGM mode > system settings
- CASH > 3 > SUBTOTAL > 2122 > SUBTOTAL > 300000 > CASH > SUB TOTAL
- Turn key back to REG.
How to change the currency symbol from. to £?
- PGM mode > system settings > CA /AMT TEND
- 2 > SUBTOTAL > 0123 > SUBTOTAL
- Then press the 7 key 36 times and you will see the £ symbol on screen.
- Press the [00] key > CA/AMT TEND > SUBTOTAL.
- Turn key back to REG
- TURN TO PGM
- scroll down to SYSTEM SETTINGS and press [CA/AMT TEND]
- [3] [SUB TOTAL]
- [0] [0] [7] [1] [SUB TOTAL]
- Press either [0] for new item or [1] to modify [CA / AMT TEND]
- Scan the item (if you are modifying an item and do not wish to change any of the 5 settings just press [CA / AMT TEND] to skip the option. Ie you might only update the price but wish to leave all the other settings as they were.
- enter the price [CA / AMT TEND]
- press the department number [CA / AMT TEND]
- enter the name [CA / AMT TEND]
- enter PLU status (standard is [2] [CA / AMT TEND]
- Enter minimum stock - most people just enter [0] [CA / AMT TEND]
- scan your next item or press [SUB TOTAL] to finish then turn key to REG

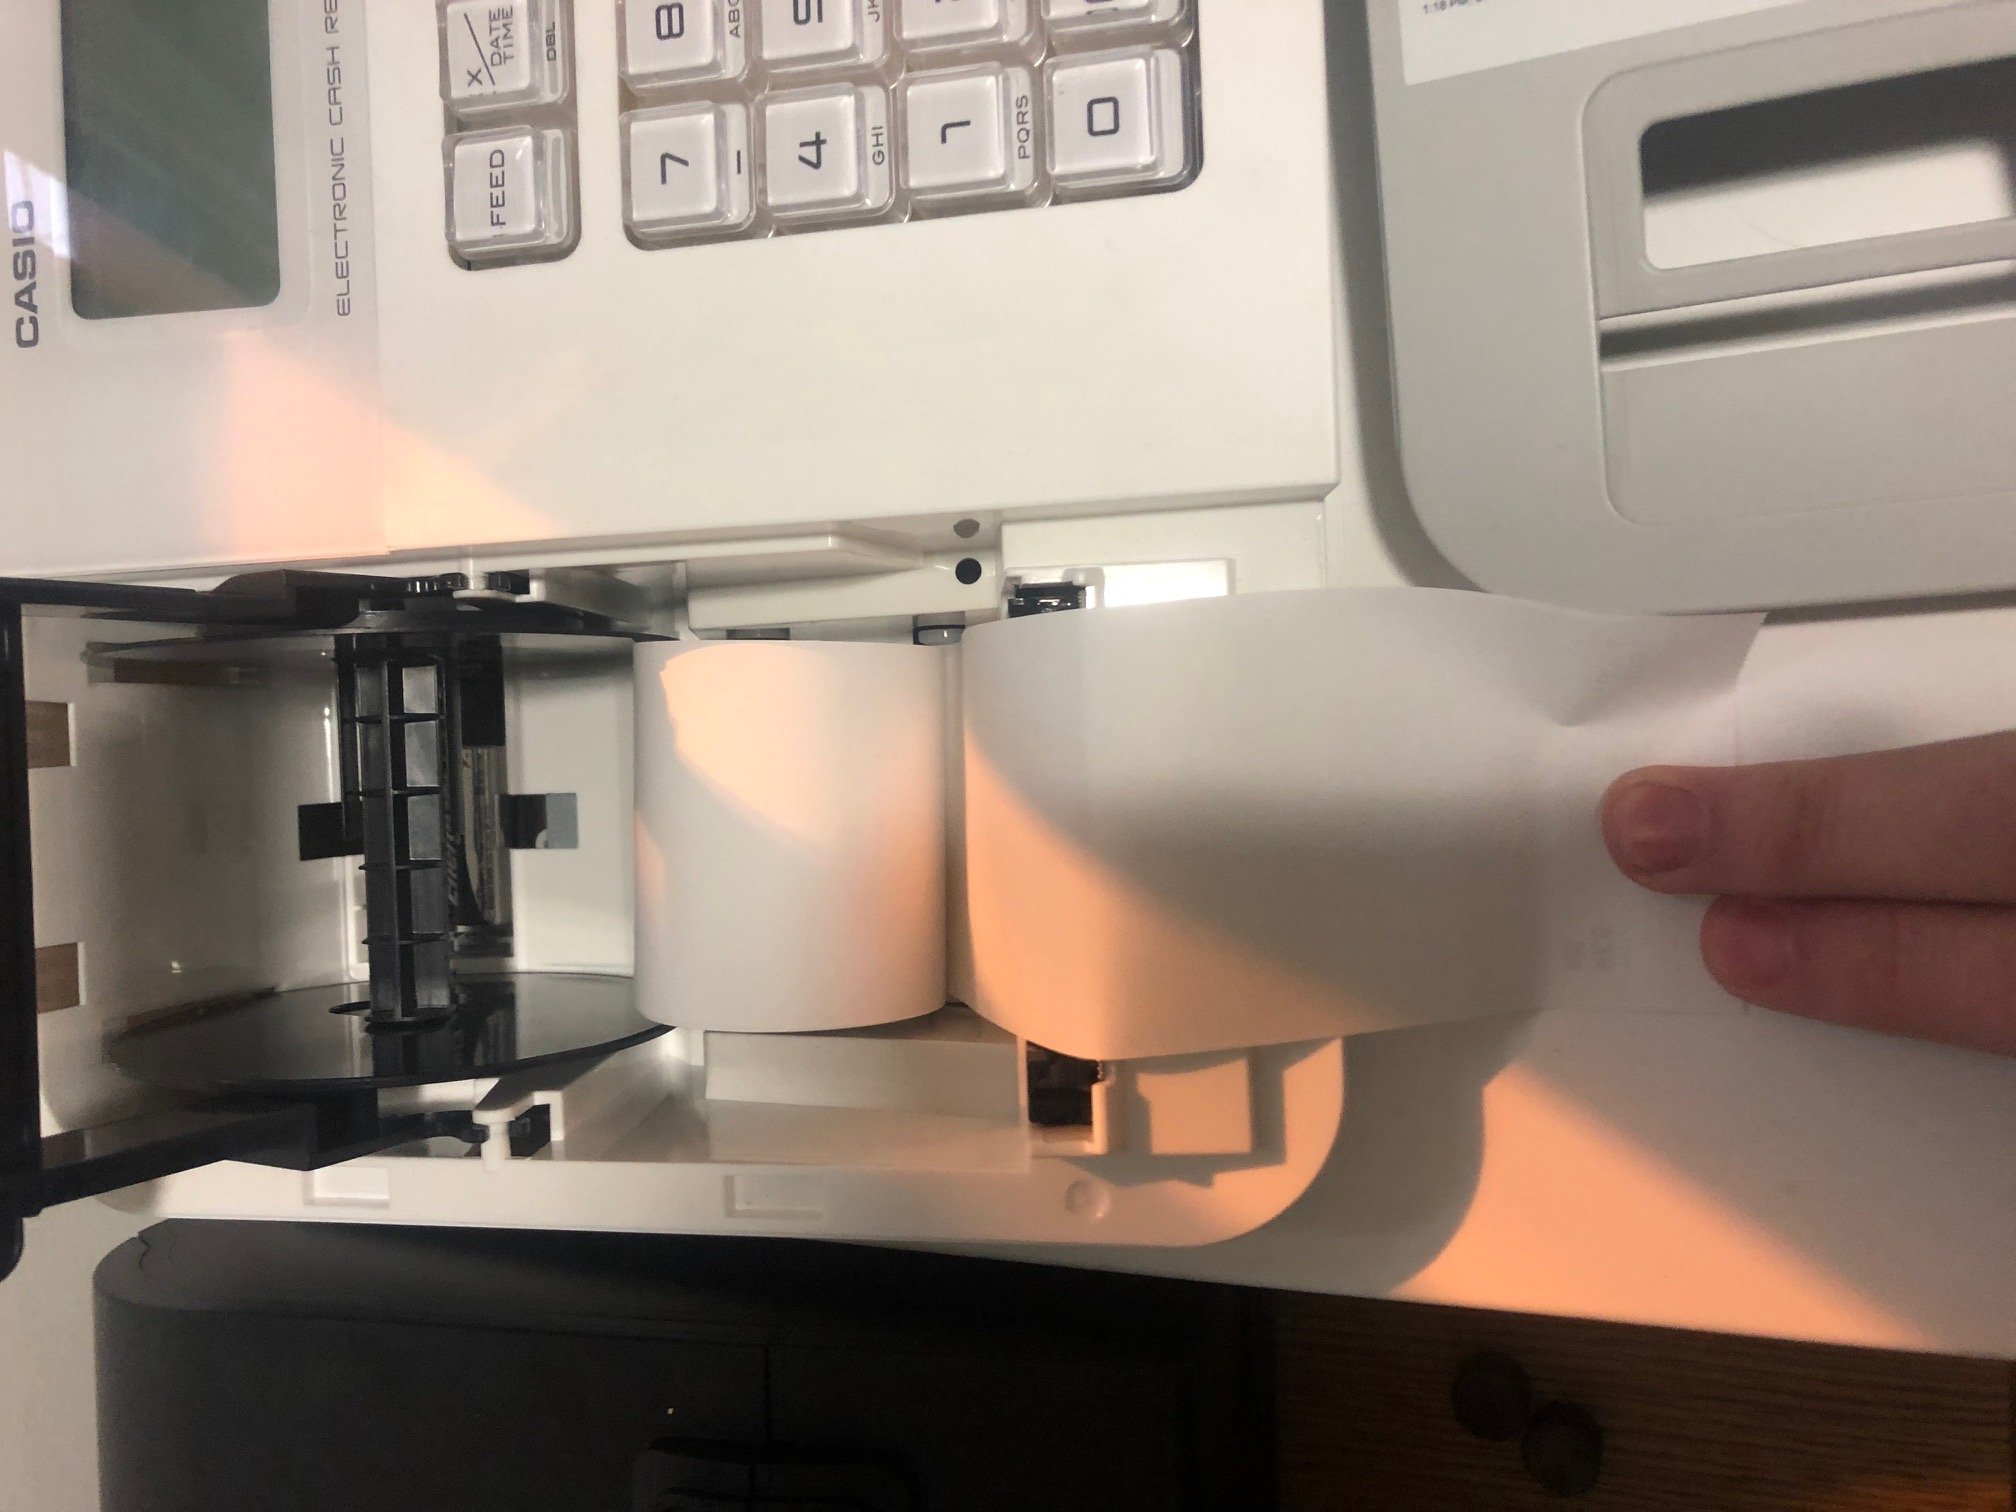
pull paper past printer teeth, and close platen arm
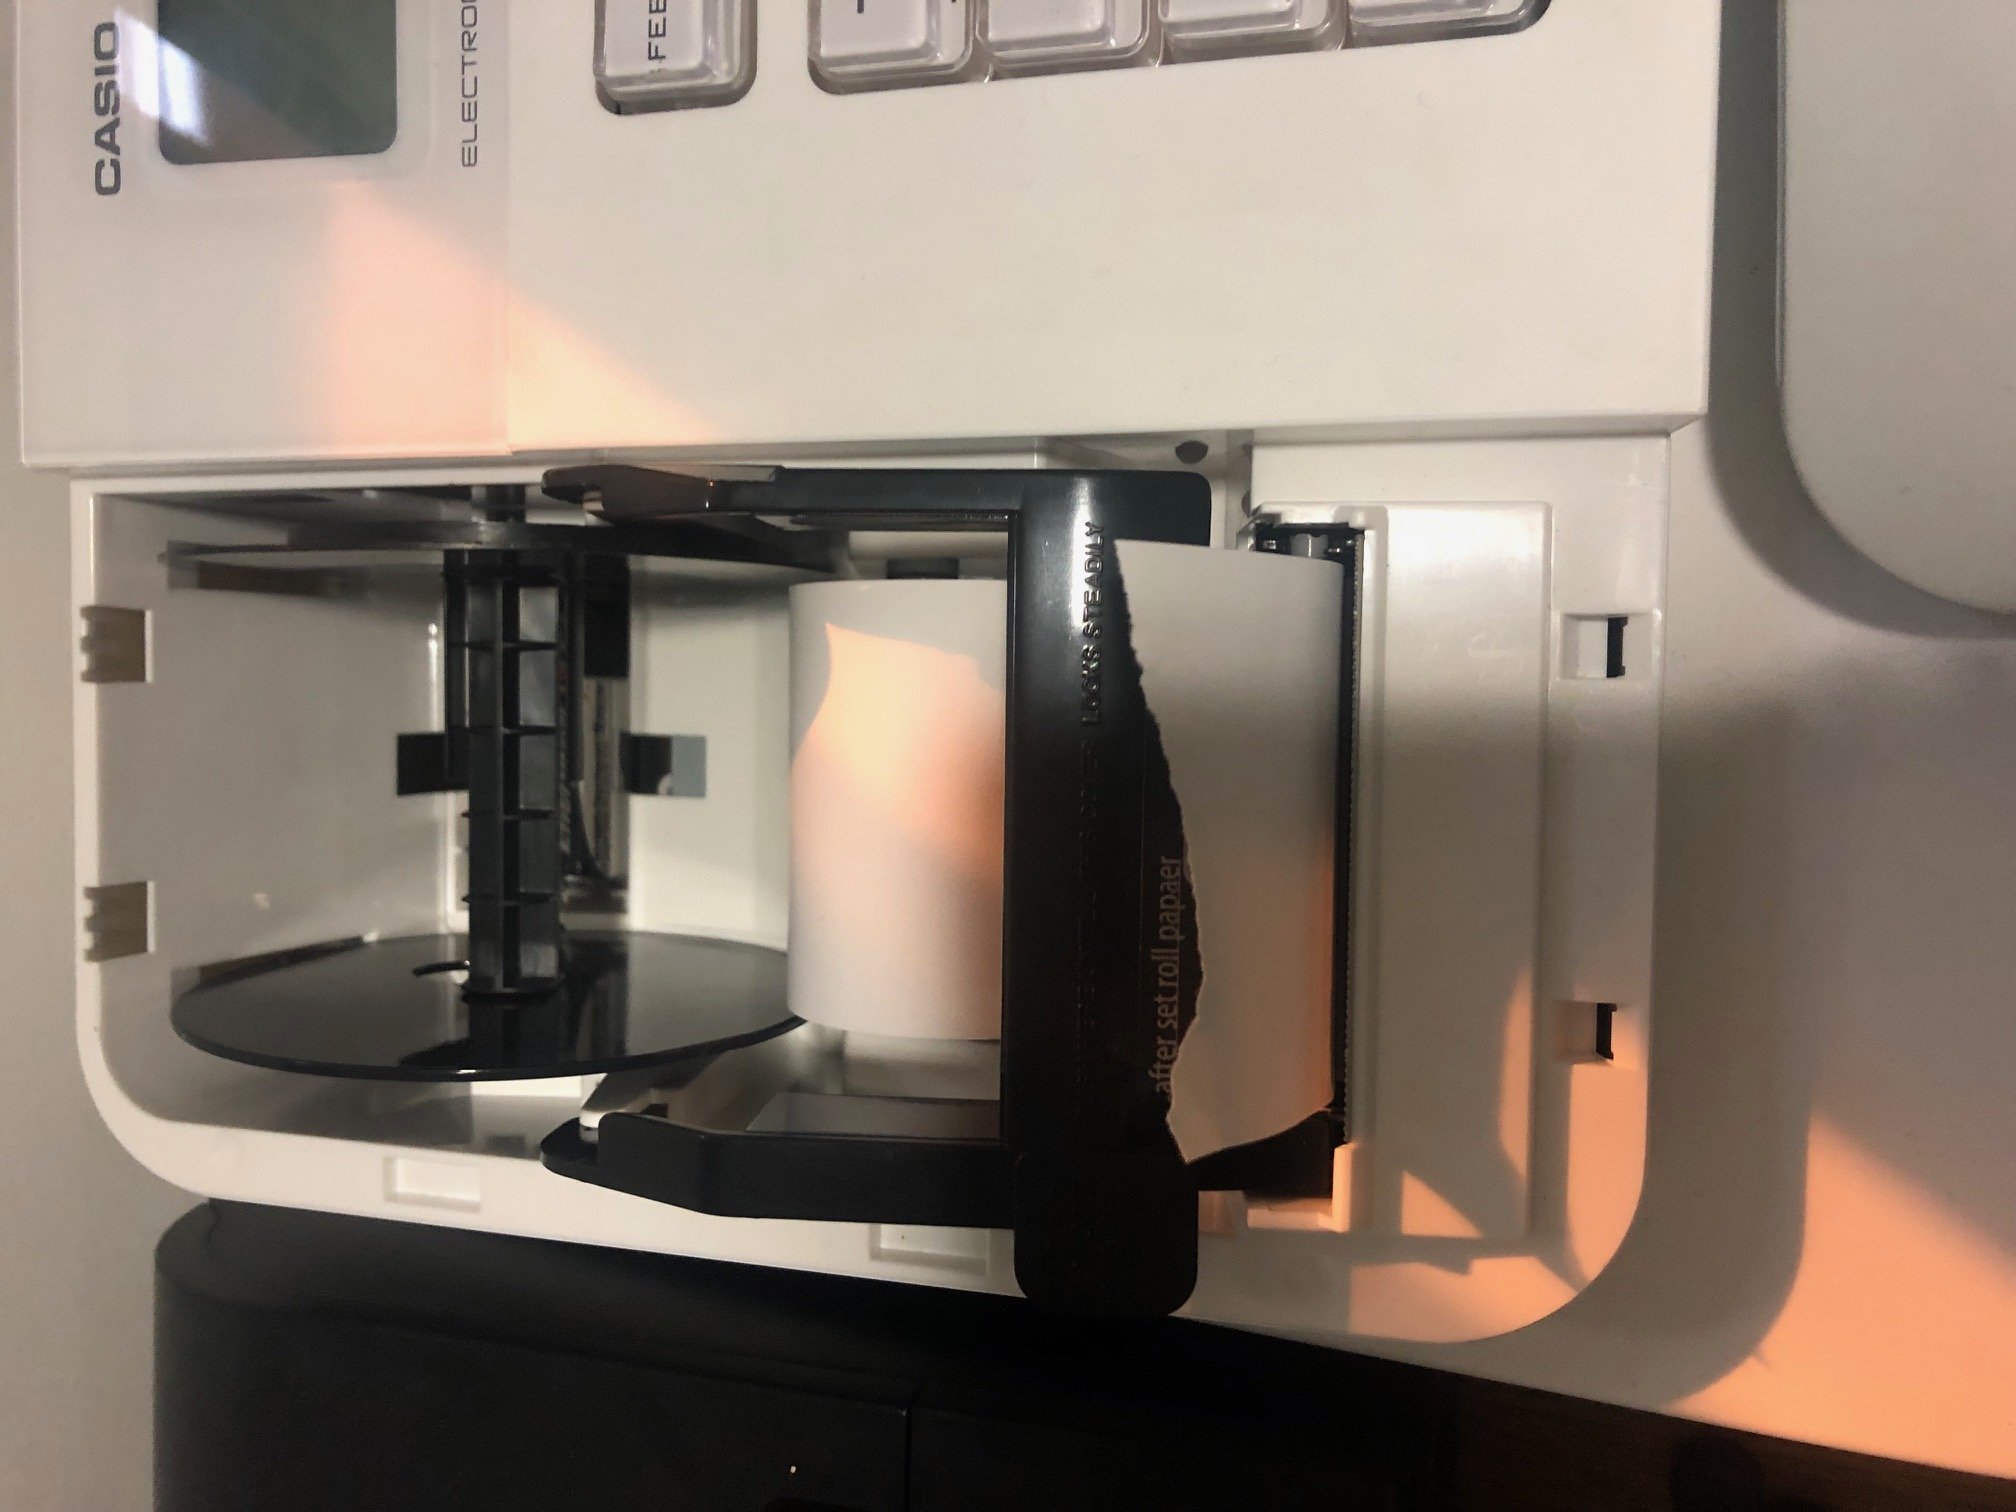

- PGM
- 3 ST
- 2422 ST
- 0 CA
Does the till only open a small way (ie a couple of cm’s)? if yes, then its almost certain that the cause is that there is part of the cash drawer which is stuck. Inside the cash drawer there is a semi-clear blue note divider, sometimes in transit this gets wedged up at the top of the drawer which results in not opening.
If you open the drawer as far as possible, sometimes you are able to dislodge it with a metal ruler, however failing this, just pull on the drawer with some force and it will release it self – this wont cause any damage to the machine.
If you are having issues setting up the till and need to factory reset the machine, please follow the below
- Turn the key to ‘off’ position
- Unplug the machine from the mains power and take out the 2 AA batteries
- Leave unplugged for a minimum of 15 minutes
- Reinsert the 2 x AA batteries
- Install the till roll
Plug the machine back into the mains power – the machine should now print out some instructions on how to set the language (if the machine shows E10 – the paper isn’t inserted correctly)
If for any reason it doesn’t print, and you have a FLASHING ZERO on the screen, please hit 0 (to select English as the language) on the keypad, then CASH.
Please follow instructions to set up the language, then date (in 6 digit format) then lastly 24 hour clock.
Turn the KEY to REG mode and it is ready to use
We have tutorials on our website that which show a lot of the functions of the till and also how to program the till receipt header.
https://www.cashregistergroup.com/acatalog/Casio-SE-G1-ERROR-CODES.html
Installing till Rolls
You DO NOT put the plastic spool through the middle of the paper rolls, the spool is only used to gather up the paper if you are keeping the journal.
You lift the arm up drop the paper in pull the end of the paper forward and then close the arm back down on top.
If you are typing in an amount DO NOT use the decimal point £1.99 is entered as 199, then use dept button.
Error Codes
Code fault
If you have a flashing zero on the screen – this is to select language. Please use 0 then cash (for English) then it will be 6 zeros on screen (date) then afterwards 4 zeros (for 24 hour clock)
L L letter appears on the left side of the display. This means low battery – either replace batteries or insert 2 x AA
E01 Mode switch position changed before finalization. CURE: Return the mode switch to its original setting and finalize the operation.
E10 Till roll error. Please insert a till roll

STEP 2


- Turn the machine to off position.
- Hold down feed button
- While holding down feed button, turn the key to PGM
- Release the feed button
- Then type in 11240 followed by sub total twice
- Wait for the initialisation to complete (approx. 30 – 60 secs)
- To check reset has completed, check the receipt that has printed and the number in total left should be 001.


2) System setting
3) Press [CA/AMT TEND]
4) Press [3]
5) Press [Subtotal]
6) Press [2][1][2][2]
7) Press [Subtotal]
8) Press[0][1][0][0][2][0]
9) Press [Subtotal]
10) Press [3][0][0][0][0][0]
11) Press [CA/AMT TEND]
12) Press [Subtotal]
13) Turn key back to 'Reg' mode
2) System settings
3) Press [CA/AMT TEND]
4) Press [2]
5) Press [Subtotal]
6) Press [0][1][2][3]
7) Press [Subtotal]
8) Press [7] x36 times until you get to the '£' sign on your screen
9) Pres [00]
10) Press [CA/AMT TEND]
11) Press [Subtotal]
12) Turn key back to 'REG' mode
If you make a mistake in operation, the machine may lock up to avoid damage to the programs.
- Power off machine
- Insert key and move to PGM mode
- Press down and hold [FEED] button while turning the machine back on
- Machine should show 0.00 on screen, release the FEED button
- Hit [SUBTOTAL] and a receipt should print
Turn machine off > hold feed down (or journal feed on the C3500) > turn key to PGM > release the feed button
BT-INIT should appear on screen > on keypad type 010040 > SUB TOTAL > CASH
AFTER A MINUTE OR SO, A PRINT OUT WILL PRINT TO SHOW COMPLETE.
- Turn key to 'PGM' mode (sign on if required) > System Setting >
- Type in the new price on keypad (in pence so £1.00 is [1][0][0]
- then press the PLU button(s) to update. You can update as many items to this price as you wish
- when you are finished on this price press [SUB TOTAL]
- follow the same process from A.
- When finished move the key position back to 'REG' mode.
2) Use [↓] [↑] to choose the setting you wish to set ie 'date setting'
3) Press [CA/AMT TEND]
4) Enter time in a 24hr format ie [1][6][0][0]
5) Use [↓] to 'date'
6) Enter date ie [2][9]
7) Use [↓] to month
8) Enter month ie [0][7]
9) Use [↓] to Year
10) Enter last 2 digits of the year 2025 ie 20[2][5]
11) Once done, press [Subtotal] and receipt will print
2) Use the [↑][↓] to go to 'Message setting'
3) Press [CA/AMT TEND]
4) On 01 Logo 1 - Header first line press [CA/AMT TEND
5) Start typing your Header 'Logo' - This is 4 lines
6) Press [CA/AMT TEND] once, happy with the completed line
7 Use the [↑][↓] to move onto the next line
When you get to line 5, it will say 'commercial'. Again, you can type whatever you want - This is 4 lines
8) Press [CA/AMT TEND] to enter into the next line
9) On line '09' it will say 'bottom', this is your footer
10) Follow steps 5 to 8
11) Once completed, press [Subtotal]
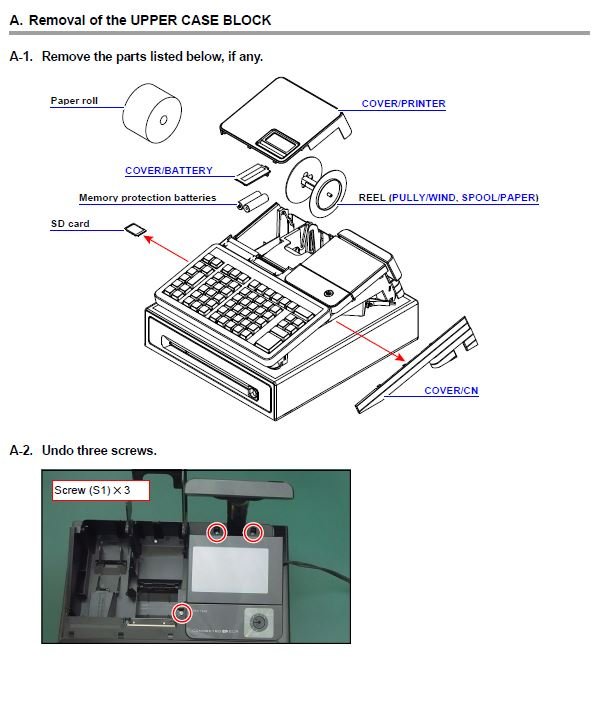


- Using the 0-9 Keypad, enter your clerk number
- Press [CLERK]
- If you have a password set up, enter your password.
- CHD3850
- Windows PC
- CHD3850 PC Tool (Download)
- Null Modem Female-to-Female Cable
Run the downloaded install tool and follow the setup wizard
Note: There is no UK selection in country settings, we usually select Australia.
Configure Connection:
- Open the PC Tool
- Go to:
- File > New ECR Configuration > CHD3850 Flat
- Press OK
- Go to:
- ECR > Driver Configuration > ECR_2*
- Find the COM Port number:
- Open Device Manager on your PC
- Expand Ports (COM & LPT)
- Plug the register into the PC
- Check which COM port appears when the device is connected (Example COM3)
- Enter the COM Port Number into the COM Number field
- Enter baud=38400 into the COM Setting field
- Press OK
- Use the [UP] or [DOWN] to scroll up and down the transaction,
- Highlight any item to remove
- then press [SUBTOTAL] [VOID]
So, for example, if you have sold DEPT 01 for £10.00 and need to remove you would press
[VOID]
[1] [0] [00]
[DEPT 01]
- You need to go to S MODE
- CLICK ON [2 SYSTEM SETTINGS]
- Scroll down to [15 RECEIPT ENABLED] and change from 1 to 0 by typing [0] [cash]
The most common reason for this is mixing up [CONFIRM] (cash) and [ENTER] (no sale) during setup.
These are not interchangeable.
Requirements:
- PC Tool Setup FAQ followed already
- Firmware File (Download)
- Extract the firmware file
- Open the PC Tool
- Open advanced settings:
- Press Basic at the bottom right of the screen
- Select Advanced from the dropdown
- Input the password: chd
- Press OK
- Go to:
- Tools > Firmware Uploader
- Do you really want to update firmware?
- Press Yes
- Browse for the extracted firmware file
- Press Browse
- Locate the Bin file
- Press Open
- Tick the With Boot box
- Press Upload
- A black command window will appear
- When the command window stops and states that it's awaiting power cycle:
- Switch the CHD3850 off at the wall
- Switch the CHD3850 back on
- Hold the power button for until the screen turns on.
- The command window should continue updating the firmware for around 5 minutes.
The CHD3850 can back up and restore all programming data and all sales data using an SD card.
Important: Restoring data will overwrite the data currently stored in the machine. If the backup on the SD card is empty or incomplete, your existing data may be lost. Always make sure you are restoring the correct backup before continuing.
Before you start
You must first enable Service Mode before you can access the backup and restore options. See the Enabling Service Mode FAQ for that procedure.
How to back up data to SD card
- Enable Service Mode.
- Go to S Mode.
- Press [CASH] to enter.
- Use the arrow keys to highlight 91.Backup/Restore.
- Press [NO SALE] to enter.
- Use the arrow keys to highlight 1.Backup.
- Press [1] [CASH] to confirm.
- The screen will show Please Wait!
- Once finished, press [NO SALE] [MODE] to exit.
How to restore data from SD card
- Enable Service Mode.
- Go to S Mode.
- Press [CASH] to enter.
- Use the arrow keys to highlight 91.Backup/Restore.
- Press [NO SALE] to enter.
- Use the arrow keys to highlight 2.Restore.
- Press [1] [CASH] to confirm.
- The screen will show Please Wait!
- Once finished, press [NO SALE] [MODE] to exit.
Warning before restoring
Be careful when using Restore. The restore process replaces the current data in the machine with the data from the SD card. This includes all programming and all sales data. If the SD card backup is blank, old, or from the wrong machine, you may overwrite data you still need.
EJ can be turned OFF in
- S-mode,
- [2] [NO SALE]
- SCROLL DOWN TO OPTION 13 (EJ ENABLED) PRESS [0] [CASH] [NO SALE]
The only way to resolve is to attempt
1) Try a factory reset (see other FAQ)
2) Reload the original firmware onto the device (see other FAQ)
You can then plug the SD card into a pc/laptop and view the EJ. The data is then stored in folders of the year, then the month when the EJ was saved to the sd card.
Also you can press [SHIFT] then [CASH] to access the menu.
- Press [MODE] to access the mode selection screen
- Using the arrow buttons, go to 'PRG MODE'
- Press [CASH]
- Using the arrows go to 'TAX'
- Press [NO SALE]
- Using the 0-9 keypad input the desired tax number
- Press [NO SALE]
- Using the 0-9 keypad input the new rate and press [CASH] to confirm
Change type if required:
- Press [1] for VAT
OR
- Press [2] for add on tax.
- After choosing either 1 or 2 press [CASH]
- Repeat indented for each tax level or [NS] to exit
- Press [MODE] to access the mode selection
- Use the arrows to go to 'PRG MODE'
- Press [CASH]
- Use the arrows to go to 'PLU'
- Press [NO SALE]
- Input desired PLU NUMBER
- Press [NO SALE]
- Type new name and press [CASH] to move to price
Prices:
- Using the 0-9 keypad, enter the price with no decimal
- Press [CASH] to confirm
TAX:
- Press [0] for 0% || press [1] for 20% || press [2] for 5%
- Press [CASH] to confirm
Link Department:
- Department number for report groupings
- Using the 0-9 keypad, enter a number between 1 and 50
- Press [CASH] to confirm
All other options:
- Press [1] for yes or [0] for no
- Press [CASH] to confirm
- Repeat all above indented for each PLU
- To exit press [NO SALE]
- Press [MODE]
- Using the arrows go to 'PRG MODE'
- Press [CASH]
- Use the arrow buttons to go to option 14: set date
- Press [CASH] to confirm
- Press [NO SALE]
- Using the 0-9 keypad type in the DDMMYY
- Press [No SALE]
Time:
- Press [MODE]
- Press [CASH]
- Use the arrows to to option 15: set time
- Press [NO SALE]
- Using the 0 - 9 keypad, enter the time HHMM
- Press [CASH] to confirm
- Press [NO SALE]
- Press [MODE]
- Use the arrow buttons and go to 'TEXT LOGO'
- Press [NO SALE]
- Use arrows to highlight line
- Type new message
- Press [Cash] to save line
- Repeat indented for each line
- Press [NO SALE] to exit
Footer:
- Press [MODE]
- Use the arrow buttons and go to 'TEXT FOOTER'
- Press [NO SALE]
- Use arrows to highlight line
- Type new message
- Press [CASH] to save line
- Repeat indented for each line
- Press [NO SALE] to exit
- Press [MODE] to access mode selection screen
- Use the arrow buttons to go to 'Z MODE'
- Press [CASH]
- Use the arrow buttons to highlight the report you want to print
- Press [CASH] to print and reset
X reports do not reset totals, these can be used throughout the day.
- Press [MODE] to access the mode selectin screen
- Use the arrow buttons to go to 'X MODE'
- Press [CASH]
- Using the arrow buttons highlight the report you want to print
- Press [CASH]

- Hold [Price 1] and [Power] together
- Wait for the screen to say 'PLEASE WAIT'
- Release [Price 1] and [POWER]
- The screen will show 'E11 BAD SEQUENCE'
- Press [CLEAR]
- Press the arrow buttons to access the item list
- Press [SUBTOTAL] to pin a product - you can pin as many products in one transaction
- Once you have pinned all the products you wish to void, Press [VOID]
Enable Service Mode
- Press [MODE]
- Highlight PRG MODE and press [CASH]
- [7] [9] [NO SALE]
- [1] [CASH]
- [NO SALE]
Disable Service Mode
- Press [MODE]
- Highlight PRG MODE and press [CASH]
- [7] [9] [NO SALE]
- [0] [CASH]
- [NO SALE]
- [MODE]
- Select S MODE and press [CASH]
- [3] [NO SALE]
- [DOWN] to Number 4 (report area) [VOID]
- [CASH]
- [NO SALE]
Take the printer lid off the cash register and then:
1) Unscrew the screw in the highlighted green circle

2) Push and slide the black lid off in the highlighted green circle
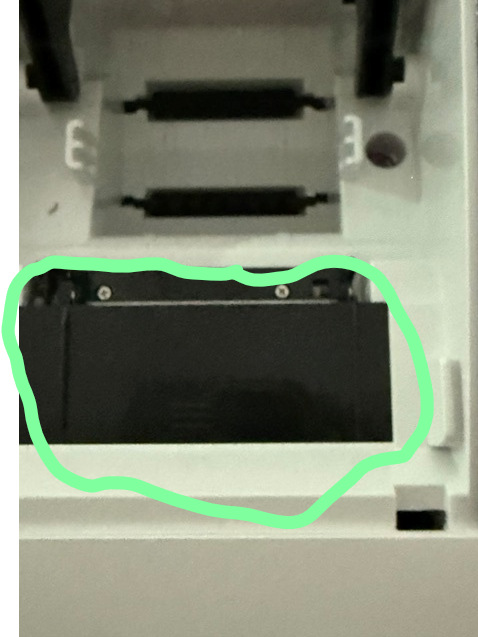
3) Unscrew the 2 screws which are highlighted in green

4) Push and slide the top of the cash register so that it comes off
5) Take out the orange printer ribbon which is the green highlighted area

6) Pull the printer out and replace it with the new one make sure you thread the orange ribbon down through the gap and clip it into place shown in step 5
7) The green wire needs to also be thread the gap upwards if it has fallen through and place it underneath the right hand side of the printer which is highlighted in green

8) put the top of the cash register in place and push towards you so that it clicks into place
9) screw all the 3 screws back into place making sure that the right hand side screw on the printer is on top of the green wired hole
10) Place the black plastic lid on top of the printer and push it gently so that it slides into place.
11) put a thermal till roll in and place the lid back onto the printer
If you would like a preset price but not overridable, then you would need to change the function key from a department key to a PLU (price look up).
Step 1 - Amend the keyboard so D1 (department 1) becomes PLU1.
- PGM Mode
- [SUB TOTAL]
- Scroll down to KEYBOARD [SUB TOTAL]
- Press the physical button - ie D1
- In the code field press [2] > [SUB TOTAL]
- In the field no. 1 enter the plu number it should be (so we are changing this to 1 for plu1) [SUB TOTAL], [SUB TOTAL]
- Repeat from step 4 to update further department keys to PLU's.
- When finished press [CASH]
- PGM MODE
- down to BASIC SETTING [SUB TOTAL], [SUB TOTAL]
- When it comes up with 'input code' type the PLU number to edit - so in this example type [1] [sub total]
- Type in a name for the item - it could be PLU1 or DEPT1 or whatever you want it to be called [SUB TOTAL]
- Enter the price in PRICE1 - ie for £5.00 TYPE [5] [00] [SUB TOTAL] [SUB TOTAL]
- Enter a department number for this PLU to assigned to - ie [1] [SUB TOTAL] [SUB TOTAL] [SUB TOTAL] [SUB TOTAL]
- Repeat from step 3 to update more PLU
- When finished press [CASH]
To check your current firmware version:
- Turn your key to P mode
- Highlight VERSION INFO
- Press [SUB TOTAL]
Update your firmware:
- Update your firmware using this tool: Download the tool
- Read the included guide carefully, proceed at your own risk
CRG100 V2 Changelog
09.09.25 - v1.22.250905 – Price Inquiry (Download)
- A price inquiry button has been added. Not on keyboard by default.
- PGM > SYSTEM > KEYBOARD > [ANY FNC BTN] > [2][4][SUB TOTAL]
- Press [PRICE INQ], type PLU number, press [SUB TOTAL]
27.12.25 – v2.60.251223 – Receipt Number Reset (Download)
- Receipt number was resetting on date progression.
- Setting A=0 on system option 17 no longer resets receipt no. when date changes.
- Open department pricing resolved.
- [1] [0][0] [DPT1] [DPT1] [DPT1] now sells 3 x DPT1 at £1.00 each
- Previous version would sell 1 x DPT1 at £1.00, then the remaining 2 at £0.00
07.04.26 – v2.60.260327 – Embedded Barcodes (Download)
- Electronic Journal now shows additional information:
- Financial Z Reports
- No Sale
- RA and PO
- References
- Multiple references may be added per transaction:
- Before any items = Order Reference
- After specific item = Item Reference
- Multiple payments per transaction
- Any payment method can be used in a split payment transaction now
- Weight and Price embedded barcodes can be activated by editing System Option 7:
- 0020 = Price Embedded Scanning
- 4020 = Weight Embedded Scanning
- Barcodes must follow format 20IIIIIPPPPPC or 20IIIIIWWWWWC
- Currency Symbols can be added by editing System Option 22:
- 0000 = No currently (default)
- 0001 = $
- 0002 = £
- 0003 = €
30.04.26 – v2.60.260424 – Journal Ref Bugfix (Download)
- Order Reference shows on Electronic Journal
- Currency shows on CASH, CARD, CHARGE on Receipt
CRG100 V1 Changelog
06.07.23 – v1.22.230704(b) – Cancel Specific Items (Download)
- Ability to remove specific item during transaction:
- Press [SUB TOTAL] [SUB TOTAL] to enter browsing mode
- Use the arrow to select the desired item from transaction list
- Press [CANCEL] to cancel the selected item
- Press [SUB TOTAL] to exit
- Clerk 49 is now training mode
- Can print training report by turning key to X and pressing [4][9] [SUB TOTAL]
17.07.23 - v1.22.230712(b) – Training Mode (Download)
- Clerk 49 is now named TRAINING by default.
06.09.23 – v1.22.230828(b) – Zero Quantity Reports (Download)
- Reports will print departments that have a value, even if the quantity is 0 due to refunding.
07.05.25 - v1.22.240506 – Quantity Function Fix (Download)
- When using the quantity function, no longer required to type 500 for 5. The decimal point now needs to be inserted manually.
01.07.25 - v1.22.250701(b) – Department Hotkey (Download)
- A department hotkey has been added. Not on keyboard by default. Works like [PLU] button.
- PGM > SYSTEM > KEYBOARD > [ANY FNC BTN] > [3][1][SUB TOTAL]
- Uses preset price only, no option to input a price during transaction
09.09.25 - v1.22.250905 – Price Inquiry (Download)
- A price inquiry button has been added. Not on keyboard by default.
- PGM > SYSTEM > KEYBOARD > [ANY FNC BTN] > [2][4][SUB TOTAL]
- Press [PRICE INQ], type PLU number, press [SUB TOTAL]
To check your current firmware version:
- Turn your key to P mode
- Highlight VERSION INFO
- Press [SUB TOTAL]
Update your firmware:
- Update your firmware using this tool: Download the tool
- Read the included guide carefully, proceed at your own risk
CRG500 V2 Changelog
01.07.24 – v2.30.240621 – Quantity Input Fix (Download)
- When using the quantity function, no longer required to type 500 for 5. The decimal point now needs to be inserted manually.
26.07.24 – v2.30.240724 – Tax Summary Print (Download)
- Reenable the printing of tax summaries on the Z financial Report.
30.12.24 – v2.30.241230 – Department Report Fix (Download)
- Fix bug for incorrect quantities or prices on department report.
07.07.25 – v2.60.250620 – No Department Consolidation (Download)
- Departments can be printed separately, even if same price. This is default.
- PGM > SYSTEM SETTINGS > RECEIPT FORMAT > 8/15 Sort the same items on printing
- A department hotkey has been added. Not on keyboard by default. Works like [PLU] button.
- PGM > SYSTEM > KEYBOARD > [ANY FNC BTN] > [3][1][SUB TOTAL]
- Uses preset price only, no option to input a price during transaction
03.09.25 – v2.60.250901 – Price Inquiry (Download)
- A price inquiry button has been added. Not on keyboard by default.
- PGM > SYSTEM > KEYBOARD > [ANY FNC BTN] > [2][4][SUB TOTAL]
- Press [PRICE INQ], type PLU number, press [SUB TOTAL]
27.12.25 – v2.60.251223 – Receipt Number Reset (Download)
- Receipt number was resetting on date progression.
- Setting A=0 on system option 17 no longer resets receipt no. when date changes.
- Open department pricing resolved.
- [1] [0][0] [DPT1] [DPT1] [DPT1] now sells 3 x DPT1 at £1.00 each
- Previous version would sell 1 x DPT1 at £1.00, then the remaining 2 at £0.00
17.04.26 – v2.60.260327 – Embedded Barcodes (Download)
- Electronic Journal now shows additional information:
- Financial Z Reports
- No Sale
- RA and PO
- References
- Multiple references may be added per transaction:
- Before any items = Order Reference
- After specific item = Item Reference
- Multiple payments per transaction
- Any payment method can be used in a split payment transaction now
- Weight and Price embedded barcodes can be activated by editing System Option 7:
- 0020 = Price Embedded Scanning
- 4020 = Weight Embedded Scanning
- Barcodes must follow format 20IIIIIPPPPPC or 20IIIIIWWWWWC
- Currency Symbols can be added by editing System Option 22:
- 0000 = No currently (default)
- 0001 = $
- 0002 = £
- 0003 = €
30.04.26 – v2.60.260424 – Journal Ref Bugfix (Download)
- Order Reference shows on Electronic Journal
- Currency shows on CASH, CARD, CHARGE on Receipt
CRG500 V1 Changelog
24.10.23 – v1.22.230712 - Release (No Download)
- Gets firmware up to date with CRG100.
07.05.24 – V1.22.240506 – Quantity Function Fix (Download)
- When using the quantity function, no longer required to type 500 for 5. The decimal point now needs to be inserted manually.
To check your current firmware version:
- Turn your key to P mode
- Highlight VERSION INFO
- Press [SUB TOTAL]
Update your firmware:
- Update your firmware using this tool: Download the tool
- Read the included guide carefully, proceed at your own risk
CRG520 V1 Changelog
01.07.25 – v1.10.250620 – No Department Consolidation (Download)
- Departments can be printed separately, even if same price. This is default.
- PGM > SYSTEM SETTINGS > RECEIPT FORMAT > 8/15 Sort the same items when printing
- A department hotkey has been added. Not on keyboard by default. Works like [PLU] button.
- PGM > SYSTEM > KEYBOARD > [ANY FNC BTN] > [3][1][SUB TOTAL]
- Uses preset price only, no option to input a price during transaction
- Z Financial Report prints on the second printer (journal)
- Receipt preprints header to save paper. On by default
- PGM > SYSTEM > RECEIPT FORMAT > 10/15 Print current receipt header only
11.08.25 – v1.10.250801 – Z Journal & Price Inquire (Download)
- Z reports now print on second printer (excluding Journal, table and refund reports)
- A price inquiry button has been added. Not on keyboard by default.
- PGM > SYSTEM > KEYBOARD > [ANY FNC BTN] > [2][4][SUB TOTAL]
- Press [PRICE INQ], type PLU number, press [SUB TOTAL]
27.12.25 – v1.10.251223 – Department Multiples (Download)
- Open department pricing resolved.
- [1] [0][0] [DPT1] [DPT1] [DPT1] now sells 3 x DPT1 at £1.00 each
- Previous version would sell 1 x DPT1 at £1.00, then the remaining 2 at £0.00
17.04.26 – v1.10.260410 – Embedded Barcodes (Download)
- Electronic Journal now shows additional information:
- Financial Z Reports
- No Sale
- RA and PO
- References
- Multiple references may be added per transaction:
- Before any items = Order Reference
- After specific item = Item Reference
- Multiple payments per transaction
- Any payment method can be used in a split payment transaction now
- Weight and Price embedded barcodes can be activated by editing System Option 7:
- 0020 = Price Embedded Scanning
- 4020 = Weight Embedded Scanning
- Barcodes must follow format 20IIIIIPPPPPC or 20IIIIIWWWWWC
- Currency Symbols can be added by editing System Option 22:
- 0000 = No currently (default)
- 0001 = $
- 0002 = £
- 0003 = €
30.04.26 – v1.10.260424 – Journal Ref Bugfix (Download)
- Order Reference shows on Electronic Journal
- Order and Item Reference shows on second printer
- Currency shows on CASH, CARD, CHARGE on Receipt
Making the logo file:
- Must be 380 pixels wide
- Maximum of 380 pixels tall, but can be less
- Must be a BMP file, monochrome bmp file is safest
- If it prints wrong, or has some extra black lines, try to open the bmp file in paint and resave it as a monochrome bmp. Photoshop seems to leave some extra info affecting the print.
- If there are colours or shading, use photoshop or another program to convert to monochrome, with dithering.
Adding the file to the device:
- Open the programming tool
- Edit the receipt header
- Select the line you wish to print on
- Change property to GRAPHIC
- Press the “BROWSE” icon in the text input field
- Browse to the image you created and press OPEN
- Image name will populate the text field
- Send the data back to the ECR
- Select RECEIPT HEADER/FOOTER tab
- Press SEND
- Select SEND DATA tab
- Press OPEN FILE
- Browse to the image you created and press OPEN
- Press SEND
Test the print on the device, if your image is not printing how you’d like it to, you can edit the image file, save it over the original one and press SEND from the step above. Print the receipt again and check it’s correct.
You can continue to edit the image, SEND and print a test receipt until you are happy.
Key entry sequence to enter training mode is :
( PRG Mode )
( 666666 ) - [ TOTAL ]
Key entry sequence to terminate training mode is :
( PRG Mode )
( 555555 ) - [ TOTAL ]
1) Press [REFUND]
2) Type in a price
3) Press the department button
4) Press [CASH]
Please note, if you are refunding more than 1 item you need to do steps 1-3 continuously and once you are happy press [CASH] to finalise the transaction.
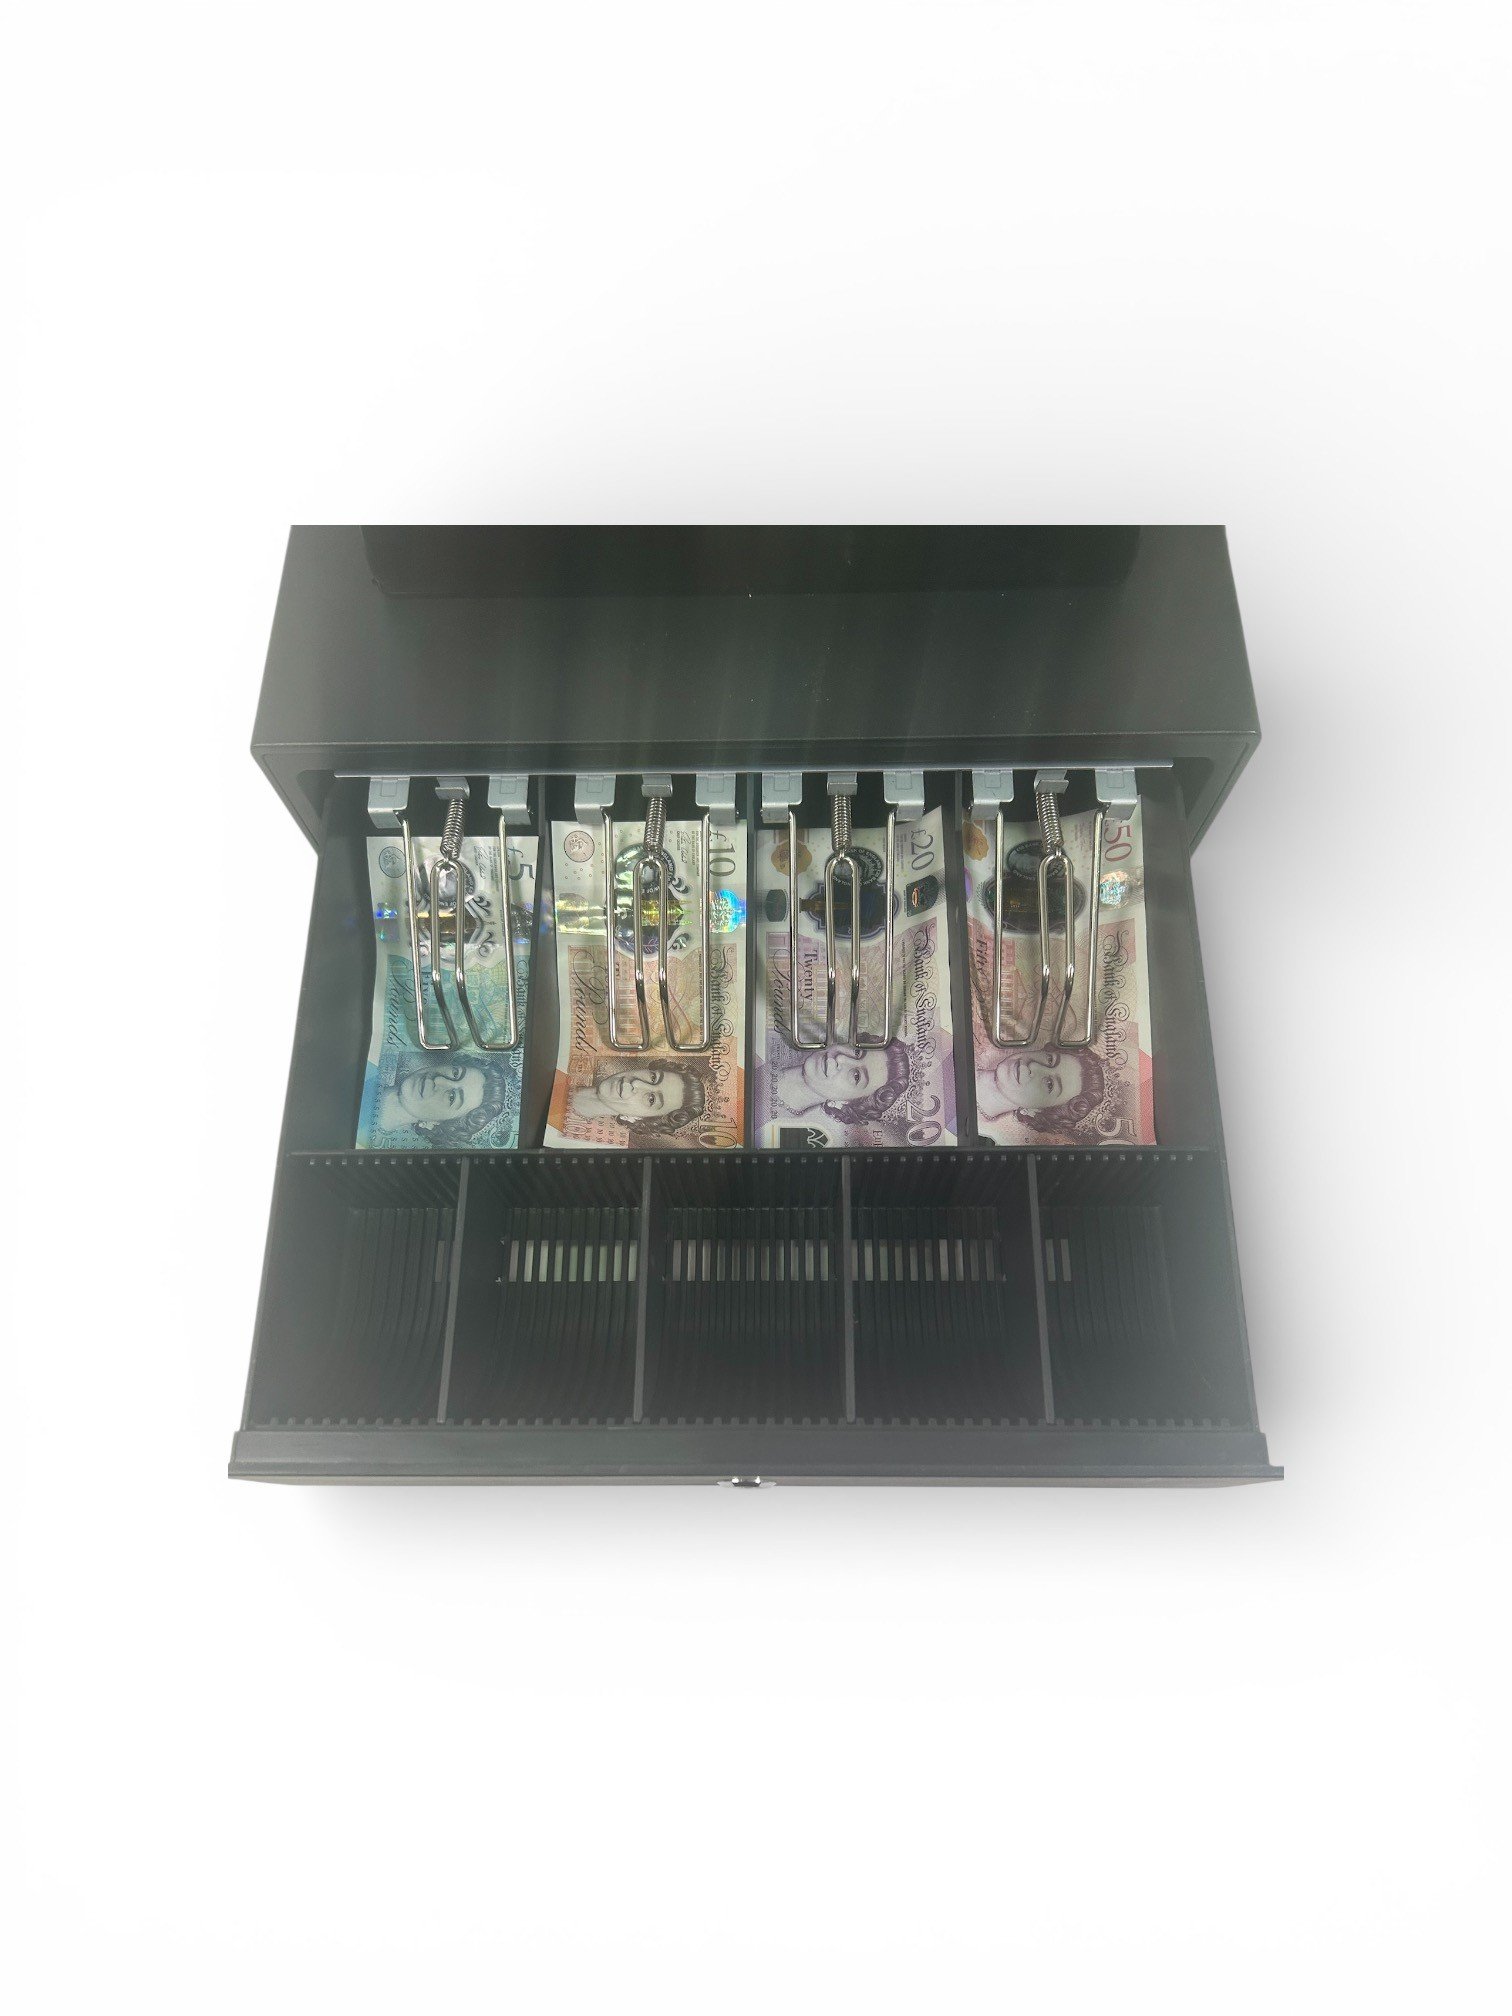
This decision was made after years and years of having various machines with only 3 note compartments and constantly being asked if you could add a forth divider!
Most people wouldn't even notice the £20 notes aren't perfectly flat - here is an image showing all 4 notes in the drawer
CRG100 - V2.60.260327
CRG500 - V2.60.260327
CRG520 - V1.10.260410
Please refer to Firmware Updates if you are unsure.
- Turn key to P Mode
- Highlight SYSTEM SETTINGS and press [SUB TOTAL]
- Highlight SYSTEM OPTIONS and press [SUB TOTAL]
- Highlight 22. CURRENCY
- Type one of the following codes:
- 0000 - No Symbol
- 0001 - $
- 0002 - £
- 0003 - €
- Press [SUB TOTAL] to save
- Turn key to a different mode to exit
To resolve this, you need to update the header/footer setting.
If you are unsure of which lines might need changing you can print of the header/footer settings by
- Turn key to 'P' mode
- Highlight 'System Settings'
- Press [SUBTOTAL]
- Use the arrow buttons to go to 'Header & Footer'
- Press [SUBTOTAL]
- Press [CARD]
This will print out the active header/footer lines - next to the where it says header or footer - it will then show the status of the printing, if any of these are 'graphics' and you have loaded the image, then these need updating.

To do this, you need to do the following:
- Turn key to 'P' mode
- Highlight 'System Settings'
- Press [SUBTOTAL]
- Use the arrow buttons to go to 'Header & Footer'
- Press [SUBTOTAL]
- Use up and down to go through the different lines to the lines which states 'graphics' in previous step
- Press [SUBTOTAL] to edit the name (if you want too) otherwise keep following the steps below
- Press [SUBTOTAL]
- Press [SUBTOTAL] X3 Times until you highlight 'Flag 4' which will state Graphics
- Use the arrow button to change between: Normal, DH, DW, DH&DW these should be the only settings you should be using
- Once done, press [Subtotal]
- Repeat for any other lines which need updating and then turn key back to R/M
DH - Double Height: Mainly used for the first line of the header if there is too much writing in the company name
DW - Double Width: Mainly used for the first line of the header if there is little writing in the company name (Not used very often)
DH&DW - Double Height and Double Width: Mainly used for the first line of the header if there is not much wording
Normal - Writing is normal sized: Mainly used for Addresses, telephone numbers, VAT's and footer
Graphics: Graphic means logo image and there is no logo file for the cash register to recognise and this will give you an error code of 0407 after every transaction and when you print off a report.
The grand total = is the running total of what you have ever taken, so basically a lifetime figure.
To do this you need to:
- Turn the key to 'P' mode, this takes you to your main settings page
- Use the arrow buttons to Highlight ‘System Settings’
- Press [SUBTOTAL]
- Use the arrow buttons to highlight ‘Report settings’
- Press [SUBTOTAL]
- Use the arrow buttons to highlight ‘3/11’ It should say 'Print Grand Total' on top of the screen
- Press [SUBTOTAL] to change the 'Y' to 'N'
- Press [CASH] [CASH] to go back to the main settings page
- Turn the key to 'R' mode - This is the registration mode
- Put in a transaction and then press a [dept] button and then press [CASH]
- Turn key to 'Z' mode
- Highlight the report you want
- Press [SUBTOTAL] to print the report
for example
- [REFUND]
- type price (or scan item & skip next step)
- press department key
- Repeat from step 2 if multiple items
- press PAYMENT button
to check/resolve
- if you turn to X mode and press [SUB TOTAL] does the machine print a X report or Beep at you?
- if so, turn the machine off on the side
- then turn it back on - as soon as the back light turns on press [CASH]
- use the up and down to adjust the contrast to see if the writing now appears. continue to press the up/down until you are happy then press [CASH]
- turn off on the side and back on - should be resolved.
Turn to P mode
[SUBTOTAL]
press [DOWN] six times
[SUBTOTAL]
Adjust the contrast by pressing left or right numerous times to adjust the contrast to see if the text starts to appear.
if you find a setting that shows the text press [SUB TOTAL]
If you have typed the price and then hit the DEPT KEY. you can void the last item by pressing [ERROR CORRECT] and then proceed with the remaider of the transaction.
Please note - you need to be in Manager mode or have clerk permissions to do this.
Cash must always be first.
Update: Cash no longer has to be first payment method, updated 17/04/2026.
CRG100 - V2.60.260327
CRG500 - V2.60.260327
CRG520 - V1.10.260410
Please refer to Firmware Updates if you are unsure.
To do a split payment you need to enter the tender amount, followed by the first payment method. Then the second payment method can be input after.
Example:
A transaction total of £18.50, customer wants to pay £10 Cash, the rest on Card.
- Type [1] [0] [00]
- Press [CASH]
- Press [CARD]
Example:
A transaction total of £43.99, customer wants to pay £20 Card, the rest with £30 Cash and receive change.
- Type [2] [0] [00]
- Press [CARD]
- Type [3] [0] [00]
- Press [CASH]
Stage 1 - Set up the rates
There are 4 tax levels available. A percentage is registered against a tax level, the tax level is then assigned to a department or item, which allows quick updating of tax percentages in the event of government increases/decreases:
1) Turn key to the P position
2) Select BASIC INFO [ENTER]
3) Select TAX SETTING [ENTER]
4) Use [↑] or [↓] to select tax level 1-4
5) Input a tax percentage (including decimal place) [ENTER]
6) Input the tax name (if you wish to change it -most people do not change this) [ENTER]
7) update any further rates
8) when finished if you press [CARD] It will print a summary of the 4 tax rates, the percentages and names - which is useful for the next stage.
9) turn key to any other mode to finish
1) Turn the key to the P position (if not already there)
2) Select BASIC INFO [ENTER]
3) Select DEPT SETTINGS [ENTER]
4) Input desired department number using 0-9 keypad [ENTER]
5) Input price if required (no decimals) [ENTER]
6) Press [.] to enter FUNC 1 setup OR [ENTER] to skip
- Use [↑] or [↓] to select an option and [ENTER] to toggle Y/N.
- The vast majority of options you will not need to change, but for example, option 10 is 'tax rate1' - so if this department needs to be tax rate 1 - then press [ENTER] to change from N to Y. Likewise, option 11 is tax rate2.
- Press [BACK] to confirm FUNC 1 setup
7) Press [ENTER] to skip FUNC 2
8) Overwrite the department NAME by typing a new name (if required)
9) Press [ENTER] to confirm changes
10) Repeat steps 5-9 for additional departments
1) Press [CANCEL]
2) Press [SUB TOTAL]
To set up the receipt message, do the following:
- Turn key to P mode
- Select SYSTEM SETTINGS and press [SUB TOTAL]
- Use arrow keys to select HEADER & FOOTER and press [SUB TOTAL]
- If you wish, press [CARD] to print out the existing messages, then press [SUB TOTAL] if not, move on to step 5
- You will now see in the top left a line number (from 01-50) you can now use the UP and DOWN to move through the different lines if required
- When you are on the line you wish to edit, Press [SUB TOTAL] to enter text edit mode
- If you want to edit this message - Type the first line of the receipt header using qwerty buttons, or if the text is correct but you want to change the settings of this lin,e move on to Step 8.
- See the bottom left of the physical buttons to locate the letters.
- Table new/old is space
- On the CRG100 - if you need to use letters or symbols, press the [00 SHIFT] button - you will see on bottom left of the screen it will change from ABC to abc and then symb:
- Basically, you are switching between text mode, is CAPITALS, lower case or numbers and symbols.
- When symb: is on screen, you can use the 0-9 keypad for numbers
- If you need to use a symbol, use the left and right to highlight the symbol required and then press [X] to select it
- Complete the details for this line
- Press [SUB TOTAL] you will now see its highlighting flag1 - You can select either 'Header' or 'Footer' for where you want it to print on the receipt by using the [↑] button. Press [SUB TOTAL]
- Flag2 is now shown, using the[↑] button, you can change from center aligned to left or right, although most people left as centre. then Press[SUB TOTAL]
- Flag3 is now shown, using the[↑] button you can change from either PRINT or NOT PRINT. Pretty self explanatory - but this feature is good if you want to write out promotional messages and then either turn them on or off based on the time of the year. Select the required option then [SUB TOTAL]
- Flag4 is now shown, using the[↑] button you can change from either DH&DW (double height and double width), Graphic (when using the pc tool for a logo, Normal, DH (double height), DW (Double width). Select the required font size. Alot of the time customers use either DH&DW or DH.
- Press [SUB TOTAL] to save and move to next line (you will see the line number in the top left again)
- From here you can either repeat the process from Steps 6-12 or you can use the up and down arrow to select a different line and then continue from step 6.
- When finished, after finishing step 12 - you can then turn the key.
- Turn the key to 'P' mode
- If prompted for login type (on the 0-9 keypad) [9] [9] [9] [9] [subtotal] [6] [9] [4] [3] [0] [3] [subtotal] (this is the master login)
- You should now be in the P mode > press [Sub total] > scroll down to 'Clerks' > Press [Subtotal]
- Use the arrow buttons to scroll down through the clerks.
- If you see '****' on the clerks password, this means that a password has been allocated.
- Highlight the passcode field which has the '****' > [CANCEL] > [SUBTOTAL] > [CASH]
- You can then move the key position back to M / Z and you should be straight in
- Z Mode
- Highlight ALL REPORTS and press subtotal (this will print all reports in one batch)
- Next highlight ELETRONIC JOURNAL - pless [CANCEL] [SUB-TOTAL]
To open a new table, type a table number followed by [TABLE NEW/OLD].
To hold a table, press [TABLE NEW/OLD] while a table is open.
To access a table that is already open, type the table number, followed by
[TABLE NEW/OLD].
(I placed the new payment button instead of RA on the machine)
1. Turn the key to P
2. Select SYSTEM SETTINGS
3. Enter the system settings – Press Sub-total
4. Select KEYBOARD - [↑] & [↓]
5. Go into the keyboard settings – Press sub-total
6. Press the button on the keyboard to be edited – where are you putting new PAYMENT button
- The name and code on screen will change to match.
7. Input the code for Payment from the “function table” - [1][0]
8. Confirm the function code - [Sub-total]
9. Input No.1 value 0004
10. Sub-total
11. Input No.2 value 0004
12. Subtotal
13. You can then go to into BASIC info and go to PAYMENT – Keep pressing sub-total until you get to code 0004 and press subtotal 3 times to move to the edit name page and you can type a new name for this payment method.
Please note you cannot edit the names of CASH, CARD and CHARGE (Payments 0001 - 0003 as these are locked in the system) so if you don't want to use CHARGE but require BACS for example, you would assign payment 0004 to the charge button and then rename payment 0004 to BACS.
Within the Z mode > E-Journal you have various options to print and view the Electronic Journal.
Please note if you view or print the Journal – this does not clear the journal and the machine continues to store the data.
By Period: Enter the date FROM as follows YEAR – MONTH – DAY – HOUR – MINUTE. So, for example 1st November 2022 you would type 2211010000 And then press SUBTOTAL followed by the TO. Press subtotal and it will show the oldest transaction in the memory – you can press SUBTOTAL to flick through the transactions. Or press CARD / print info to print the report.
By Bill Number: On the top of each receipt, you will see a receipt number such as ‘No :0006’ so if you know what receipt number you want (or range) you can type in from and to. If for any reason your machine is resetting the receipt number after each receipt you can turn this off by going to P MODE > SYSTEM OPTIONS > 17 – change to [0] [0] [0] [0] [SUBTOTAL]
All – the easiest one to do – just press subtotal – as always it will show on screen, oldest to newest. Pressing CARD will print the info.
Handy Tip – if you need to cancel a printout – just turn the machine off on the side and leave off for a couple seconds.
Lastly if you do want to clear the journal – Z mode > highlight E-Journal – CANCEL – SUBTOTAL and you will see an option on screen to clear the journal
- P mode
- system settings [enter]
- keyboard [enter]
- Press the physical button where you want it (ie table new / old)
- type [3] [5] [enter] [enter] [back]
- at the beginning of the sale - press the button assigned to REF
- use the keyboard to type in a name. if you need to use symbols or numbers - press the [00] twice and you will see on screen the keyboard switches from UPPER CASE LETTERS > lower case > numbers and symbols.
- press CASH
- continue with transaction
- at the top of the receipt it will print REF NO xxxx
Update: References can now also be added after each individual item, updated 17/04/2026.
CRG100 - V2.60.260327
CRG500 - V2.60.260327
CRG520 - V1.10.260410
Please refer to Firmware Updates if you are unsure.
If you wish to circumvent this restriction, you can create a negative department called "REFUND" and sell this department for a negative amount. Here's how to set up a negative department:
| Turn key to program mode | |
| Go to BASIC INFO | ↓SUB TOTAL |
| Select DEPT SETTING | ↓SUB TOTAL |
| Input department number, 10 for this example | 10SUB TOTAL |
| Skip to FUNC 1 | SUB TOTAL |
| Enter FUNC 1 settings | . |
| Go to NEGATIVE? | ↓↓↓ |
| Change from N to Y | SUB TOTAL |
| Exit FLAG 1 settings | CASH |
| Go to NAME | SUB TOTAL |
| Input new name as REFUND | REFUND |
| Confirm changes | SUB TOTAL |
| Turn key back to register mode |
If you were now to sell REFUND for £5.00 and FLOWERS for £4.00, the total cost would be £1.00.
As default clerk 49 is set up as training mode.
To access training mode – turn to the R (registration mode) and type [4] [9] [CLERK].
Any sales entered under training mode will not show on any reports.
The training clerk does have restrictions such as no being able to perform a NO SALE for example – these permissions can be updated in program mode.
If you want to print out a sales report of training mode only - turn the key to X mode - [4] [9] [clerk] [sub total] - and the report will print and reset.For example, if there is only £10 in the register and you try to pay out £20, you will get the error message.
1) Turn key to the P position
2) Select BASIC INFO [ENTER]
3) Select DEPT SETTINGS [ENTER]
4) Input desired department number using 0-9 keypad [ENTER]
5) Input price (no decimals) [ENTER]
6) Press [.] to enter FUNC 1 setup OR [ENTER] to skip
· Use [↑] or [↓] to select option and [ENTER] to toggle Y/N
· Press [BACK] to confirm FUNC 1 setup
7) Press [ENTER] to skip FUNC 2
8) Overwrite the department NAME by typing a new name
9) Press [ENTER] to confirm changes
10) Repeat steps 5-9 for additional departments
However if you wish to add more DEPT buttons to the keyboard for redundant function keys - this is possible.
In this example - we will be changing the button of [DEPT SHIFT] to DEPT 23.
- P MODE
- [SUB TOTAL]
- scroll down to KEYBOARD [SUB TOTAL]
- press the physical button to edit - so [DEPT SHIFT]
- on the top line it will show the current function of this button - so in this example it will say SHIFT
- type [1] [SUB TOTAL] enter the department number you want so [2] [3] [SUBTOTAL]
- if you wanted to use the shift, the number is 2 is the shifted department if required [SUBTOTAL] to finish
- repeat from step 4 if additional buttons to edit.
- when finished turn key back to M/R
When you start a transaction, the number is recorded in the memory, however if you do a CANCEL SALE (of the whole transaction) the receipt number actually moves up one for the cancellation.
So if you made two sales in day (first one complete and second one cancelled mid-transaction)
Receipt 0001
Sale £10.00 department one
Receipt 0002
Sale £20.00 department two
**cancel**
In the journal receipt 0002 wouldn't exist, and you would see the data on receipt 0003.
Like wise, if you then did a new transaction, it would become receipt 0004.
when you run a X report, this number prints on the report too, so if you run a X various times during the day, the report number remains the same. Once you then do a Z report - this number is logged on to the Z report and any further report will have moved up a number.
Program Mode > System Settings > Receipt Format
scroll down to option 4 'Print receipt after taking bill' - as default this is set as Y - please change this to N
*Please note this wasn't available on some of the old versions of the firmware
**Please also note - if you enable this - you are then unable to edit a transaction by pressing [sub total] twice to then remove lines from the transaction. If you have made a mistake or needed to remove a item (which wasn't the last item) you would need to cancel the whole sale and start again.
CRG100 - V1.22.250701
CRG500 - V2.60.250620
CRG520 - V1.10.250620
Please refer to Firmware Updates if you are unsure.
You can now create a department hot key to be able to sell quickly into departments higher than available on the keyboard.
Note: These are not open pricing, price must be preset.
Add the button to keyboard
- Turn key to P mode
- Highlight SYSTEM SETTINGS and press [SUB TOTAL]
- Highlight KEYBOARD and press [SUBTOTAL]
- Press any function button you wish to overwrite
- Type [3] [1] [SUB TOTAL]
- Turn the key to a different mode to exit
- Type the department number
- Press the new button
Turn to PGM MODE
highlight SYSTEM SETTINGS [SUB TOTAL]
highlight SYSTEM OPTIONS [SUB TOTAL]
Scroll down to option 11 (DCT RATE)
enter the % discount ie 20% would be [2] [0] [0] [0] [SUB TOTAL] [CASH]
To use the discount button - you can either use it on item or complete sale
To use on complete sale
- enter your sale
- press subtotal
- press [%-]
- this will discount the whole transaction
- Enter item to sell, ie price then department key -
- if this item is to be discounted then press [%-]
- this will just discount the last entry
- so any items not be discounted you wouldnt press the [%-] after entry.
1) Turn to PGM MODE
2) highlight SYSTEM SETTINGS
3) [SUB TOTAL]
4) highlight SYSTEM OPTIONS
5) [SUB TOTAL]
6) Scroll down to option 11 (DCT RATE)
7) enter the % discount ie 20% would be [2] [0] [0] [0]
8) [SUB TOTAL]
9) [CASH]
To use the discount button - you can either use it on item or complete sale
To use on complete sale
- enter your sale
- press [subtotal]
- press [%-]
- this will discount the whole transaction
To use on items only
- Enter item to sell, ie price then department key -
- if this item is to be discounted then press [%-]
- this will just discount the last entry
- so any items not be discounted you wouldn't press the [%-] after entry.
If you do populate price 2 - then on the PLU report (in X or Z) you will get data showing you Gross Profit.
- Firstly unplug the register from the mains power
- Unscrew the 4 screws holding the upper casing in place (see image 1 below)
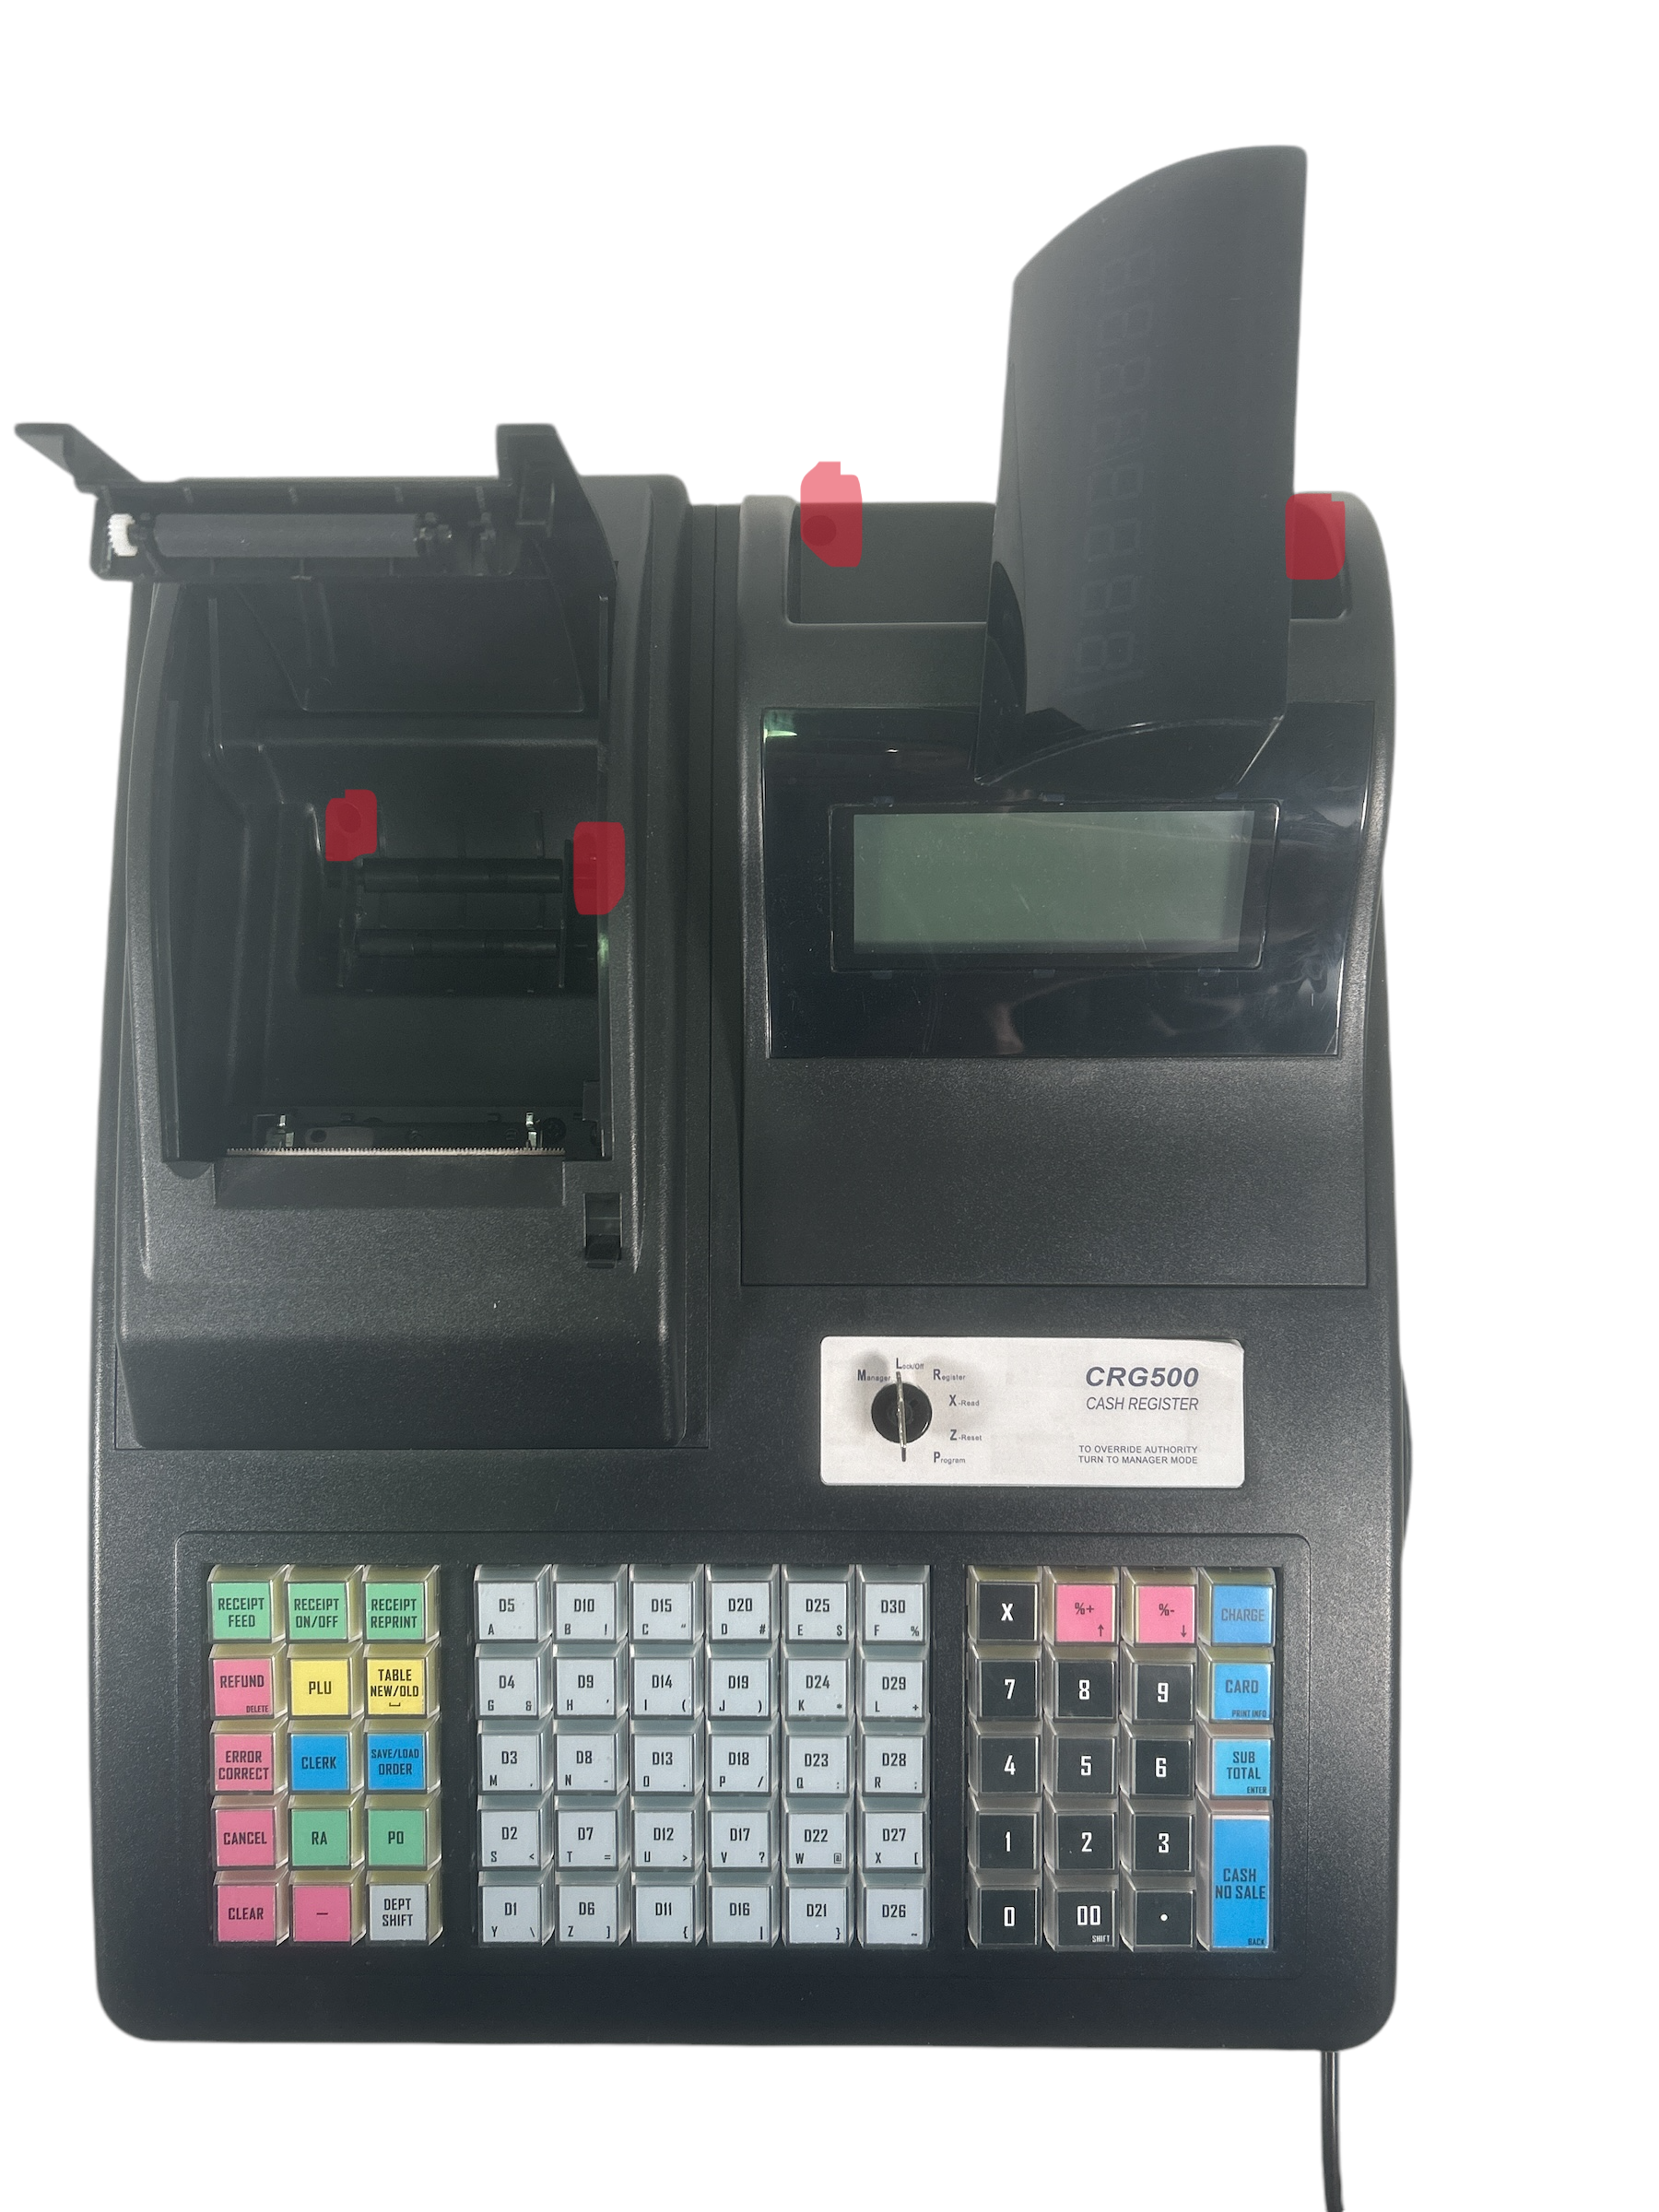
- Then pop the top part of the casing off the base, by lifting it from the back (where the customer display is) towards you. there are 3 clips which holds the first part of the casing in place - be careful not to snap these and do not pull it away from the bottom part too far
- Remove the power supply (highlighted in RED) The 2 cables highlighted in orange can be removed - but only optional to give a bit more clearance. Once the power supply is unplugged you should now be able to turn over the top part of the register

- Next unplug the keyboard comm cable from the main board (in RED) and then unscrew the 10 small screws holding the keyboard in place.

- Replace the physical keyboard, and screw it into place. plug the comm cable from new keyboard into the main board.
- Re-attach the power cable into the main board (and any others)
- Re-position the top casing onto the register
- At this stage, restore power and turn on and test the keyboard (just in case you have missed plugging in any of the cables)
- if all working, push down the casing into place and put back in the screws and tigthen
- Turn the key to 'PROGRAMME MODE'
- Highlight 'SYSTEM SETTINGS'
- Press [SUBTOTAL]
- Using the arrow buttons go to 'RECEIPT FONT'
- Press [SUBTOTAL]
- Use the arrow buttons to highlight 'DATE LINE'
- Press [SUBTOTAL]
- Use the arrow buttons to change between 'normal, DH, DW, DW&DH'
- Press [SUBTOTAL] to confirm
- Keep pressing [CASH] until you get to the main settings page
- Turn the key to 'REG MODE'
If it says 'REG MODE CLOSED', you need too:
- Press [1]
- Press [CLERK]
The writing of the font on the receipt:
DW = Double width
DH = Double Height
DW&DH = Double height and Double Width
Adding the reference button:
- Turn the key to ‘P’ mode
- Go to ‘SYSTEM SETTINGS’
- Press [SUBTOTAL]
- Go to ‘KEYBOARD’
- Press [SUBTOTAL]
- Press the department button you wish to make a reference button
- Type [3][5] on the 0-9 keypad
- Press [SUBTOTAL]
- Turn the key back to ‘REG’ MODE
Using the reference button
Before entering the transaction, press the new REFRENCE button, using the 0-9 keypad type reference number and press [SUBTOTAL]
Note: The reference number does not show on the E-Journal, ONLY on receipt. Only one reference can be added to a transaction.
Disclaimer: This method is unofficial and not recommended. It may damage the cash register or void your warranty
- Power off the machine
- Lift the printer cover and then lift the platen arm.
- Carefully remove the small roller from the printer mechanism.
- Close the platen arm with some till roll in position and the printer cover.
- Power on the machine; it will still function, but the journal roll will no longer print.
To do this, you will need
- A new barrel and keys (suitable for the drawer)
- Screwdriver
- Turn of the register at the mains power
- Turn the register on its side so you can see the silver base of the drawer
- Remove the screws holding this in place
- Remove the base from the drawer.
- Next, you will be able to slide the complete drawer through the base of the drawer to remove it
- Remove the cash drawer insert.
- Visually look at the way the barrel is positioned, and then remove the silver clip holding the barrel in place on the inside and remove the barrel.
- Fit the new barrel and secure with the clip - ensuring its the correct way around. Worth checking with the keys the lock is secured and turns.
- Secure back the silver base. Refit the drawer in the drawer housing. Put back in the drawer insert
- Close the drawer
- Enter the transaction as normal
- Once done press [subtotal] to see a summary of the transaction (ie total quantity and value)
- If you want to review and potentially edit press [sub total]
- Using the arrow buttons you can scroll up an down on each transaction.
- If you made a mistake on one or more item you can press [cancel] to remove it from the transaction
- Once happy press [sub total] to exit out of reviewing, and you can either add more items or press [subtotal] to again see the summary and then
- complete the transaction by selecting the correct payment button
- [sub total]
- [sub total] - you will now notice on screen you can see the first item on the order.
- use the up/down to scroll through the items on the order
- press [CANCEL] to remove any from the order
- when finished editing press [sub total] to exit editing then press [save/load order] to save the order a new receipt will print of the remaining items
Taking the end with the holes off. You do this by gently pushing up from the small hole to the big hole.
Please see photo below:

- Turn key to ‘P’ mode
- Press [Enter] on ‘System Settings’
- Use
- To go to Clerks
- Press [Enter]
- Press [Enter] until you get to ‘Clerk 1’
- Carry on pressing [Enter] Until you get to ‘Clerk Auth’
- Use
- Until you get to ‘Open Drawer’
- Press [Enter] to change ‘N’ to ‘Y’
- Once done press [Back] Until you get to the beginning of your settings page
- Turn Key to ‘Reg’ mode
- Press [1] then [Clerk]
- Put through a transaction
- Press [Cash]
- If the drawer opens it has worked.
Or alternatively, if too complicated leave till in manager mode all the time.
To clarify the machine as default prints 'receipt mode'. This means when automatic printing is on - the receipt generated is one you would give to the customer - you can of course turn off auto printing and then just print when required.
however you can turn on 'journal printing' - this mode is for record keeping (and not to give to customers. Also you cannot turn off printing in Journal mode). This also enables the motor to then turn the spool which in turn keeps the receipts printing and collecting on the spool.
To turn on journal mode:
- PRG mode
- [4] [0] [1]
- VOID
- PRG mode
- [4] [0] [0]
- VOID
Make sure the paper is round the correct way:

Make sure that you are using the correct paper - this would be thermal paper
Put a new till roll in if needs be
To try and resolve -
- Press Clear to stop the E1
- Turn to the OFF position - if there is anything on screen, this is almost certainly means you are stuck in a process.
- If you are unsure what, the easiest way is to do a partial reset to clear the working memory (ie what you are in)
- turn off the power to the machine
- turn key to PRG
- Press and hold [CLEAR] and [7] (not department 7)
- turn back on the power
- release the [CLEAR] and [7] button
- if done correctly, you will now have a single [0] on screen
- if turned to OFF the screen will be blank and the register can be used as normal
E1: Operator Error (wrong buttons)
E2: Sales amount exceeded
E3: Zero-price entry error
E5: Clerk number/password required
E6: Security code error
- Turn the key to 'X' mode
- Press [TOTAL]
If the report prints out, your receipts are working
- Next, turn the key to 'REG' mode
- Check to see if there is a dot '.' on the left-hand side of the screen?
- If there is this means that the receipts are turned off
- To switch the receipts back on you need to press the [R ON/OFF] button - you will find this button on the top right-hand corner.
There are 4 tax levels that can be assigned a tax %. Department buttons are then assigned to the tax levels in the next section.
1) Turn key to PRG.
2) Press the number you wish to assign tax to: 1,2,3 or 4.
3) Press [CARD].
4) Type the tax rate, 5 digits. Three digits required after decimal.
5) Press [TOTAL] to confirm.
Example: set tax 1 to 20%.
[1] [CARD] [2] [0] [0] [0] [0] [TOTAL]
Assign tax level 1,2,3 or 4 to a department. You can also enter a preset price, but this is not required. If left empty, prices must be input manually during each transaction.
1) Turn key to PRG.
2) Type [0][0] followed by tax number from previous step (HOW TO SET TAX RATES)
3) Press [CHECK]
4) Type a preset price for this department (optional)
5) Press the relevant department button
Example: Department 7, tax level 1 and preset price of £4.99.
[0] [0] [1] [CHECK] [4] [9] [9] [DPT 7]
- PRG MODE
- [2] [6] [0]
- [VOID]
- X mode
- Type a number between 1-999
- Press [SUBTOTAL]
- Example: oldest 5 transactions - X MODE > [5] > [SUB TOTAL]
Print the newest transactions on the electronic journal:
- X mode
- Type a number between 1-999
- Press [CARD/PO]
- Example: oldest 12 transactions - X MODE > [1][2] > [CARD/PO]
- turn key to PRG.
- Type date in DDMMYY format.
- Press [#/NS] to confirm.
- turn key to PRG.
- Type time in HHMM format.
- Press [X/TIME] to confirm.
If you require the journal and the end of day reports - Please note that the end of day reports will be at the end of the printed journal and you would need to manually take off the report from the journal report.
2) Type a price. (NO DECIMALS)
3) Press a department key
Repeat steps 2-3 for more items.
4) Press a payment method
Example: £3.00 sale in Dept. 4, by cash.
REG [3][0][0] [4/27] [CASH]
1) Turn key to PRG.
2) Type [0][0] followed by tax number from previous step.
3) Press [CHECK].
4) Type a preset price for this department (optional).
5) Press the relevant department button.
Example: Department 7, tax level 1 and preset price of £4.99.
[0] [0] [1] [CHECK] [4] [9] [9] [DPT 7]
1) Turn key to PRG.
2) Press the number you wish to assign tax to: 1,2,3 or 4.
3) Press [SUB TOTAL].
4) Type the tax rate, 5 digits. Three digits required after decimal.
5) Press [TOTAL] to confirm.
Example: set tax 1 to 20%.
[1] [SUB TOTAL] [2] [0] [0] [0] [0] [TOTAL]
ON: PRG [5][5][5][5][5][5] [TOTAL]
OFF: PRG [5][5][5][5][5][5] [TOTAL]
ON: PRG [8][1] [VOID]
OFF: PRG [8][0] [VOID]
E2: Sales amount exceeded
E3: Zero-price entry error
E4: Item over for full-void
E5: Clerk number/password required
E6: Security code error
ie
- [REF]
- Enter price
- Enter DEPT key
- repeat if mulitple items
- when finished the items press [SUB TOTAL]
- then press the correct payment button to refund to the customer
You press [VOID), Then the amount you want to void off ie £1.00 [1][0][0], then the department ie [dep1] (you repeat this sequence [void], [price], [department] how many times you need to and then press [Total] once done.
- Take the plastic covering off the button (may need to use a pair of small pliers)
- Using the pliers/screwdriver, remove the button
- Have a look inside either the right hand side or left hand side and confirm if there is a bouncy type screw
- Clean the insides of the button insert (where the button goes) and clean the plastic button and covering itself.
- Once done all the above, reattach everything ie putting everything back into it’s place.
[email protected]
Photo 1) You take off the flat front lid

Photo 2) Using a screwdriver, you unscrew the screws on either end of the orange printer
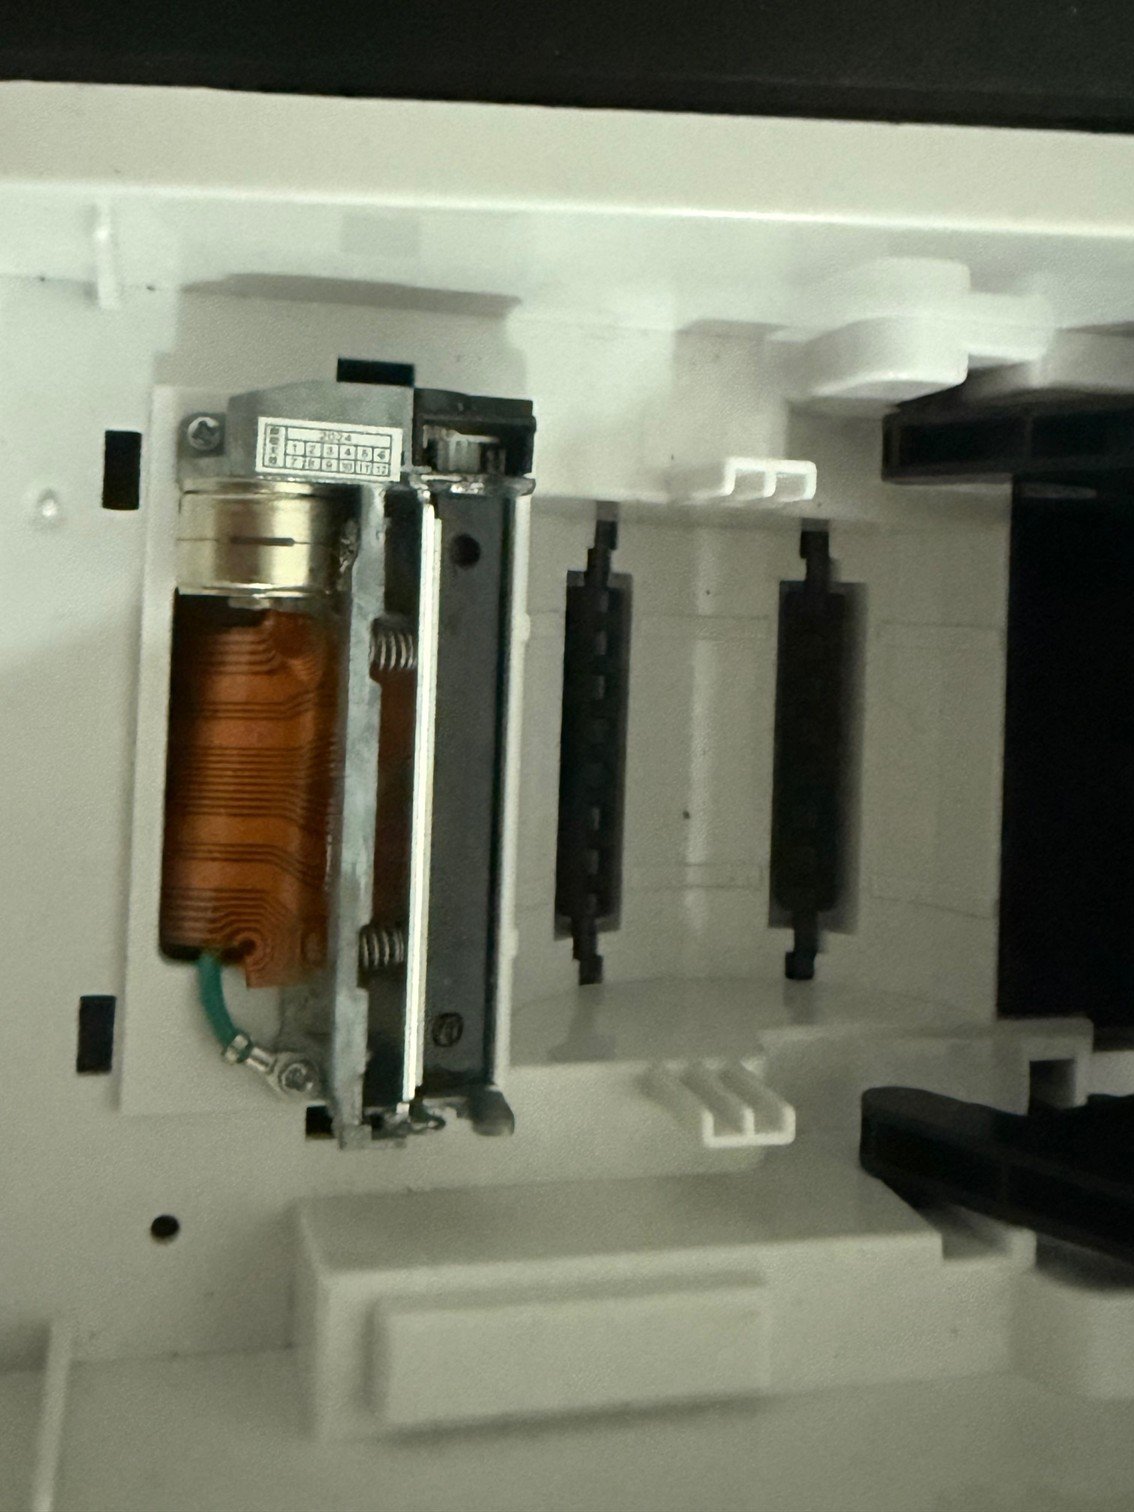
Once done photo 2) you pull and push so that the product comes in 2 parts (top which has the keyboard and bottom which is the base of the cash register)
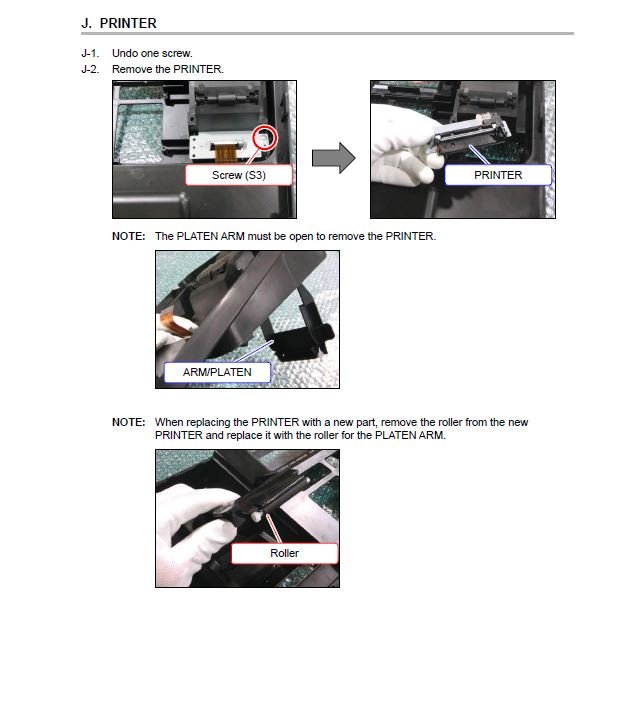
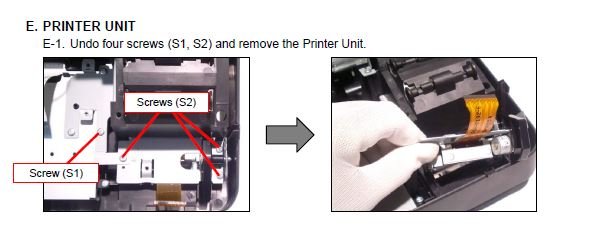
Photo 3) Underneath, you will see where the orange thread leads to (printer), you need to detach it from where it goes in (pull it out gently.
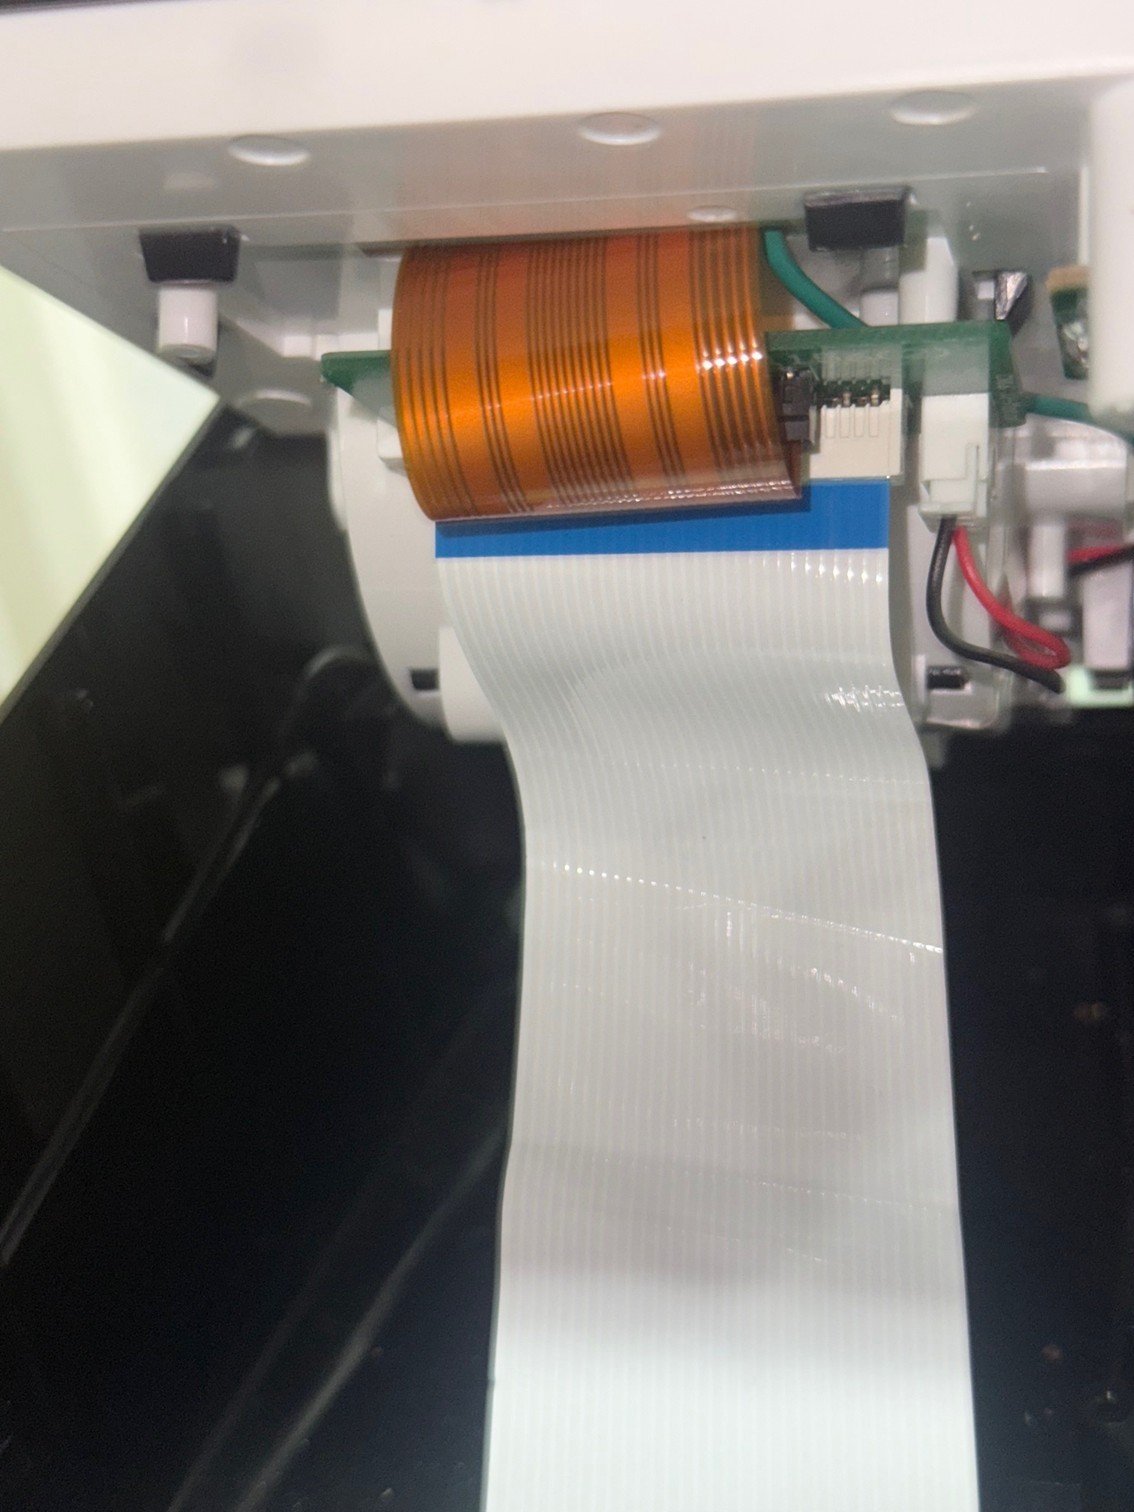
4) Once you have unattached the old printer and removed it, you can now replace the old printer with the new. (in photo 4 the printer loops round underneath, make sure you do the same.) and put all the pieces back together again.
Training mode is depicted by a dot in the 3rd segment of the display. Exit training mode to reenable the report functionality.
- Turn the key to PRG mode
- Type [4] [5] [1] [VOID]
To show the grand total on reports again:
- Turn the key to PRG mode
- Type [4] [5] [0] [VOID]
Once you have your items set up, registering a basic sale is very simple:
1) Press [MENU] and select REGISTRATION MODE
2) Sign in as a clerk using the 1 - 5 [CLERK] buttons
· For clerks 6 - 15, type the clerk number followed by [CLERK#]
3) Press the items you wish to sell to the customer
· For items with open pricing, type the price in before pressing the item button, prices must be entered in pence (no decimal places)
4) Press the [SUB TOTAL] button to see the outstanding balance
5) Press the [CARD] or [TOTAL] (cash) to finalise the transaction
· [PAY MENU] has additional payment methods
· Money can be input before pressing [TOTAL] to calculate change
When you use the programming tool and add PLUs you can add the amount of stock you have there. Or you can access the PLUs on the register and change stock within the PLU. Stock reports are available within the X1/X2 reports menu – you can do a mini stock report which shows stock above the requested minimum quantity level or a full report. The machine cannot tell you when you have a Low stock or No stock item.
For Take-Away – press the Takeaway button and TO will appear on the screen. On the receipt it will print Take Out on there – handy if you are food retail market and if you press TOTAL again after the transaction it will print a copy receipt for you. You can allocate Take Away tax to PLUs (ie, for hot/cold food).
To open a table press 1 then TABLE, enter the items for that table. When you have finished press TABLE again and it will hold until either more items are added, or bill paid. For adding more items, you MUST open the table first. Clerks can do other sales. You can use the Open Table Report to also see how many tables are in use and the balances on them.
Table Menu
Table Review—to see amount table owes on screen
Table Add—to merge tables—press table number, highlight table add, press TOTAL— press the table number you would like to add it to, press TOTAL—When done press C to return to sales mode
Table Change — to change a table number—press the table number, highlight table change, press TOTAL, press new table number and TOTAL
Programming Mode then Sales Programming then Scrolling Message to add up to 5 scrolling messages for customer/staff displays.
In advanced settings you can allocate a manager passcode (4 digits) – this can be used to limit access to reports etc by other clerks. Also used when clerks do not have access to refunds/voids this is where an authorized manager will then intervene in the sale to enter the passcode. You can set passcodes for the following functions PRG+Z modes/X mode/Manager and Training mode.
You can turn off receipts but when you change the mode on the machine this function will then switch itself back on.
X1&2 are reports that can be done at any point of the day and will give you the sales figures up until that point. If you press to do a flash report it will not print on the receipt, but it will show you the sales figures on the screen. Pressing TOTAL on any other option will print on the receipt for you. Here you can also do your stock reports and OPEN table reports.
You press the Refund/Void button and then bring up refund menu – highlight refund press TOTAL and then press the PLU you would like to refund. For each item you MUST press Refund/Void first then the PLU.
Press HOLD/RECALL button which will hold the sale of those items in the system. When there is a sale on hold a H will appear on the screen. Only one transaction can be held at any time. Other clerks can use the machine. ONLY 1 SALE CAN BE PLACED ON HOLD. Other clerks can recall that sale and finish the transaction. You cannot access the programming menu when you have a transaction on hold .
Programming mode – Training mode On/Off – Press Enter to turn on. A T will appear in bottom left of the screen. There is also a Training Mode report available in Z1/Z2. Also see Clerks system for allocating a Training Clerk
The master data is stored on the register. When you open the software and click on “Update Cash Register” and select YES. Even if you have changed some prices on the register, the software will receive all those details so you can adjust and change what is required. SAVE each change and SEND TO ECR when complete.
Change in PRINT mode. You can turn OFF various options, such as ECR number (appears as MCNo.0001 on receipt).
There are 15 CLERKS, available on this cash register. To access the settings for the clerk system:
1) Press [MENU]
2) Go to PROGRAMMING MODE
3) Go to CONFIGURATION SETUP
4) Go to CLERK SYSTEM
To access the settings for induvial clerks:
1) Press [MENU]
2) Go to PROGRAMMING MODE
3) Go to CONFIGURATION SETUP
4) Go to INDIVIDUAL CLERK
Using our default data, there are 42 PLUs on the main keyboard, and 20 PLUs inside each of the 5 menus, totalling 142 PLUs.
To set up PLUs:
1) Press [MENU] to access the main menu
2) Go to PROGRAMMING MODE=
3) Go to SALES PROGRAMMING
4) Go to PLU
5) Type the PLU number you wish to edit, following by [PLU#]
6) Make the required edits to the PLU
7) Press [NEXT] to save and move to next item (NS key)
8) Once you have finished editing, press [BACK] to exit
There are 99 departments available on this cash register. Departments are groupings for your items, which allow you to report on item groupings, rather than individual items.
To set up a department:
1) Press [MENU] to access the main menu
2) Go to PROGRAMMING MODE
3) Go to SALES PROGRAMMING
4) Go to DEPARTMENT
5) Press [TOTAL] on NAME to begin editing
6) Once finished, press [TOTAL] again to save the name
7) Press [NEXT] to move to the next item
8) Once you have finished editing, press [BACK] to exit
Remove cash register from box, keep the packing safe in case of warranty return.
1) Remove printer cover
2) Insert 3 x AA batteries
3) Insert SD Card
4) Release printer arm with blue button
5) Insert 57mm thermal roll
6) Close printer arm
7) Replace printer cover
8) Insert keyboard template
9) Plug in the cash register
To initialise the system, you must select a language and memory allocation during set up.
1) Select preferred language using ← →
2) Move to PLU/EJ/TABLE using ↓
3) Select 1500/9000/70 using ← →
4) Move to Are you sure? Using ↓
5) Select YES using ← →
6) Press [TOTAL] to confirm changes
The system will automatically show the menu, load the default data from the SD card.
1) Go to PROGRAMMING MODE
2) Go to SD MAINTENANCE
3) Go to LOAD FROM SD-CARD
4) Select ALL PROGRAMMING DATA
5) Select PLU DATA
6) Press the MENU button to return
Setting the data and time on the cash register can be done in the programming mode.
1) Go to PROGRAMMING MODE
2) Go to CONFIGURATION SETUP
3) Go to INITIAL SETUP
4) Highlight DATE SETUP
5) Enter date as DDMMYY [TOTAL]
6) Highlight TIME SETUP
7) Enter time as HHMM [TOTAL]
8) Press MENU to return
E1: Operator Error (wrong button pressed)
E2: Sales amount exceeded
E3: Zero-price entry error
E4: Incorrect full-void entry
E5: Clerk number/password required
E6: Manager password requested
- Turn mode switch to PRG
- type [2][2][2][2][2][2][TOTAL]
- enter 4 digit password
- [s.total/VAT]
- switch to PRG mode
- [5] [5] [5] [5] [5] [5] [TOTAL]
The Grand Total on the Z report can be set to reset daily by the following:
PRG [2][1][1] [VOID]
Font size can be changed between normal and small, this can be changed with the following sequence:
SMALL: PRG [2][4][1] [VOID]
NORMAL: PRG [2][4][0] [VOID]
You can print either a X or Z report of any transactions ran in Training mode . Turn the mode switch to X or Z then press:
[8][8] [TOTAL]
- Move switch to PRG
- [4] [5] [1] [VOID]
To bring the GT printing back to the Z Report:
- Move switch to PRG
- [4] [5] [0] [VOID]
E2 - Sale amount exceeded
E3 - Zero-price entry error
SEC CODE - Password needs entering
How to clear an error code - using you can resolve the error on screen by pressing [C] and then repeating the process correctly.
- Unplug from the mains
- press and hold down [C] and [7]
- When the 2 keys are held down, restore power
Full Reset Reports- all totals reset
- Unplug from the mains
- press and hold down [C] and [3]
- When the 2 keys are held down, restore power
Full Reset - all totals and programming reset
- Unplug from the mains
- press and hold down [C] and [9]
- When the 2 keys are held down, restore power
- turn to PRG
- type in the date in the DDMMYY format
- press [#/NS]
- turn to PRG
- type in the time in 24 hour format - ie [1] [8] [3] [0] for 6.30pm
- press [QTY/ TIME]
- turn dial to PRG
- type in the vat number you want to update (ie 1 for vat 1, 2 for vat 2, 3 for vat 3 or 4 for vat 4)
- press [s.total VAT]
- type in the vat rate required- this is in 5 digits and must include the decimal point. so for example 20% would be [2] [0] [.] [0] [0] [0]
- press [TOTAL]
- repeat from step 2 if other tax rates are required setting up.
- turn to PRG
- Type the status
- 0 = multiple positive (most common)
- 1 = single positive
- 2 = multiple negative
- 3 = single negative
- 0 = multiple positive (most common)
- type the tax status
- 00 - non tax
- 01 - tax rate 1
- 02 - tax rate 2
- 03 - tax rate 3
- 04 tax rate 4
- Press [CHECK]
- type in a default price (optional) ie for £10.00 you would type [1] [0] [0] [0]
- press the DEPARTMENT button on the keyboard ie dept 1.
- repeat from step 2 to update others
PRG MODE > 100 > SUBTOTAL > PRESS PLU BUTTON > 000 000 000 > QTY/TIME > CASH
Repeat for mulitple PLU's
The ER230 runs on mains or on its internal battery. It can run for up to 8 hours on a single charge.
Charge for 15 hours before 1st use.
Never let the battery fully go flat—charge immediately—may take up to 15 hours for complete full recharge.
So, your products should always be in the PLU table and then potentially assigned to a relevant group.
If your PLU needs an open price (ie where you manually type the price) you should leave the price field empty. So to sell the PLU on the cash register, you would type the price, then press the PLU button on the keyboard.
Generally speaking, you wouldnt have more than around 6-12 groups - but the machine can hold more group if required.
- Press [MODE] until you see P on the screen
- Enter [5][2][0] and press [SUB TOTAL]
- Press the [DEPT1] button
- Type the price with no decimal place
- for this example of £3.00 it would be [3][0][0]
- Press the [X/TIME] button
- Press [CASH] to finish.
To turn on for Journal printing you need to do the following:
- Press [MODE] until you get to PGM MODE
- [3] [0] [SUBTOTAL]
- [6] [X/TIME]
- [1] [SUBTOTAL]
- [CASH]
- Press [MODE] until you get to REG MODE
- If the display shows 'CLOSED' press [1] [CLERK]
If you want the machine to store the data (to potentially print in the future) you need to turn on the EJ.
- PGM MODE
- [3] [0] [SUB TOTAL]
- [7] [X/TIME]
- [2] [SUB TOTAL] [CASH]
To print the Journal (NOT reset)
- X MODE
- [3] [0] [0] [SUBTOTAL]
- Z MODE
- [3] [9] [9] [SUBTOTAL]
- Turn key to PGM mode
- [5] [0] [SUBTL]
- Enter the tax rate you want to update (from 1 to 4) [SUBTL]
- Enter the new tax rate, its 3 decimal places, so for 20% it would be [2] [0] [.] [0] [0] [0]
- Then enter the tax type of either [0] or [2] (0 means add-on tax and 2 means inclusive of tax)
- Type [0] [SUBTL]
- Repeat from step 3 if you want to update further tax rates
- When finished, press [CASH]
- Turn key to PGM mode
- [1] [0] [0] [SBTL]
- Press the physical PLU button on the keyboard
- The next sequence is a list of 9 separate settings - below are the most common sequences - but PLEASE refer to page 90 of the manual to check these are relevant for you
- if you want the plu to be TAX1 - type [4] [0] [0] [0] [0] [0] [0] [0] [0] [QTY/TIME]
- If you want the plu to be TAX2 - type [0] [1] [0] [0] [0] [0] [0] [0] [0] [QTY/TIME]
- If you want the plu to be TAX3 - type [0] [2] [0] [0] [0] [0] [0] [0] [0] [QTY/TIME]
- If you want the plu to be TAX4 - type [0] [4] [0] [0] [0] [0] [0] [0] [0] [QTY/TIME]
- repeat from step 3 for additional PLU's
- press [CASH] when finished
Important: Configure tax rates and tax-exempt items in line with your business’s VAT requirements. We recommend confirming the correct setup with your accountant where needed.
Before You Start
You will need to decide which tax level will be used for takeaway items.
We suggest the following setup:
- Tax 1: Standard-rate items that should always remain taxable, such as drinks or other non-exempt products.
- Tax 2: Items that may become tax exempt when sold as takeaway.
Both tax levels can initially be set to the same VAT rate, for example 20%. The Take Away button will then remove Tax 2 from the transaction when required.
1. Add the Tax Exemption Button to the Keyboard
First, choose an existing function button on the keyboard that you are happy to replace.
- Insert the C key and turn it to Service Mode (the 6 o’clock position).
- Enter [7] [0] [ST]
- Enter [2] [0] [2]
- Press the function key you want to replace with the Tax Exemption button.
- Press [CASH] to save and finish.
The selected key is now set as a Tax Exemption function button.
2. Set the Tax Level That Will Be Exempted
Next, choose which tax level the new button will remove from the sale.
- Turn the key to Program Mode.
- Enter: [7] [0] [ST]
- Enter the code for the tax level you want to make exempt:
- [1] [0] = Tax 1
- [2] [0] = Tax 2
- [4] [0] = Tax 3
- [0] [1] = Tax 4
For a takeaway setup, we recommend selecting Tax 2, so enter: [2] [0]
- Press the Tax Exemption function button you created in the previous section.
- Press [CASH] to save and finish.
3. Rename the Button to “Take Away”
You can now change the button name so it is clearer for staff to use.
- Turn the key to Program Mode.
- Enter: [9] [0] [ST]
- Type: TAKE AWAY
Use the register’s QWERTY keyboard to enter the name.
- Press [QTY/TIME].
- Press the Tax Exemption button you created.
- Press [CASH] to save and finish.
The button should now display as Take Away.
Using the Take Away Button During a Sale
- Add all items to the transaction as normal.
- Press [SUB TOTAL].
- Where the customer is taking the eligible items away, press the [TAKE AWAY] button.
- Complete the payment as normal.
The button should only be used after pressing Sub Total and before taking payment.
- Press [7] [0] [SUB TOTAL]
- Enter the 3 digit key code (see below)
- press the physcial key location on the keyboard you want to update
- Repeat from 2 step for addtional
- CASH to finish
217 Clerk 1
218 Clerk 2
219 Clerk 3
220 Clerk 4
221 Clerk 5
222 Clerk 6
223 Clerk 7
224 Clerk 8
225 Clerk 9
226 Clerk 10
However, most customers like to set up a PRESET on the SALE.
for this, it's two steps
CHANGE THE FUNCTION KEY TO BE PRESET AND SALE
- P MODE
- [7] [0] [SUB TOTAL]
- [0] [3] [0] [0] [0] [0]
- Press the button on the keyboard ie either [%1] or [%2]
- [CASH]
- P MODE
- [9] [0] [SUBTOTAL]
- Enter the percentage value, its to three decimal points so for 5% it would be [5] [0] [0] [0]
- Press the button on the keyboard ie either [%1] or [%2]
- [CASH]
- in reg mode, sell all the items in the sale
- press [SUBTOTAL]
- Press the button on the keyboard ie either [%1] or [%2] to apply the discount
- press the relevant payment button
Requirements
- Blank SD card no larger than 16GB (May need formatting to FAT32) purchase here if required
- Windows PC
- Espresso Software
Prepare Espresso For First Time (one time)
- Install the Espresso Software
- Open the software and press SET REGISTER
- Type the STORE NAME and press the [+] button at the top
- Open the new store by double clicking it
- Type a REGISTER NAME
- Select the correct MODEL, KEYBOARD and PRINTER and press the [+] button at the top
- Open the new register by double clicking it
Prepare The SD Card With Till Data
- Insert SD card into cash register
- Go to SERVICE MODE
- Highlight PROGRAM BACKUP and press [CASH]
- Highlight SD and press [CASH]
- Highlight PGM BACKUP and press [CASH]
- Wait for the backup to finish and remove the SD Card
Load The SD Card Data In To Espresso
- Press CONVERT PGM
- Press the BROWSE button at the top of the screen 📁
- Browse to the SD CARD and find the folder PGMBACK
- Press OK, it will populate the PATH field on the right
- Tick all of the boxes in the PROGRAM LIST
- Press the IMPORT button at the top of the screen

Edit The Program Data
- Return to the HOME screen
- Select EDIT PROGRAM
- Make all adjustments required
Save The Change To The SD Card
- Press CONVERT PGM
- Press the BROWSE button at the top of the screen 📁
- Browse to the SD CARD and find the folder PGMBACK
- Press OK, it will populate the PATH field on the right
- Tick all of the boxes in the PROGRAM LIST
- Press the EXPORT button at the top of the screen

Load SD Card Data Back To Till Data
- Insert SD card into machine
- Go to SERVICE MODE
- Highlight PROGRAM BACKUP and press [CASH]
- Highlight SD and press [CASH]
- Highlight PGM RESTORE and press [CASH]
- Wait for the reload to finish
Time and date are set by the machine but if you wish to reallocate go to P mode and number 6 press CASH then you can change to what is required. Date will automatically come up to change after date. Press CASH to enter details and CLEAR to go back to main menu
For setting tax 1 as VAT at 20%
Mode then Program mode and use arrows to go to 7.Taxes press CASH
Press 1 then CASH in desc press CASH and type TAX/VAT 1 press CASH to save entry use arrow keys to move to next item
In type you can choose to have it set as add-on or VAT—I picked VAT
For rate type in 20000 for 20%
So now once I have placed in my PLUs with relevant VAT rates on my receipt it will show the amount of VAT added at the bottom of the receipt.
If you want the machine to add VAT to a product then choose ADD-ON and it will add VAT to the preset PLU price.
Go to Program mode 1.PLU press CASH
Add/Change press CASH
1.One PLU press CASH then enter which number PLU you want to add press CASH
In One PLU you the arrow keys to move up and down the menu here you can give item a description and a price and allocate the tax rate for that item. To go into each part you want to change press CASH.
When you want to change from Y to N (Yes to No) use the up and down arrow keys and press CASH to enter that change.
When you see REGISTER MODE on the screen—
1) Type a price. (NO DECIMALS)
2) Press a plu key
Repeat steps 2-3 for more items
3) Press a payment method
Example: £3.00 sale in Dept. 4, by cash.
REG [3][0][0] [PLU4) then CASH
This method can be used if you do not preset your PLU keys with prices. You will have OPEN PLUs
Programme mode
8.Messages then CASH
1.Preamble is for the top of your receipt you can use the arrow keys to move and pick which line of text you would like to change.
For line 1 press CASH until you see L:01 on the screen you can now type 1st line of receipt header. When you have finished line 1 press CASH You have 6 lines you can type into.
2.Postamble is for the bottom of the receipt and same technique and you also have 6 lines you can use here.
For each line there is a maximum of 32 characters—that includes spaces etc.
Delete any message s that are already installed or they will still print as default.
*To switch the receipt function on or off press the RCPT ON/OFF key*
Go to Program mode
5.Employee
Enter clerk number 1-5
Go into employee and you can give each clerk a name
Here you can also set passwords and give authority for various functions on the machine if required
To have a practise and train new clerks you can use the training mode
Manager mode then CASH
4.Set train mode then CASH
Press 1 to start training mode then CLEAR to return to main menu and MODE to go to REG mode in training mode.
To exit training mode follow first 2 steps but then press 0 to END training mode. In training mode a small line will appear on the bottom of the display screen
In the event you have an error you cannot clear, or are stuck without being able to exit, you may perform an initial clear to clear the working memory, this will end any transactions that have not been finalised, but all other information will be stored:
Power machine OFF
Hold the [SUBTOTAL] button
Power machine ON
Release [SUBTOTAL]
Press [CASH] to begin clear
Press [CASH] to confirm clear
You will need to sign back in a clerk
Captures sales journal in the memory of the machine. Press CASH for X mode and go into X REPORTS and from there you can press 8 and CASH to display the electronic journal menu. Use the arrow keys to select from the menu and press CASH key to confirm. You must allocate memory to electronic journal, f it is a function that you wish to use. Default allocated lines for electronic journal is 1000. To re-set the EJ you need to go to RESET EJ in Z mode.
However, the VD key can turn to the X position, this would be the key to use if you wish to stop people turning further than X.
You will need a SD Card with the original firmware saved on it (file is called NR300.bin)
- Turn off the NR320 and make sure the SD card is plugged in
- while pressing both [MODE] and [CASH] turn back on the register
- you will get a message on screen stating 'select down mode' press down to select SD CARD and press [cash]
- the machine will now reapply the firmware and will take a approx a minute to finish
- when complete - turn off the register. press and hold [CHECK] to see the message RAM ALL CLEAR
- press [FEED] then [0] then [mode] then [cash] to do a reset
- then press [3] [mode] to go to register mode and then [1] [clerk]
please see this FAQ
CLICK HERE
- Press [RA/PO] button
- Using the 0-9 keypad enter the amount you want (excluding the decimal point)
- Press [CASH]
- Press [RA/PO]
To do a PAID OUT you need to do the following:
- Press [SHIFT] Press [RA/PO] button
- Using the 0-9 keypad enter the amount you want (excluding the decimal point)
- Press [CASH]
- Press [RA/PO]
- Ensure you are signed into the machine
- Press [MODE] until you reach P (program mode)
- Type [1] [3] [0] [0]
- [SUBTOTAL]
- Enter time in 24hour format ie [1] [8] [0] [0]
- [X/TIME]
- Enter date in 6 digit format - MONTH - DAY - YEAR. so 15 June 2024 would be [0] [6] [1] [5] [2] [4]
- [X/TIME]
- [CASH]
- press [mode] to return to REG (register mode)
When you set the date on this machine, it is in a 6 digit format – but it goes Month first, then day, then year.
For example, 1st of September 2024 would be typed as 090124.
If the register is in an error which cannot be cleared the following operation will reset the current transaction and clear the error without any loss of pre-programmed data.
Power OFF, press the SUBTOTAL key and while still pressing the key, power ON
The register prints INITIAL CLEAR OK! Move to the REG position.
At the CLOSED prompt enter a Clerk Number 1 to 10 and press the CLERK key. I.e. 1 CLERK
You need to:
- Press [3]
- Press [MODE] - this will take you to 'REG' mode.
PLEASE NOTE THIS WILL WIPE ANY PROGRAMMING DATA FROM MACHINE
This procedure has been carried out prior to shipment and need not be carried out as part of the initial setup.
- Power OFF and press the [CHARGE] button and while still pressing the [CHARGE] button, turn the power ON
- Press the following buttons in order: [FEED] > [TAX] > [MODE/CALC] > [CASH]
- Keep pressing the [MODE] button until you come across 'REGISTRATION'. Press [CASH]
- At the CLOSED prompt enter and press [1] then [CLERK]
E00—Wrong key sequence—press CLEAR
E4— Time & date required
E8—Subtotal required—press subtotal
E14—Electronic journal full—reset the report (see next page)
E21—Printer is cooling off to operate again
CLOSED—Sign on as a clerk
PEA Error—PEA appears change the till roll or the paper arm is not shut properly
[RETURN]
ENTER THE PRICE
PRESS DEPT BUTTON
- Press [mode]
- Press [mode] till you get to ‘P’ mode
- Press [5] [3]
- [Subtotal]
- enter the tax percentage required ie 20% you would type (please note, you need to press the decimal point) [2] [0] [.] [0] [0] [0]
- *Press either [2] (vat included price) or [0] for VAT to be added on
- **Press the number of the tax rate from 1 -4 - ie [1]
- [X/TIME]
- [Cash]
Key notes:
*[2] = VAT inclusive prices
[0] = VAT add on
**Numbers [1], [2], [3] and [4] = You are allocating the tax rate.
e.g. [1] = Tax rate 1, [2] = Tax rate 2, [3] = Tax rate 3 and [4] = Tax rate 4
RA - Recieved on Account (putting cash into the till)
To perform either of these actions
- press [PO] / [RA]
- type in the amount (no decimal point) so £5 would be [5] [0] [0]
- press [CASH]
- press [PO] / [RA]
- Press [mode]
- Press [mode] till you get to ‘P’ mode
- For heading press [3] [0] [0] [0]
- For the 1st line type [1], line 2 press [2] and for the 3rd line press [3]
e.g. [3] [0] [0] [0] [1]
5) For the footer press [4] [0] [0] [0]
6) For the 4th line press [4], line 5 press [5] and for line 6 press [6] e.g [4] [0] [0] [0] [4]
7) [Subtotal]
Your screen should look like 0 0 1 – 0 0. – 0 this Line number – letter count – Key press count.
8) Press a number 1 to 9 e.g. [2]
9) To get the letter V, you would press [2] x3 times
10) [Subtotal]
11) [Cash]
The Alpha Keyboard
7 Space | 8 ABC | 9 DEF |
4 GHI | 5 JKL | 6 MNO |
1 PQRS | 2 TUV | 3 WXYZ |
0 Bold | 00 Caps | . Back |
Side note:
To get BOLD
lettering you would need to press: for example CASH:
Press [0] Then press the [8] x3 times, Press [0] then press [8] x1 times, press [0] then press [1] x4 times, Press [0] then press [4] x2 times
If you put words into a line that you decided, you wanted it to be a space:
- Press subtotal and go back into either the header [3] [0] [0] [0] or footer [4] [0] [0] [0]
- Press the line you want to change ie 5
- Example: [3] [0] [0] [0] [5]
- Then press [7] which is the space
- [Subtotal]
- [Cash]
- Press [mode]
- Press [mode] till you get to ‘p’ mode
- Type [1] [0] [0]
- Type department code [0] [1]
Example: [1] [0] [0] [0] [1]
Side note: [0] [1] is the department code for department 1, [0] [2] is the department code for department 2, [0] [3] is the department code for department 3 etc
- [Subtotal]
- Type what you want the department to be called ie Beer Example: Press [8] x2 times, press [9] x2 times, press [9] x2 times and press [1] x3 times
- [Subtotal]
- [Cash]
- Press [mode] to return to REG mode
Repeat the steps 1-6 to carry on with setting up the departments. Once finish press [CASH]
Side note: You can only have up to 12 letters in a department
LTPZ225 printer (production up to and including November 2012, serial number B5AGB***** or earlier)
LTP01-245-01 printer (production December 2012 onwards, serial number B5AGC***** or later) - can be replaced with the following printer - CLICK HERE
If any of the modes state CLOSED - this means no CLERK/CASHIER is signed on. All you need to do is type your clerk number followed by the CLERK button on the keyboard. If you dont really use CLERKS, just sign on as clerk 1, so you would just type
- [1]
- [CLERK]
A clerk needs to be signed on to the device in order to operate, by default the clerk will stay logged in.
To sign on, type your clerk number followed by the [CLERK] Button, so for example press [1] [clerk]
if you do not use the function, you still need to sign on, even if you all use CLERK1 for entering sales
- insert the C key into the machine and turn the key clockwise past the PGM mode to the Service mode
- turn off the machine on the side
- Press and hold [SUB TOTAL]
- turn on the register on the side
- release [SUB TOTAL]
- you should have a RAM ALL CLEAR ON SCREEN
- press in the following order [FEED] [1] (white button not black) [CLERK] [CASH]
- this will spell out GOOD
- follow the memory allocation prompts on the screen.
- when finished memory allocation - turn the key to REG mode - then press [1] [CLERK]
- Enter [6] and press the [CASH] button
- Then press the [CASH] button
- Enter the time (i.e HHMM)
- Then press [CASH]
- Enter the Date (i.e DDMMYY)
- Then press [CASH]
- Then press [CASH]
- Press [CLEAR]
- Press [CLEAR]
- Press [ CLEAR]
- Go back to 'REG' mode
Setting the receipt Header and Footer
- Turn the key to ‘PGM’ mode
- On the 0-9 Keypad press [8] messages
- Press [CASH]
- Using the 0-9 keypad select option 1 or option 2
- Option 1 is your header (preamble) and option 2 is your footer (Postamble)
- Once you’ve selected your option press [CASH]
You can have up to 6 lines each of Header and footer
9) Using the white keypad enter your first line of the receipt
If numbers are required use the 0-9 keypad.
To go back a space, press the button which has the 'arrow pointing left'.
To turn off/on the bigger case letters, press [CAPS].
If you require the letters to be DW (Double Width) press [double] – please note that if you are using DW (Double Width) it counts as 2 characters.
If you are wanting to use a letter which is on the same department key, press the [- SKIP] button to move forward a character. The [+%] is delete and The space button says [SP*+@].
12) To edit the next section of the receipt HEADER/FOOTER press [CLEAR]
13) Follow steps 4 to 9
BUTTON | FUNCTION |
[CASH] | Enter / Open section / Confirm |
[CLEAR] | Back / Close section / Cancel |
[CHEQUE] | Move down through menus |
[CHARGE] | Move up through menus |
KEY | Switch positions |
Firstly you need to have enabled the Electronic Journal
1) Turn key to P mode
2) OPTIONS [CASH]
3) EJ OPTIONS [CASH]
4) ELECTRONIC JOURNAL ENABLE [CASH]
5) Select Y with the arrows
6) [CASH]
- Turn to X mode and press [CASH]
- Go into 'X reports' by pressing [CASH] ; from there you can press [8] then press [CASH] (this will display the E-Journal menu)
- Use the arrow keys to select from the menu and press [CASH] to confirm
If you haven’t used your till in a while and it says ‘warning time error’ you need to reset the date and time. This is because the till has reset itself.
Resetting the Date and Time:
- Turn Key to ‘PGM’ mode
- Press [6]
- Press [CASH]
- Press [CASH]
- On the 0-9 keypad enter the time in HHMM
- Press [CASH]
- On the 0-9 Keypad enter the date DDMMYY
- Press [CASH]
- Press [CLEAR
- Press [CLEAR]
- Press [CLEAR]
- Turn key back to ‘REG’ MODE
In the event you have an error you cannot clear, or are stuck without being able to exit, you may perform an initial clear to clear the working memory, this will end any transactions that have not been finalised, but all other information will be stored:
1) Turn key to P mode
2) Power machine OFF
3) Hold the [SUBTOTAL] button
4) Power machine ON
5) Release [SUBTOTAL] button
6) Press [CASH] to begin clear
7) Press [CASH] to confirm clear
8) You will need to sign back in a clerk - If you don't have clerks set up press [1] [CLERK]
- Turn the key to ‘PGM’ mode
- Press [1]
- Press [CASH][CASH][CASH]
- Press a PLU button you wish to edit (This is your white keypad)
- Press [CASH] and change the name of the PLU by using the keypad to enter the name required.
- Press [CASH]
- Use the arrow buttons to change the settings of the PLU to suit your needs such as price, tax rates etc
- Once completed press [CLEAR][CLEAR][CLEAR][CLEAR]
- Move to PGM / PROGRAM MODE
- Using the arrow buttons, go to ‘PLU’
- Press [CASH]
- Select option 1: ADD/ CHANGE
- Press [CASH]
So Either select
- Press [CASH]
- Enter ‘From’ PLU. For example: Press [1]
- Press [CASH]
- (if range) Enter ‘to’ PLU. For example: Press [1][2]
- (if range) Press [CASH]
- Using the arrow buttons. Go to ‘Price/Halo1’
- Press [CASH]
- Type in the price - (Using 0-9 keypad, no decimal point required) [CASH]
- Press down on the arrow keys to option 3 which is ‘Preset’
- Press [CASH]
- Press down on the arrow key to change ‘Y’ to ‘N’
- Press [CASH]
- Press down again on the arrow keys to option 4: Preset override
- Press [CASH]
- Use the down arrow to change ‘Y’ to ‘N’
- Press [Cash]
- Press [Clear] x4
- Return back to ‘reg’ mode’
In P mode
Turn machine OFF—press and hold SUB-TOTAL key—whilst pressing switch machine back on. When you see INITIAL CLEAR release sub-total key then press CASH when prompted. CASH again to confirm.
5 > MODE > 2 > CASH > CASH
The machine will print a small receipt saying - electronic journal reset. Return to the REG mode.
In REG mode - you can press SUBTOTAL and it will advise how many electronic journal lines you have available.
To avoid this we recommend being connected to mains power for a minimum of 4 hours (ideally 12 hours) every couple of months
- 6
- MODE
- 4
- CASH
- 10
- CASH
- CASH
- DOWN (CHECK) to change it from Y to N
- CASH
- CLEAR, CLEAR, CLEAR
- 6
- MODE
- 3
- CASH
- press the button to edit (ie CASH, CHARGE, CHECK)
- CASH
- type in new name
- CASH
- CLEAR, CLEAR, CLEAR, CLEAR
[6] [MODE]
[4] [CASH]
[4] [CASH]
[2] [CASH]
[DOWN] (to change from Y to N)
[CASH]
[CLEAR] [CLEAR] [CLEAR]
[3] [MODE]
- Press Mode until you get to P (program mode)
- Press [4] [CASH]
- Press [1] [0] [CASH]
- [8] [CASH]
- using the Down arrow, change from 'NONE' to 'every time' or 'once after z report' [CASH]. Selecting either of these options will force the register to have an SD card at the moment of time you select. ie, if you select 'every time', if you attempt to do a sale without the SD card in the register, you will not be able to complete a sale.
- [CLEAR] [CLEAR] [CLEAR]
- [3] [CASH]
Below is an example of what the journal looks like

| Switch the device off | |
| Press and hold check button | check |
| Switch the device back on | |
| Wait for RAM all clear and release check button | check |
| Input the reset sequence to spell GOOD | feed0modecash |
| Wait for MEMORY ALL CLEAR receipt | |
| Return to REGISTER mode | 3mode |
| Sign in as a cashier | 1clerk |
Next a couple of settings changes:
Increase memory of eletronic Journal
[7] [MODE] [3] [CASH] [CASH] CASH] [CASH] CASH] [CASH] [1] [5] [0] [0] [0] [CASH] [CASH] [CLEAR] [CLEAR] [CLEAR] [CLEAR]
Currency Symbol
[6] [MODE] [4] [CASH] [2] [CASH] [2] [1] [CASH] [4/8] [4/8] [4/8] [CASH] [CLEAR] [CLEAR] [CLEAR] [CLEAR]
Date / Time
[6] [MODE] [6] [CASH] [CASH] type in correct time ie 0905 [CASH] type in correct date - YYMMDD - ie 240925 [CASH] [CLEAR] [CLEAR] [CLEAR]
Return to REG Mode
[3] [MODE]
**UPDATED 16/5/25 - As default vat is shown on receipts as standard**
To change the receipt print settings to display VAT, perform the following:
| Go to the PROGRAM mode | 6mode |
| Open the OPTIONS menu | 4cash |
| Open the PRINT settings | 2cash |
| Open TAXABLE DESCRIPTION setting | 25cash |
| Change N to Y | ↑ |
| Save the changes | cash |
| Return to main menu | clearclear |
| Return to REGISTER mode | 3mode |
The battery symbol is not directly related to operation time remaining, it is related to battery voltage which drops quickly from full charge, but stabilises shortly after.
Charge is not a common UK term, to change the wording on receipts and reports to CARD, perform the following:
| Go to PROGRAM Mode | 6MODE |
| Open FUNCTION KEY | 3CASH |
| Open the FUNCTION KEY editor | CASH |
| Press the charge key | CHARGE |
| Open the DESC editor | CASH |
| Type the word CARD | 2222VOID22777733 |
| Save the changes | CASH |
| Return to the main menu | CLEARCLEAR |
| Return to sales mode | 3MODE |
- [6]
- [cash]
- [8]
- [cash]
Preamble is for the top of your receipt you can use the arrow keys to move and pick which line of text you would like to change.
For line 1 press CASH until you see L:01 on the screen you can now type 1st line of receipt header.
When you have finished line 1 press CASH. You have 6 lines you can type into.
Postamble is for the bottom of the receipt and same technique and you also have 6 lines you can use here.
For each line there is a maximum of 32 characters—that includes spaces etc.
If characters on same button use SPACE and BACK to move forward a space then return back to allocated space for next letter.
- Press [mode] until you get to 'Program mode'
- Use the down arrow to go to ‘3. function key’
- Press [Cash]
- When it says ‘1.Function key’ press [CASH]
- Press the [%] button on the keyboard
- Use the arrow buttons to go to ‘3.amount/rate’
- Press [cash]
- Type the new percentage for example 20% = 20000
- Press [CASH] to save
- Press [CLEAR] [CLEAR][CLEAR]
Step 1 - Set up tax rates
Press [MODE] until you get to 'programme mode'
- Use the arrow buttons to go to: Option 7 - TAXES
- Press [Cash]
- Enter 1-4 which Tax you want to edit
- Press [CASH]
- Press [CASH]
- Type: TAX/VAT then Tax number
- Press [CASH] to save
- Use arrow buttons to go to the next option: Option 2 - Type
- Press [CASH]
- Use the arrow buttons to change between ADD-ON and VAT (This should be VAT)
- Press [CASH]
- Use the arrow buttons to go to: Option 3 - Rate
- Press [CASH]
- Change the percentage rate in the following formats: 5%: Press [5][0][0][0] || 10%: Press [1][0][0][0][0] || 20%: [2][0][0][0][0]
- Press [CASH]
- Press [CLEAR][CLEAR][CLEAR] until you go back to 'programme mode'
- Use the arrow buttons to go to: Option 1 - PLU
- Press [CASH]
- Use the arrow button to go to: Option 1 - ADD/CHANGE
- Press [CASH]
- Use the arrow buttons to choose between: Option 1 - Change one PLU (singular you can have different tax rates and Option 2 - Range PLU (Group tax rates)
Step 2 - assiging tax rates to PLU's
If selected Option 1 - Change one PLU
- Press [CASH]
- Enter PLU you wish to edit/change
- Use the arrow buttons to go to: Option 5 - Taxable by rate
- Press [CASH]
- Use the arrow buttons to change the 'N' to 'Y'
- Press [CASH]
-Press [CLEAR] [CLEAR] [CLEAR] [CLEAR] Until you get to 'Programme mode: 1. PLU'
- Press [MODE] until you go to 'Register mode'
- Press [CASH]
If selected Option 2 - Range PLU
- Press [CASH]
- Enter a PLU from
- Press [CASH]
- Enter a PLU to
- Press [CASH]
- Use the arrow buttons to got to: Option 5 - Taxable by rate
- Press [CASH]
- Use the arrow buttons to change 'N' to 'Y'
- Press [CASH]
- Press [CLEAR] [CLEAR] [CLEAR] [CLEAR] Until you see 'Programme mode: 1. PLU'
- Press [MODE] until you get to 'register mode'
- Press [CASH]
Please note this is not a recommended setting change to the register - we would always recommend hiding the GT (grand total) from the reports rather than this. Please see the other FAQ regarding how to hide the GT figure.
To reset the grand total every time you run a financial Z report, perform the following:
| Go to the PROGRAM mode | 6mode |
| Open the OPTIONS menu | 4cash |
| Open the REPORT settings | 3cash |
| Open the RESET setting | 7cash |
| Change N to Y | ↑ |
| Save the changes | cash |
| Return to the main menu | clearclear |
| Return to REGISTER mod | 3mode |
Be aware that it will reset after printing, so it may not appear to have worked for the first report
Within the settings you can turn off printing this
- PGM mode
- Report Options
- Then scroll down to 'print grand total on X report' and Change to the option to N
- Next scroll down to 'print total on Z report' and Change to the option to N
- Exit out of PGM mode
1) Turn key to S mode
2) Power machine OFF
3) Hold the [CASH] button
4) Power machine ON
5) Release [CASH] button
6) Press [CASH] to begin clear
7) Press [CASH] to confirm clear
8) You will need to sign back in a clerk
1) Insert C key and turn to S mode (which is the mode past PGM mode)
2) Power OFF/ON while holding [CHEQUE]
3) The screen will display RAM ALL CLEAR
4) Press the following buttons in sequence:
Raised Keyboard


5) Press [X/TIME] to begin allocation
If you use to much memory, you will be prompted to try again. See our memory calculator:
cashregistergroup.co.uk/500calculate
On the NR520F/NR520RB If both printers feed the paper but both are blank – it is possible the first printer has failed. Swapping them around won’t resolve it, but replacing the first can resolve the issue and then both printers would print as expected.
NR500 to CRGRP Setup
Switch Positions
The switches on the bottom of the printer can be found by removing the small compartment cover
Switches should be in position as follows:
o | o | o | |||||
o | o | o | o | o | |||
1 | 2 | 3 | 4 | 5 | 6 | 7 | 8 |
Connect the Printer to the Cash Register
Connect the printer to the cash register using the serial cable provided. USB connection is not available.
Cash Register Settings
To enable the receipt printer on the cash register:
Turn the C key to 6 o’clock (one notch past PGM)
Select DEFINE PORT and press [CASH]
Select PORT 1 and press [CASH]
Select DEVICE and press [CASH]
Use the arrow keys to change NONE to PRINTER
Press [CASH] to confirm
Select PRINTER and press [CASH]
Use the arrow keys to change NONE to TM-U200/U300
Press [CASH] to confirm
Select KP END LINE and press [CASH]
Type 9
Press [CASH] to confirm
Press the [CLEAR] button twice to exit
Set Groups to Print to KP
Groups must be told whether to print to KP or not. Any item assigned to the groups with KP will print.
To set a group to print:
Turn the key to PGM mode
Select GROUP and press [CASH]
Enter the group number you wish to enable printing on, for this example group 1:
Press [1] [CASH]
Select SEND TO KP and press [CASH]
Use the arrow keys to change N to Y
Press [CASH] to confirm
Select KP PORT #: 1 and press [CASH]
Use the arrow keys to change N to Y
Press [CASH] to confirm
Press [CLEAR] twice to exit
To make this change
- PGM mode
- [4] [CASH]
- [CASH]
- [4] [0] [CASH]
- change from N to Y using the up/down [CASH]
- [CLEAR] [CLEAR] [CLEAR]
Steps
1) assign VOID function key in service mode to one of the keys
2) in REG mode, after you have entered some items - you press VOID > PRICE (if applicable) > PLU button
- PGM mode
- Options
- Detailed Print
1) Turn key to P mode
2) OPTIONS [CASH]
3) EJ OPTIONS [CASH]
4) ELECTRONIC JOURNAL ENABLE [CASH]
5) Select Y with the arrows
6) [CASH]
To set up a halo limit, on the PLU programming, enter the HALO limit in the field price/halo.
Then the next two options need changing from Y to N.
Firstly you need to enable the PLU to be an inventory item.
- PGM mode
- CASH
- CASH
- You will then be presented with an option of 'one PLU' or 'RANGE PLU'
Here you can select whether to update a single plu or a range - select the required option and on option 16 (inventory item) change from N to Y.
Repeat for additional PLU's.
Next you then need to add physical stock to the PLU's
- X MODE
- CASH
- 5
- CASH
- CASH
- CASH
- enter the PLU number [CASH]
- you are then presented with a stock option, pressing down you will see either 'ADD', 'SUB' or 'REPLACE' - Select the correct movement
- then enter the new value - please note you need to type in to 2 decimal places so for example if you want stock of 10 - you would type [1] [0] [00].
- Repeat for any other adjustments
- X MODE
- CASH
- 5
- 2
- CASH
In simple terms, you are not adding "more memory," you are just adjusting what type of data you wish to store. By default, the machine has 1000 PLUs (product look-ups), but you can adjust this up to 6000, for example.
Please also note - this is the first thing you should do on the machine, as this will factory reset the device to the new configuration.
Please follow the FAQ on this page to perform a factory reset and then follow the memory allocation prompts on screen
Below is a memory calculation tool if you wish to use
CLICK HERE

Allocate memory as required (optional), this will clear all programming and sales data. You need to do the Initialisation before you can do any programming if you want to want add more memory to the cash register.
1) Insert C key and turn to S mode
2) Power OFF/ON while holding [CHEQUE]
3) Screen will display RAM ALL CLEAR
4) Press the follow buttons in sequence:
5) Press [X/TIME] to begin allocation
If you use to much memory, you will be prompted to try again. See our memory calculator:
cashregistergroup.co.uk/500calculate
To turn on
- turn key to PGM mode
- [4] [CASH]
- [CASH]
- [4] [6] [CASH] (use receipt as detail)
- change option from N to Y
- Turn key to ‘PGM’
- Use the down arrow to go to ‘3. function key’
- Press [Cash]
- When it says ‘1.Function key’ press [CASH]
- Press the [%] button on the keyboard
- Use the arrow buttons to go to ‘3.amount/rate’
- Press [cash]
- Type the new percentage for example 20% = 20000
- Press [CASH] to save
- Press [CLEAR] [CLEAR][CLEAR]
Step 1:
You unclip the black bit of plastic at the front.

Step 2: Unscrew the screws on either end

Step 3: Gently pull the printer upwards and un-attach the printer from the bottom

Step 4: When replacing the printer make sure the light side of the orange strip is facing you and push gently but firmly down so that it slots into place.

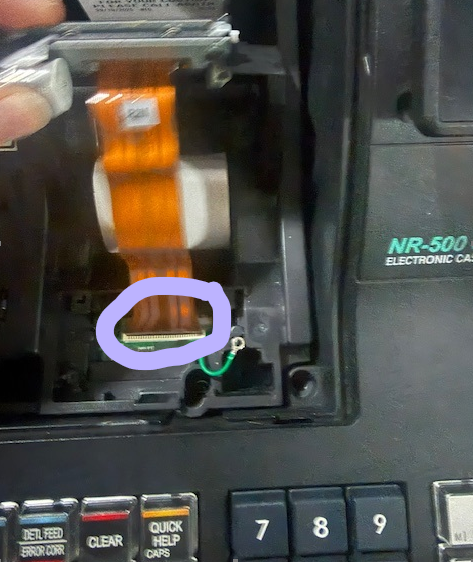
Step 5: Once the printer is in place, put the screws back on and replace the black plastic lid.


Step 6: Test the printer by doing a transaction to make sure that it is working all okay.
A HALO lets you set a maximum price that can be entered against a PLU. To do this, the PLU must be set so that its programmed price acts as the upper price limit.
Basic overview
To use a PLU as a HALO, the PLU status must be set correctly.
If you want the PLU price to act as the HALO, set these 2 options:
- PLU is preset = No
- PLU is override preset = No
With these 2 options set, the programmed PLU price becomes the HALO value.
If you want a manager to be able to bypass the HALO, set these 3 options instead:
- PLU is preset = No
- PLU is override preset = Yes
- PLU is preset override in MGR control = Yes
How the status table works
Each section of the PLU status chart, from N1 to N9, makes up one digit of the final 9-digit PLU status.
Within each section, find the options you need and add their values together. The total for each section becomes that section’s digit in the final status code.
For example, in N1:
- PLU is preset = No gives 1
- PLU is override preset = No gives 2
- Total for N1 = 3
The default PLU status is:
000000000
Because most HALO setups only change N1, and optionally N9, the most common HALO status codes are:
- 300000000 = HALO enabled, no manager bypass
- 100000002 = HALO enabled, manager bypass allowed
| Address | Program Option | Value | = | Sum |
|---|---|---|---|---|
| N1 | PLU is preset? | Yes = 0 No = 1 | ||
| PLU is override preset ? | Yes = 0 No = 2 | |||
| PLU is taxable by rate 1? | Yes = 4 No = 0 | |||
| N2 | PLU is taxable by rate 2? | Yes = 1 No = 0 | ||
| PLU is taxable by rate 3? | Yes = 2 No = 0 | |||
| PLU is taxable by rate 4? | Yes = 4 No = 0 | |||
| N3 | PLU is food stamp eligible? | Yes = 1 No = 0 | ||
| PLU is negative item? | Yes = 2 No = 0 | |||
| PLU is hash (non reporting) ? | Yes = 4 No = 0 | |||
| N4 | PLU is single item? | Yes = 1 No = 0 | ||
| Compulsory non-add number? | Yes = 2 No = 0 | |||
| PLU is gallonage? | Yes = 4 No = 0 | |||
| N5 | PLU is Stock inventory? | Yes = 1 No = 0 | ||
| PLU is inactive? | Yes = 2 No = 0 | |||
| PLU is scalable? | Yes = 4 No = 0 | |||
| N6 | PLU is a condiment? | Yes = 2 No = 0 | ||
| Compulsory condiment entry? | Yes = 4 No = 0 | |||
| N7 | Print PLU on receipt? | Yes = 0 No = 1 | ||
| Print PLU on check bill? | Yes = 0 No = 4 | |||
| N8 | Print item price on receipt? | Yes = 0 No = 1 | ||
| Print item price on check bill? | Yes = 0 No = 2 | |||
| PLU is disabled PROMOTION function? | Yes = 4 No = 0 | |||
| N9 | Allow discounts? | Yes = 0 No = 1 | ||
| PLU is preset override in MGR control? | Yes = 2 No = 0 | |||
| PLU is price change Item? | Yes = 4 No = 0 |
Warning: The PLU status controls a range of other functions as well, including tax settings and other behaviour. Before overwriting an existing status, make sure you understand what each digit controls and confirm that changing it will not affect other programmed options on that PLU.
Setting the PLU status
- Turn the key to PGM.
- Press [1] [0] [0] [SUB TOTAL].
- Press the PLU button you want to edit.
- Work out the required 9-digit PLU status using the chart above.
- Enter the full 9-digit status code.
- Press [QTY/TIME].
- Press [CASH] to finalise.
For a standard HALO setup, you can normally use one of these codes directly:
- 300000000 = no manager override
- 100000002 = manager override allowed
Setting the HALO price
- Turn the key to PGM.
- Press [2] [0] [0] [SUB TOTAL].
- Press the PLU button you want to edit.
- Type the price with no decimal places.
- Press [QTY/TIME] to confirm.
- Press [0] [QTY/TIME].
- Press [CASH] to finalise.
Once programmed, this price becomes the maximum allowed price for that PLU.
Programming a range of PLUs
For both the status programming and the HALO price programming, you do not have to program PLUs one at a time.
Instead of pressing a single PLU button, you can select a range by:
- Pressing the first PLU in the range
- Pressing the last PLU in the range
All PLUs between those two selections will be updated.
- Turn the power switch located on the right side of the register to OFF
- Turn the control lock to the PGM position.
- Press and hold the key CASH key
- 4. While continuing to hold the appropriate key, turn the power switch to the ON
- 5. The message "INITIAL CLEAR OK!” prints when the initial clear is complete.
- PGM mode
- 1 3 0 0 then Subtotal
- Enter time (24hr clock) ie 1 3 0 0 = 1pm – Press Qty/time
- Enter date – MM(month) – DD(day) – YY(Year)
- Qty/time
- Cash to finish
- Must be formatted fat32
- Max size of SD Card 16GB
- Turn the key to the P mode
- Enter the descriptor programming mode [8] [1] [0] [SUBTOTAL]
- Enter the Clerk Number (1 - 15) followed by [QTY/TIME]
- Type the Clerk name, using the A-Z buttons
- Press [QTY/TIME] to confirm
- Press [CASH] to finish and exit
Example for naming clerk 1 as JOE and clerk 2 as VALERIE:
P [8] [1] [0] [SUB TOTAL]
[1] [QTY/TIME] J O E [QTY/TIME]
[2] [QTY/TIME] V A L E R I E [QTY/TIME]
[CASH]
You need to:
- Turn the key to ‘Program mode.’
- On the 0-9 key pad, type [8][0]
- Press [SUBTOTAL]
- Type in the new name required (using the QWERTY keyboard)
- Press [QTY/TIME]
- Press the payment button on the keyboard you want to change the name of (ie cash, card, cheque)
- Press [CASH]
This will allow anybody to run the report at the press of a button, without needing the Z key. This can stop users accidently clearing reports you need to access.
Add the button to the keyboard:
- Turn the C key to SERVICE MODE (6 o'clock)
- [7] [0]
- [SUB TOTAL]
- [1] [7] [0]
- Press the button on the keyboard you want to become the new EOD button
- [CASH]
- Turn the C or P key to P MODE
- [1] [5] [0] [0]
- [SUB TOTAL]
- Press <Your New Button>
- Turn the key to Z MODE
- [1]
- [SUB TOTAL]
- Turn the key to P MODE
- Press <Your New Button>
- [CASH]
- X MODE
- [1] [4] [SUB TOTAL]
- on 0-9 keypad type the from plu number - ie [1] [PLU]
- on 0-9 keypad type the to plu number - ie [110] [PLU]
To turn on
- Turn to X
Type 199 Subtotal - 1111 press Qty/Time
To turn off
- Turn to X
- Type 199 Subtotal
- 0 press Qty/Time
- PGM mode
- [3][0][0] SUB TOTAL
- Press the PLU you wish to change- or enter manually and press PLU button.
- Enter new text using alpha keys/overlay.
- Press QTY/TIME when PLU changed.
- When finished press CASH to exit.
- PGM mode
- 30 Sub-total
- 20 Qty/Time
- 1 Sub-total CASH
- CASH
- X mode
- 300 Sub-total
- Z mode
- 399 Sub-total


if you need to move around PLU's on the keyboard (or deleted them) you can add them by following this sequence
- PGM MODE
- [1] [0] [0] [0]
- [SUB TOTAL]
- type on the 0-9 keypad the PLU number you wish to add
- press the physical PLU button the keyboard you want to assign it to TWICE (a small receipt will print showing what it has changed from and to
- for additional items repeat from step 4
- when you have finished press [CASH]
- Turn the C key to the S position (6 o'clock)
- Type [7] [0] [SUBTOTAL]
- <input function code> found in the table below
- Press the <button you want to change>
- Press [CASH] to finalise
SERVICE MODE [7] [0] [SUBTOTAL] [2][2][7] [CLERK#] [CASH]
| Key Code | Function | Key Code | Function | Key Code | Function | Key Code | Function |
| 1 | NLU 1 | 151 | ENDORSE | 184 | MODIFIER 4 | 217 | CLERK 1 |
| 117 | NLU 117 | 152 | CHEQUE TEND | 185 | MODIFIER 5 | 218 | CLERK 2 |
| 120 | Numeric 1 | 153 | CHECK # | 186 | P/BAL | 219 | CLERK 3 |
| 121 | Numeric 2 | 154 | CLEAR (ESC) | 187 | PAID OUT 1 | 220 | CLERK 4 |
| 122 | Numeric 3 | 155 | CLERK # | 188 | PAID OUT 2 | 221 | CLERK 5 |
| 123 | Numeric 4 | 156 | CURR. CONV. 1 | 189 | PAID OUT 3 | 222 | CLERK 6 |
| 124 | Numeric 5 | 157 | CURR. CONV. 2 | 190 | PAPER FEED | 223 | CLERK 7 |
| 125 | Numeric 6 | 158 | CURR. CONV. 3 | 191 | PRINT CHECK | 224 | CLERK 8 |
| 126 | Numeric 7 | 159 | CURR. CONV. 4 | 192 | PROMOTION | 225 | CLERK 9 |
| 127 | Numeric 8 | 160 | ANALYSIS 1 | 193 | REC ON ACCT 1 | 226 | CLERK 10 |
| 128 | Numeric 9 | 161 | ANALYSIS 2 | 194 | REC ON ACCT 2 | 227 | PRICE INQ |
| 129 | Numeric 0 | 162 | ERR CORRECT | 195 | REC ON ACCT 3 | 228 | ADD STOCK |
| 130 | Numeric 00 | 163 | F/S SHIFT | 196 | SUBTOTAL | 229 | DEDUCT STOCK |
| 131 | DECIMAL | 164 | F/S SUB | 197 | SCALE | 230 | OVERWRITE STOCK |
| 132 | #/NS | 165 | F/S TEND | 198 | SERVICE | 231 | NOT FOUND |
| 133 | %1 | 166 | GUEST | 199 | TABLE # | 232 | STOCK INQUIRE |
| 134 | %2 | 167 | PLU | 200 | TARE | 233 | CHARGE # |
| 135 | %3 | 168 | PRICE LEVEL 1 | 201 | ANALYSIS 3 | 234 | MACRO # |
| 136 | %4 | 169 | PRICE LEVEL 2 | 202 | TAX EXEMPT | 235 | TABLE ADD |
| 137 | %5 | 170 | MACRO 1 | 203 | TAX SHIFT 1 | 236 | HELP |
| 138 | QTY/TIME | 171 | MACRO 2 | 204 | TAX SHIFT 2 | 237 | ALPHA TEXT |
| 139 | ADD CHECK / Tray Subtotal | 172 | MACRO 3 | 205 | TAX SHIFT 3 | 241 | AUTO CASH 1 |
| 140 | CANCEL | 173 | MACRO 4 | 206 | TAX SHIFT 4 | 242 | AUTO CASH 2 |
| 141 | CASH | 174 | MACRO 5 | 207 | TIP | 243 | AUTO CASH 3 |
| 142 | CHARGE 1 | 175 | MACRO 6 | 208 | VOID ITEM | 244 | AUTO CASH 4 |
| 143 | CHARGE 2 | 176 | MACRO 7 | 209 | WASTE | 245 | AUTO CASH 5 |
| 144 | CHARGE 3 | 177 | MACRO 8 | 210 | VALIDATION | 246 | AUTO CASH 6 |
| 145 | CHARGE 4 | 178 | MACRO 9 | 211 | PAYMENT | 247 | AUTO CASH 7 |
| 146 | CHARGE 5 | 179 | MACRO 10 | 212 | RCPT ON/OFF | 248 | AUTO CASH 8 |
| 147 | CHARGE 6 | 180 | MDSE RETURN | 213 | DETAIL FEED | 249 | AUTO CASH 9 |
| 148 | CHARGE 7 | 181 | MODIFIER 1 | 214 | INACTIVE | ||
| 149 | CHARGE 8 | 182 | MODIFIER 2 | 215 | NON ADD | ||
| 150 | CHEQUE CASHING | 183 | MODIFIER 3 | 216 | PRICE CHG |
Connect the Printer to the Cash Register
The printer must be connected via serial cable (rs232) and powered on before setup (Please see photo below):

- Connect the printer to COM 1 on the cash register using the serial cable provided (Please see photo below)
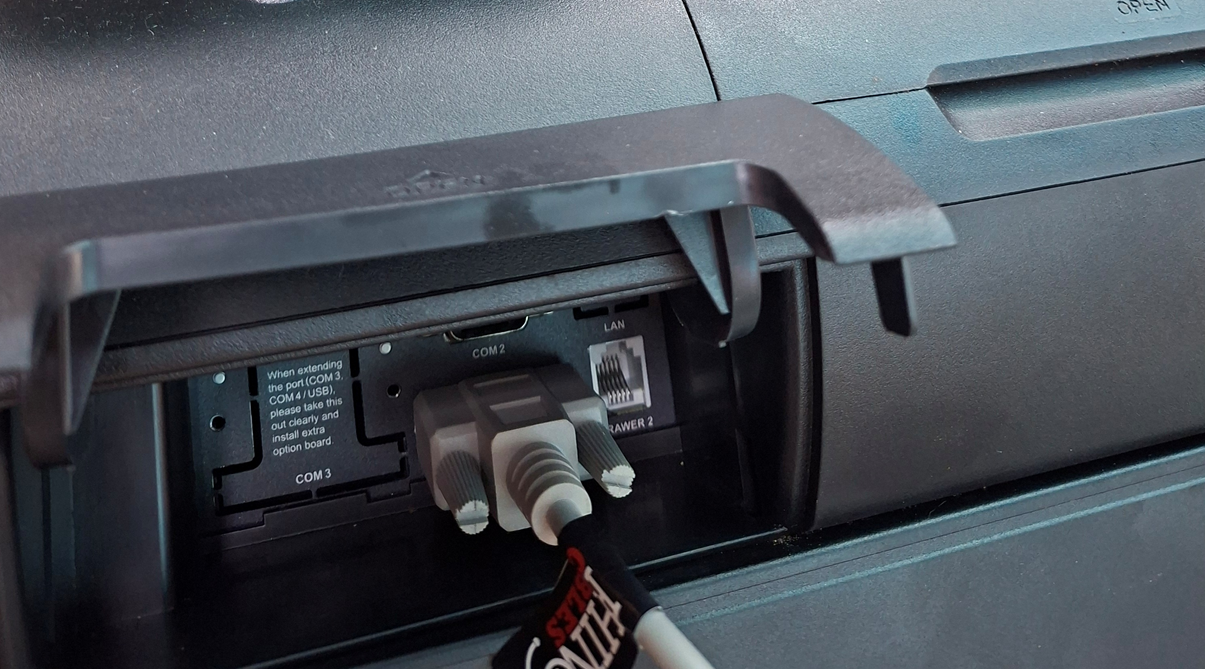
- Plug the printer into the power outlet the wall.
- Insert provided paper into the printer.
- Switch printer on at the front.
Cash Register Settings
To enable the receipt printer on the cash register:
- Turn the C key to 6 o’clock (one notch past PGM)
- Press [8] [0] [SUB TOTAL]
- Press [1] [QTY/TIME]
- Press [4] [CASH]
- Press [5] [QTY/TIME]
- Press [4] [CASH]
- Press [1] [1] [QTY/TIME]
- Press [8] [CASH]
- Press [CASH]
Set Groups to Print to KP
Groups must be told whether to print to KP or not. Any item assigned to the groups with KP will print
To set a group to print:
- Turn the key to PGM mode
- Press [9] [0] [0] [SUB TOTAL]
- Type the group number you wish to enable KP for, using the 0-9 keypad
- Press [QTY/TIME]
- Press [2] [2] [0] [0] [SUB TOTAL]
- [CASH]
PGM [9] [0] [0] [SUB TOTAL] [4] [QTY/TIME] [2] [2] [0] [0] [SUB TOTAL] [CASH]
- PGM Mode
- [2] [0] [0]
- [sub total]
- press the PLU button
- type in price (no decimal point)
- [QTY/TIME]
- type in price 2 - if you dont use price levels, then either type in same price or press 0
- [QTY/TIME]
- the receipt will feed and show you the prices saved
- Repeat from step 4
- when finished press [CASH]
- Turn the key to ‘PGM’ mode
- On the 0 – 9 keypad, enter [1] [5]
- Press [Subtotal]
- On the keyboard, press the ‘from PLU button’
- Then enter the PLU button.
For example, if you want to print data for PLU1 to PLU10
- Turn key to ‘PGM’ mode
- On the 0 – 9 keypad enter [1] [5]
- Press [Subtotal]
- On the keyboard enter the ‘from’ PLU button, then enter ‘to’ PLU button. (For example: Press [PLU1] to Press [PLU15])
- This will then print the price list report
However, most cash registers you can hide the Grand Total.
- Using your P key
- Turn key to ‘P’ mode
- Press [4][0]
- Press [Subtotal]
- Press [9]
- Press [Q/TIME]
- Press [7]
- Press [subtotal]
- Press [cash]
- Turn the S position (beyond the PGM mode and you will need the C key in the machine)
- type [7] [0] [SBTL]
- enter the keycode of the function you require (see page 79 for list) in this example No Sale - so type [1] [3] [2]
- press the physical button on the keyboard where you want it located
- Repeat from step 3 if required
- when complete press [CASH]
- Turn key to PGM Mode
- [3] [0] [SBTL]
- [0] [3]
- [QTY/TIME]
- [2]
- [SBTL] [CASH]
Product names:
- PGM Mode
- Press 300 subtotal
- Press button you want to program ( left hand side 1 to 117 )
- Type name using the keyboard ( the letters are inside the buttons & quite small IN RED !)
- Press X/TIME
AT THIS POINT YOU CAN DO ANOTHER OR PRESS CASH TO FINISH
To program your items into the machine:
Prices:
- Key to PGM
- Press 200 subtotal
- Press the button you want to program (left-hand side 1 to 117 )
- Enter price ( eg £ 1.99 will be just 199, forget the decimal point )
- Press qty/TIME button
- enter 2nd price ( if applicable)
- Press qty/TIME button
AT THIS POINT YOU CAN DO ANOTHER OR PRESS CASH TO FINISH
The alternatives cash registers which can be used with a barcode scanner are:
CRG100:
https://cashregistergroup.co.uk/product/crg100-black-cash-register-till-and-drawer-545
CRG500:
https://cashregistergroup.co.uk/product/crg500-black-cash-register-and-large-drawer-718
CRG520:
https://cashregistergroup.co.uk/product/crg520-black-cash-register-and-large-drawer-twin-printer-970
- Be sure to disconnect the power plug from the power outlet.
- Remove paper roll.
- Remove the printer cover
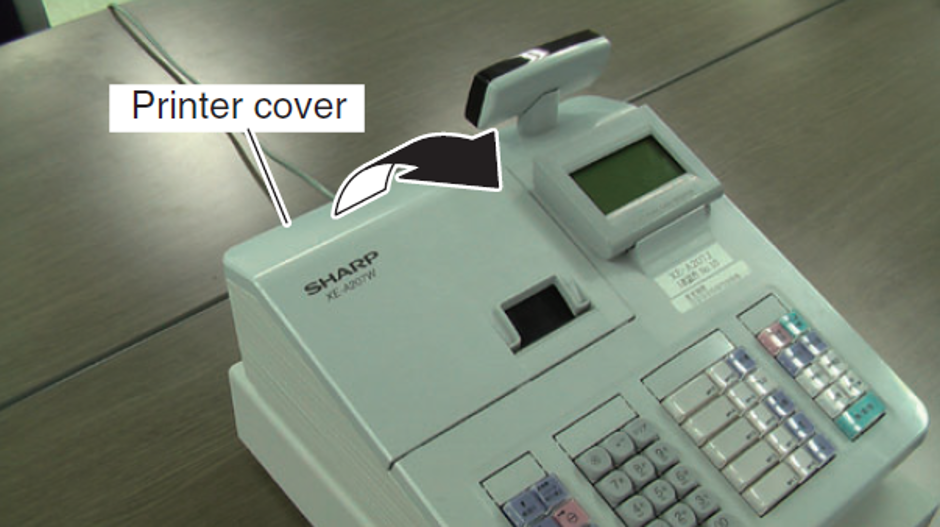
- Remove the 4 screws. The right screw is much longer than the rest.

- Lift the rear of the top unit slightly towards you
Caution: The top unit is connected with the flat cable. Do not lift more than 70 degrees, to ensure cabled are not pulled.
- Disconnect the two flat cables and earth wire.
Note: If careful, it’s possible to change the printer without disconnecting these.
- Disconnect the printer flat cable.

- Remove the two printer screws.
The cable holder is stuck by double sided tape and can be pulled off. The printer should now come out with ease.
The dashes indicate that the voltage or amperage being delivered to the till is wrong. Continuing to operate the till in this state can permanently short out or damage the thermal printer head.
Please ensure you are using the original power supply - if it is, then perhaps the power supply has been damaged and a replacement can be ordered from our spares section - found HERE
If this doesn't resolve the issue, it could be a printer issue, which usually requires the printer to be replaced.
Input : 100-240v ac 50/60Hz
Output: DC 9V - 2A (perfect for 2A and below)
(If using departments 1 to 4)
1. Turn to Z/PGM
2. Enter 1000007
3. Press X/TM-------
4. Press Department Key
5. #/ST
(If using departments 5 to 8)
1. Turn to Z/PGM
2. 1000007
3. Press X/TM
4. Press SHIFT
5. Press Department Key
6. #/ST
1. Turn the MA Key to the Z/PGM position.
2. Enter ST.
3. Enter 63, using the numeric buttons
4. Enter the X button.
5. Using the numeric buttons enter 01010001 (see page 68 Op Manual for complete table)
6. Enter ST.
7. Enter TL/NS to complete
1) PGM mode
2) 2 #/ST
3) 01000001
4) #/ST
5) #/ST
code :
1. Turn to Z/PGM
2. Enter 0000
3. X/TM
4. TL/AT/NS
5. #ST
1. Turn the Key to PGM
2. Press TL/NS
3. Turn Key to Reg position
4. Ensure that a Clerk is signed on i.e. 1 CLK#
If this does not work then try performing a Program/Master Reset
pressed.
1. Turn Key to PGM
2. Press 9
3. Press #/ST
4. Press 1 (for tax rate 1)
5. Press X/TM
6. Enter 200000 (for 20%)
7. Press #/ST
8. Press #/ST
Secondly the VAT rate that was set above needs to be assigned to department
1. Enter 0000017
2. Press X/TM
3. Press Department Key (Press the Shift key before department to shift to higher number)
4. Press #/ST
Repeat for multiple departments
to return to default would be to Master Reset the machine
the mode lock is in PGM or Reports mode then long printouts could occur.
If a master reset does not fix the problem, then an engineer may need to visit the
site.
be reset to the default by following this procedure:
1. Turn Key to Z/PGM
2. Enter “0000”
3. Press X/TM
4. Press TL/AT/NS
5. Press #/ST
6. Turn key to REG
If the Machine becomes “Locked out” during a transaction a Program Resetting can be performed. This Clears the Current transaction in the event of an operation problem
Procedure: -
- Unplug the Power from the mains outlet
- Turn the mode switch to the PGM position.
- While holding down the paper feed key plug the power back on.
(If successful a row of stars will be printed).
No, the ER-A160 does not have a Logo Stamp facility.
The ER-A160 has a one-station printer, however you can fit 2-ply paper, which would record Journal data and Receipt.
Yes, within the Article - PLU/EAN programming you enable the AGE VERIFY option. When this PLU is sold a prompt will appear on the screen.
On DEPT
Yes, within the Article – Dept programming you need to enable the AGE VERIFY option.
ERA280 APLD Cable Spec.pdf
PC link manual
ERA280 PC LINK Manual.pdf
Product Brochure
ERA280 Product information sheet.pdf
Thermal paper spec
ERA280 Thermal Paper Specification sheet.pdf
Parts Guide
ERA280 Parts Guide.pdf
However there is a Price Shift function or a Level Shift function
- Z MODE
- [7] [0] [0]
- [.]
- [x]
- [TL/NS]
- Has the fuse been changed? If not, please do so.
- Press 'Mode' - Is there any beeping and/or anything showing up on the display screen?
- Put the cash register plug into another mains socket? This will help us rule out weather the mains are working or not.
If the mains are working, it is more than likely the power supply which needs changing. If that's the case, we would need to receive the till so that we can change the power supply.
Or
Ultimately, you could invest in another cash register
stage 1 - setting the tax rates (there are 4 tax rates available to be added)
- PGM MODE
- [#/TM/ST]
- [9]
- [X / RCPT/SW]
- Enter the tax rate number from [1] to [4]
- [X / RCPT/SW]
- enter the tax rate - i.e., for 20% it would be [2] [0] [00] [00]
- [#/TM/ST]
- [TL/AT/NS]
Stage 2 - assigning tax rate(s) to departments
- PGM MODE
- [#/TM/ST]
- [2] [0]
- [X/ RCPT/SW]
- Enter the tax rate number (which you set up in stage 1 - which would be from 1 to 4)
- Press the physical [DEPT] button on the keyboard
- Repeat from step 5 for setting up any further departments
- [TL/AT/NS]
Disclaimer: This method is unofficial and not recommended. It may damage the cash register or void your warranty
- Power off the machine and ensure the memory protection batteries are installed.
- Lift the printer cover and then lift the platen arm.
- Carefully remove the small roller from the printer mechanism.
- Close the platen arm with some till roll in position and the printer cover.
- Power on the machine; it will still function, but the journal roll will no longer print.
Example:
Customer A:
Item sold in Department 1 for £10.00 — No VAT applied.
Customer B:
The same item sold in Department 1 for £10.00 — 20% VAT applied.
This feature is simple to configure and can be tailored to suit your specific operational needs.
In this example, the register will be set up so that VAT/Tax is only applied at the end of the transaction if you choose to shift it. By default, the machine charges zero VAT/Tax on all items. However, if required, you can use the VAT/Tax Shift function to apply a different VAT/Tax rate before finalizing the sale.
This means:
Default behaviour:
Transactions are processed with no VAT/Tax applied.
When needed:
You can manually shift the VAT/Tax to another rate (e.g., 20%) before completing the transaction.
This setup gives full flexibility when serving different types of customers who may require different tax treatments
Programming Setup
Step 1 – Set VAT/Tax Rate
Enter Programming Mode
Go to Tax 1
Set the rate to 20.00%
Step 2 – Select Tax System
Navigate to Programming > Taxes > Tax System
Choose one of the following options based on how you want VAT/Tax applied:
Manual VAT 1–4 – VAT is calculated within the price entered (VAT-inclusive).
Manual TAX 1–4 – VAT/Tax is added on top of the price entered (VAT-exclusive).
Step 3 – Assign Tax to Departments
Go to the Department settings
Ensure Tax 1 = Yes for each department where VAT/Tax Shift will be used
Using VAT/Tax Shift During a Transaction
(Optional: You can create an auto key to speed up this action.)
Enter the transaction as normal
After the last item, press:
[#/TM/ST] → [PAYMENT MENU] → 3
The register will apply the VAT/Tax according to the tax shift settings you programmed
Complete the transaction using your normal payment buttons
By default, the factory data contains no passwords. If the register is prompting for a password, this means the permissions have previously been edited and a password has been set. Unfortunately, if this has been done, there is no way for us to know what those passwords are.
If the passwords have been forgotten and you can no longer access the till, there are two available options:
1) Master reset the register
This will completely wipe the register, including all data and reports.
To perform a master reset:
Remove the two AA batteries from the register
Unplug the register from the mains power
Leave it powered off for at least 5 minutes
Reconnect the power and batteries
Complete the initial setup and reprogram any required settings
2) Access Service Mode
Service Mode is a dealer-level premium service and is not published online.
Please contact us directly, and we can advise whether we are able to assist.
If you have any issues regarding this, please send a photograph to: [email protected]
We would need a photo of the way you put your till roll in the printer compartment and we can confirm if you have done this correctly
[#/TM/ST]
[6] [3]
[x/RCPT/SW]
[1] [0] [0] [0] [0] [0] [0] [0]
[#/TM/ST]
[TL/AT/NS]
- To turn off the Automatic printing of receipts - you just need to press the button [X/ RCPT SW]
- You will then see a small dot in the bottom left of the display
- If you then put a transaction through and then require a receipt - please press [RCPT / RA] to print the last transaction.
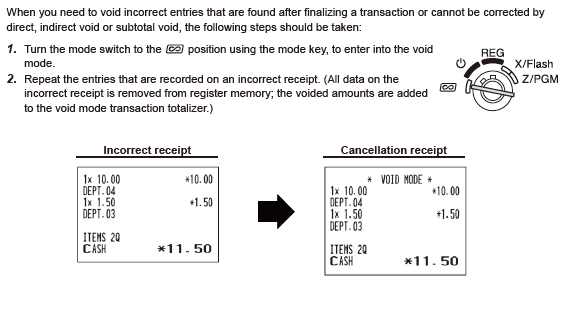
| Message | Message / Solution |
| PPPPPPPPPP | No till roll detected. please insert till roll |
| E01 | Registration error |
| E02 | Misoperation error |
To amend this setting
- Z/PGM mode
- [#/TM/ST]
- [1] [0]
- [x/RCPT/SW]
- [1] [0] [0] to turn off the feature OR
- [0] followed by the number of minutes ranging from 01 to 99 - ie for 5 minutes i would type [0] [0] [5]
- [#/TM/ST]
- [TL/AT/NS]
- Programme mode
- Type in the date in a 6-digit format ie [0][1][0][7][2][5] (01/07/25) DAY / MONTH / YEAR
- Press [#/TM/ST]
- Type in the time in a 24hr format ie [1] [6] [0] [0]
- Press [#/TM/ST]
- Press [TL/AT/NS]
1) Take the lid off the printer and using a screwdriver, unscrew the screw here

2) Put the lid back on and push the top half towards you so that the top part of the cash register comes off

Step 3) Be careful of the wire as it is fragile and may snap. You can unclip the wire.


Step 4) Unscrew all 3 screws

Step 5) Unscrew the screw

Step 6) Unscrew both of the small screws

Step 7) Remove the platen roller if it is still attached and detach the printer from the green board.


Step 8) Replace the new printer in place and screw in the screws back into place.
Step 9) Reattach all of the screws. Please refer to step 4 of where to put the wire with the circular hole back into place as well.
Step10) Slot into place the top of the cash register and push up.
Step11) replace the screw back into the hole on step 1
Step12) Lift the lever up and replace the roller onto the lever
Step 13) put the paper roll in place
Step 14) Push the lever down and lid on
- Make sure the compatible SD card is in the machine
- Turn the key to Z mode
- [#/TM/ST]
- [1] [4] [0] [X]
- [#/TM/ST]
- [TL/AT/NS]
- On screen, it will say SD ACCESS, and after about 20 seconds, the machine should print and state #140 ***Normal end.
- Make sure the compatible SD card is in the machine
- Turn the key to Z mode
- [#/TM/ST]
- [1] [4] [1] [X]
- [#/TM/ST]
- [TL/AT/NS]
- On screen, it will say SD ACCESS, and after about 20 seconds, the machine should print and state #141 ***Normal end.
- Now you can take the SD card to the PC / Laptop and load up the PC tool.
- insert SD card
- Press the File(f) in top left and then 'all to SD / ALL from SD'
- you will see the drive and folder below. ensure you select the folder and then press 'ALL FROM SD' followed by Yes.
- next make any changes to the data such as the receipt header, departments etc.
- When finished - Press the File(f) in top left and then 'all to SD / ALL from SD'
- you will see the drive and folder below. ensure you select the folder and then press 'ALL TO SD' followed by Yes.
- Put SD card back into the cash register
- Turn the key to Z mode
- [#/TM/ST]
- [1] [4] [7] [X]
- [#/TM/ST]
- [TL/AT/NS]
- On screen, it will say SD ACCESS, and after about 20 seconds, the machine should print and state #147 ***Normal end.
When you see REG on the screen:
1) Type a price. (NO DECIMALS)
2) Press a department key
Repeat steps 1-2 for more items
3) Press a payment method
Example: £3.00 sale in Dept. 4, by cash.
[3][0][0] [Dept 4] [TL/NS]
Press the following—
1) [Mode]
2) [Void Mode]
3) Then type amount—for example [1][5][0]
4) Then press the relevant department the void is related to ie [DEPT 4]
5) Then press [TL/NS] for CASH or [CARD/CHARGE] for method of payment and that will be voided from the till.
6) The machine should return to REG mode
Departments should be set up to allow sales to show item types on the receipt, along with better reporting. The 16 department buttons on the cash register can be set up by doing the following:
1) [MODE]
2) PROGRAM MODE > SETTING > ARTICLE > DEPARTMENT
3) Open the department you wish to edit
· PRICE: Preset price if required
· BLANK (name): Change name for reports and receipts
· TYPE:
* OPEN: Manual input price each sale
* PRESET: Price above always used for this button
* OPEN & PRESET: Price unless manually input
* INHIBIT: This department button is disabled
· TAX#: Change required taxes to YES or NO
· GROUP: Group departments together for reporting
· HALO: Maximum input price allowed
4) Press [TL/NS] to save and move to next department
5) Press [ESC/CANCEL] to exit
6) Press [TL/NS] to save
4 tax rates can be set up on this cash register. Tax levels are assigned to DEPARTMENTS, all departments are TAX1 default:
1) Press [MODE]
2) Go to PROGRAM MODE > SETTING > TAX
3) Open the tax level you wish to edit
4) Enter required tax under TAX RATE
5) Press [TL/NS] to save

If you are unable to move press the down arrow to highlight the different options and just keeps beeping at you
- Press [ESC/CANCEL] button
If that still doesn't do anything
- Press [2] on the 0-9 keypad
- Press [TL/NS]
If that doesn't solve the issue, it is more than likely that there is a fault with the keyboard.
if you are outside of warranty - then we could hold stock of limited amounts of sharp parts - please contact us in the first instance to see if we still have the keyboard parts to potentially be able to perform a repair. If we do, we would ask you to send us the machine to our workshop and we can look at providing a quote to repair.
How it works:
- You need to purchase the software (and potentially a SD card if you dont already have one)
- The software is emailed to you
- You install the software on your PC/LAPTOP.
- You initially format the SD Card on the register > save the existing data to SD card
- Open the software and in turn open the data from the SD card.
- Edit the details and save to the SD card
- take SD card back to the Register and load the changes
Programming a sharp 217 can be a little daunting at first however with this guide, it should clarify a few points and help you understand the basics of the machine and its programming settings.
Before you start, it’s helpful to replace the default keyboard with the ‘alpha overlay’ (a keyboard with all of the letters and symbols which are required for programming). You will find this keyboard underneath the blank one.
Basic setup
When you first turn on the machine, please complete the basic settings of language, date / time, vat rates (you can come back to these if required), passcodes (of certain modes) and receipt header. It is also a good time to insert the 2 x AA batteries in the machine (this is for memory back up in case of a power cut or you need to unplug your machine from the mains).
Some useful tips to remember
- Any numbers you need to use, always use the black 0-9 keys
- TL/NS is also the ENTER key (this is also your CASH button when you doing a transaction)
- ESC/cancel – IS BACK
- When you’re in the programming setting, if there is a setting with various options to choose from, pressing the decimal point moves through the options
- When you enter amounts, you don’t use the decimal point. A price of £5.00 would be just [5][0][0].
- The HELP button has some useful guides in
Different buttons and their purposes
- Buttons 1-6 in pale yellow (next to mode). These are departments 1-6 – which are great for selling misc items into a department
- G.C RCPT – this prints off the last transaction receipt.
- EJ View – on screen display of last few transactions
- FUNC MENU – There are a couple functions in here such as RA (Received on account, i.e. float) and RECEIPT SW – this is the receipt on / off option. So, if you don’t want to print receipts continuous set this to OFF and then use the G.C RCPT button to print a receipt when required
- CLK# - this the clerk/cashier sign on/off. You will see in the bottom right of the display the clerk number signed in (if its blank, then no clerk is signed on). Press relevant number then CLERK# to sign on.
- L1, L2, L3 – these are (keyboard) levels. So, the easier way of thinking about it, is level 1 – the keyboard on the right is products (PLU) 1-70. level 2 is 71-140 and level 3 is 141-210. This allows two main ways of working, either as a price level (i.e. different measurements, i.e. level 1 is small, level 2 is medium and level 3 is large), or perhaps a different menu (i.e. breakfast, lunch and dinner)
Onto the programming – Please press MODE > 6 PGM MODE > SETTING. (remember to use the TL/NS as the enter button & the up and down arrow)
The first place to start is ARTICLE > DEPARTMENT
Departments are used to group your products to give high-level sales information on reports, you can have up to 99 departments, but its rare than you want to use more than 10 generally. Also remember departments 1-6 are also available on your keyboard to sell MISC items into.
As an example, in a pub environment, your departments might be - draughts, bottled beers, spirits, wines, snacks, food, soft drinks.
Highlight each department you want to edit, press the TL/NS button to open the department settings, you can put a default price in if required (which is rare as it’s a department) however where it says DPT.01 – this is the name of the department. So, use the down arrow and then overtype the department. (This is where you use the overlay for alpha keys to type in words).
TYPE isn’t relevant on a department.
TAX1,2,3,4 – if you have set up tax rates then press select the correct YES/NO options here – you can use the DECIMAL point to switch between yes and no. The remaining options are not relevant.
HALO – This is upper limit what a cashier could manually sell an item for – so for example, if the max product you sell is under £10.00, you could in £10.00 here and it would stop someone accidently selling something for £100.00 – please note this feature needs enabling in MODE > PGM MODE > OPTIONAL > BASIC SYSTEM> HALO FUNC
Once you have completed the name and tax rates, you can press the TL/NS and it will move onto the next department and save the data you have just entered. Continue to complete the various departments required.
When you have finished the last department, you can press the ESC/CANCEL button and it will ask you to save / abandon – of course save the data. It will return you to the list of departments, if you press ESC again – you will be the article screen – this time we will want to go to the PLU screen.
PLU (on the right-hand side on the keyboard, you will see the keyboard is numbered from 1-70, starting bottom left and working up). The menu works like the department setting, press the TL/NS button to open the first PLU. Firstly enter the price (remember don’t use the decimal point) then move to where it says PLU000001 and enter the name.
Next is TYPE
- PRESET – i.e. a pre-set price has been entered and cannot be overwritten by a cashier
- OPEN AND PRESET – although a price is there, it can be overwritten if required
- INHIBIT – disabled
- OPEN – no price is pre-set, so must be manually entered by the cashier
Usually its PRESET or OPEN and PRESET are the most common.
DEPT. CODE – Please ensure the product is in the correct department (as set a moment ago). Once this is entered, press the TL/NS button to move to the next PLU and continue the process.
Continue to populate the PLU’s until you are finished, if you have any price levels you want to add, as mentioned earlier you need to go to the plu +70 (for level 2) or plu +140 (for level 3). So, if for example you have created a COFFEE on plu 15 at £2.00. and you wanted a level 2 price – you would go to plu 85 – enter a new name ‘LG COFFEE’ at £2.75 and amend the department, then you want a level 3 price – go to plu 155 enter ‘XL COFFEE’ at £3.50 and amend the department. Once complete, press ESC twice and return to the SETTING screen.
That is the main programming complete – next we will look at different functions on the machine that we can get to from the SETTING SCREEN.
FUNCTIONS – in here you can set some pre-set information, or even rename some of the functions. For example - number 2 says %1
(the button is next to number 4 on the keyboard). In here you can set up a common discount / surcharge.
- RATE – the % discount/increase
- TEXT – you can edit the text which appears on the receipt – i.e. staff discount, member discount etc
- SIGN – positive or negative affect
- ITEM & SUBTOTAL – you can have YES in both of these; however, it’s not recommended (as can lead to double discounts)– basically If you wanted to discount the whole transaction or just item by item.
- ITEM – how this works, each time you sell a product and it is eligible for the discount, you press the %1 button directly after you have the item, and it will discount that single item by the %.
- SUBTOTAL – you sell all products, then press subtotal – then the %1 button and it will take of the discount off the total amount.
Options 4-8 are really just renaming (if required) i.e. you might want to amend the name of option 6 (which is CASH IN DRAWER). Once complete press ESC/CANCEL
Back to setting MEDIA, FUNCTION TEXT – are both just renaming if required. However, its often best not to touch these to avoid confusion when referring to manuals etc.
Back to setting then PERSONNEL > CLERK as default the machine begins with only 4, however if you need any more on this screen, just press the number you want to create – i.e. 5 then TL/NS. Once complete go into each clerk and edit the name as required (and you can set up a password is required – 4-digit pin).
If you get a Non Reset Clerk message
This message is appearing because there are sales assigned to the existing Clerks. You will need to perform the following X1/Z1 reading before being allowed to add more clerks. ESC back to the registration screen
Press the Mode Key > (4) X1/Z1 then TL > (3) Resetting then TL > (3) Clerk Menu > (1) All Clerk
To return to Reg mode press the Cancel key 3 times.
MODE > 6 PGM MODE > SETTING > PERSONNEL >
MANAGER – This allows you to put a passcode on the MANAGER clerk (which is 99). You can then go to PGM > SETTING > OPTIONAL > FUNC AUTHORITY – and change any setting from public to limited. Things like REFUNDS.
MODE PASS CODE – This is a nice way of setting a PASSCODE for various screens such as PGM, Z1 etc – it will require the set password to be entered
TRAINING CLK – this is a nice way of learning how to use the machine and/or for new starters. You can assign a CLERK number here, and whenever you sign in as this clerk – you are not affecting the sales and totals. ONCE COMPLETE PRESS ESC/CANCEL
Next is OPTIONAL - We will only look at a couple of settings in here:
FUNCTION SELECT > Depending on how you use price levels, there are some options which help control which price you are using.
If you run two price lists, i.e. a standard and premium/function – where you have the same products but at two different prices depending of the event
LV .SFT MODE this allows PUBLIC or LIMITED – if you change this to LIMITED – then only a manager can change the price List – combined with LV .SFT TYPE – AUTO (after each transaction it reverts back to L1) or MANUAL (where once you change price level, it remains locked to that level, regardless of signing on and off with different clerks)
If you run 1 price list, with different measurements (i.e. button 1 is CARLING @ £3.00 but price level 2 is HALF PINT CARLING @ £1.50) Then RETURN TO L1 is useful, if you select BY ITEM – then after each item it reverts back to L1 or if you have RECEIPT – its after each transaction.
RECEIPT MESSAGE If you need to amend the message at the top of the receipt please go to MODE > PGM MODE > SETTING > MESSAGE here there are 6 lines of text, which you can delete and amend as required. We cover receipt template on the help sheet for you – with instructions as to how to change format.
If you are still struggling or need help, please contact our technical team on 0800 151 0949 (Mon-Fri 9am-5pm) who will be pleased to help in any way.
Also we do have a blank keyboard template available in excel, which we can email to you, which you can then edit the buttons with your product names and then print and place under the keyboard – Please contact us if you would like us to email this to you. Lastly you should also receive a FAQ sheet which covers some general user operations and settings.
- Open up the table/tab [GLU]
- Using the up/down highlight the item(s)
- Press the void button (button left of keyboard, looks like a 8 on its side)
- Resave the table by pressing [NBAL]
OPEN - this means you type a price then press the PLU button
PRESET - This means, you set up a price within programming and you cannot over ride it
OPEN AND PRESET - you have set up a price within programming, but you can enter a price and then press the button and it will accept the new inputted priced.
INHIBIT - button disabled.
Therefore for a MISC item, you should have it set up as either OPEN or OPEN AND PRESET.
Also on the default keyboard - there are the first 6 department buttons which can be used be typing a price and then pressing the department button
- On the 0-9 keypad, put in an amount
- You have 6 department buttons, these are above the 'CL' button
- Select a department
- Press [TL/NS]
- Press 'Mode'
- Use the arrow buttons to go to 'X1/Z1'
- Press [TOTAL/NS]
- Use the arrow buttons to go to 'Resetting'
- Press [TOTAL/N/S]
- Use the arrow buttons to highlight 'Clerk Menu'
- Press [TOTAL/NS]
- Use the arrow buttons to select which option you want to choose
- Press [TOTAL/NS]
When setting them up (or maintaining them), please note that the way it works is that when you switch to level 2 (price level 2 / L2) what you are doing is switching the keyboard from PLU1-PLU70 to PLU 71-140 (or PLU 141-210).
So if, for example, you have STRONGBOW set up on button 1 - the information for level 2 is held on PLU71 and the information for level 3 is on PLU141. Please note any info is not auto copied, so if you are using level 2 / 3 - you will need to go into the PLU1,PLU71,PLU141 and update name, price and department number.
- Press [MODE]
- Use the arrow buttons to highlight 'Option 6: PGM MODE'
- Press [TOTAL NS]
- Use the arrow buttons to highlight 'Option 2: SETTING'
- Press [TOTAL NS]
- Use the arrow buttons to highlight 'Option 5: PERSONNEL'
- Press [TOTAL NS]
* Use the arrow buttons to highlight 'Option 1: CLERK'
- Press [TOTAL NS]
- Use the arrow buttons to select which clerk you would like to update
- Press [TOTAL NS]
- You can add a 4 digit code if you wanted by using the 0-9 keypad or skip it by using the arrow buttons to go onto the next line
- Using the alpha keyboard layout, type in what you would like your clerk to be called
- Use the arrow buttons to highlight 'AUTO KEY'
- On the 0-9 keypad, press the [.] to change between 'Enabled' and 'Disabled'
- Once happy, press [TOTAL NS]. This will take you to the next clerk.
- If you want to change different clerks, press [ESC/CANCEL]. This will take you back to all of the different clerks and you go from the '*' step to do the same process.
- Once all happy and completed, press [ESC/CANCEL] [ESC/CANCEL] [ESC/CANCEL] [ESC/CANCEL] all the way until you get back to 'REG' mode
To change and update the PLU what you need to do is:
- Press [MODE]
- Use the arrow buttons to go ‘PGM’
- Press [TOTAL/NS]
- Use the arrow buttons to highlight 'SETTINGS'
- Press [TOTAL/NS]
- Use the arrow buttons to highlight ‘ARTICLE’
- Press [TOTAL/NS]
- Go to ‘PLU’
- Press [TOTAL/NS]
- Use the arrow buttons to highlight the PLU you want to change
- Press [TOTAL/NS]
- Highlight ‘PRICE’
- Type in the price which excludes the decimal point
- Use the arrow buttons to change any of the settings if need be
- Once happy press [TOTAL/NS] this will then take you down to the next PLU.
- After you have finished changing the PLU's that you wanted to change you need to press [ESC/CANCEL] [ESC/CANCEL] [ESC/CANCEL] [ESC/CANCEL]
On both the sharp 207 and 217 they do not have a spool nor can one be purchased. Although the back of the roll area looks like it could accommodate one – the reason for this, is that it uses the same shell as a machine which has two printers (and spool). The 207/217 also don’t have the physical motor to turn the spool.
The reason why the 207/217 doesn’t have a spool is that it has an electronic version of the journal – which can be viewed on-screen and printed.
To view on-screen – just press the EJ button, and it will bring up the details of the last transaction, continue to press EJ to flick through older transactions.
To print the journal – please go to MODE > X/Z mode > Z mode > electronic journal. Within here you can select date,time, clerk as required (to edit any of these, press the decimal point on the criteria you want to edit)
- [MODE]
- PGM MODE [TL/NS]
- SETTING [TL/NS]
- MESSAGE [TL/NS]
- [TL/NS]
ONCE FINISHED EDITING - press [ESC/CANCEL] and save the changes, then continue to press [ESC/CANCEL] to return to registration mode
There are 6 different receipt / header formats available - see below the different layouts, to access and amend
- [MODE]
- PGM MODE [TL/NS]
- SETTING[TL/NS]
- OPTIONAL [TL/NS]
- PRINT SELECT [TL/NS]
- LOGO PATTERN - use the button [.] to amend the selection. once selected the option, please press [ESC/CANCEL] and save, then continue to press [ESC/CANCEL] to return to REG mode.
PATTERN 2 - Image logo header
PATTERN 3 - Image logo header and 3 lines text footer
PATTERN 4 - 6 lines text header
PATTERN 5 - imago logo header and 3 lines text header
PATTERN 6 - 3 lines header, 3 lines footer
FAQ
Can I adjust the different layouts, ie can I have 4 header, 2 footer
No these are locked
If I delete the text will it reduce the receipt length
No, even if you delete the text from the line, it will still consume the same amount of paper but there will be no print on that line. you are best using PATTERN 1 - which is just 3 lines header.
To View
On the keyboard is a button called EJ view – once pressed it will show your more recent sale, continue to press the EJ VIEW button to go back prior transactions
To print ad-hoc (if you want to print the journal everyday view the next option)
MODE > X1/Z1 > READING > E.JOURNAL – in here you can select pre-defined dates, times etc (you use the decimal point to select the different options) ie if you highlight the date field ALL and select decimal point it will give you options from and to. Please also note there are further options below date. Please note that a) this doesn’t reset the EJ and best used ad-hoc to spot check and look for errors.
To print regularly for record keeping
MODE > X1/Z1 > RESETTING > E.JOURNAL – running this report will print the complete journal since the last time it was printed and then reset the report. Please note if you have never reset the EJ prior – the first time you run it could be very long. Also please note if you do reset it here – then the option above (to print ad-hoc) isn’t available as you have reset the data – so really its one way or the other
To clear an error message press [CL] key.
PAPER EMPTY error message: Replace the thermal till roll and press the [CL] key.
Options missing when pressing [MODE] - Sign on with a clerk (see reverse page).
Further help with programming: Press [HELP] for further guidance.
There are 6 lines of text to add to the receipt, by default 3 lines appear at the top, 3 lines at the bottom:
1) [MODE]
2) PROGRAM MODE > SETTING > MESSAGE > RECEIPT LOGO
3) Using the navigation buttons shown above, input the message you would like on your receipt
4) Press [TL/NS] to save
1) Open the menu with [MODE]
2) PGM MODE > SETTING > OPTIONAL
3) Open BASIC SYSTEM
4) Highlight CURRENCY SYMBOL
5) Press [DEL] to clear current symbol
6) Press [7] [7] to select £
7) Press [TL/NS] to confirm
8) [ESC][ESC][ESC]
To extend the power save time please go to
MODE > PGM > SETTINGS > DEVICE CONFIG > DISPLAY > change the number upto a maximum of 99 (this is minutes). > ESC/CANCEL (ensure you save)
MODE > PGM MODE > SETTING > PERSONEL > TRAINING CLERK – then please enter the clerk number you want as TRAINING MODE – this wont affect any sales totals and perfect for new starters
This message is appearing because there are sales assigned to the existing Clerks. You will need to perform the following X1/Z1 reading before being allowed to add more clerks. ESC back to the registration screen
Press the Mode Key > (4) X1/Z1 then TL > (3) Resetting then TL > (3) Clerk Menu > (1) All Clerk
To return to Reg mode press the Cancel key 3 times.
You need to check the clerks to see if any transactions are active by doing the following:
[1] [clerk]
If the screen only shows ***TOTAL 0.00 then there is no transaction
However if there is anything above the ***TOTAL 0.00 then this needs cancelling / finishing
Then continue checking all the clerks, ie
[2] [clerk]
[3] [clerk]
continue to check all clerks and then attempt to go back in to MODE.
- Press [REFUND]
- Type in the amount you want to refund
- Press the same department button as you did originally when putting in a transaction
- Repeat steps 2 and 3 if multiple items
- Press [SUB TOTAL]
- Press the relevant payment button
- Make sure you are in registration mode
- Use the 0-9 keypad, type in the amount you want to take from the till
- Press [PO]
- A should print our stating 'PO' and the amount
Please see the below image of the Z report:
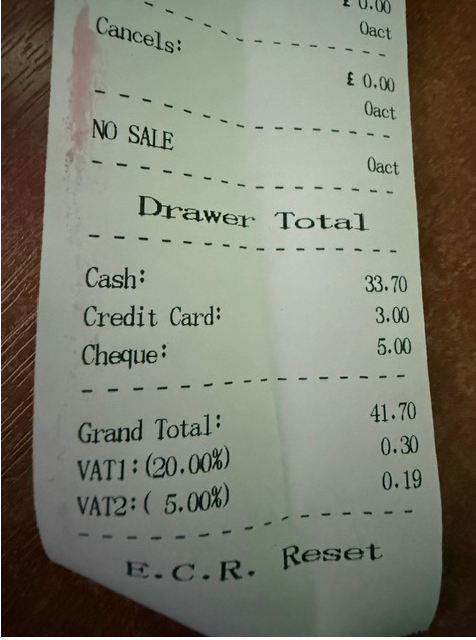
As you can see on the image above, you can see that 2 VAT rates have been applied and each have their own records.
- Go to the main settings page by pressing [ESC]
- Use the arrow buttons buttons to go to 'Z' reports
- Press [ENTER]
- Use the arrow buttons to go to 'Electronic Journal'
- Press [ENTER]
- Use the arrow buttons to filter through the dates
If you want to print the Electronic Journal. All you need to do is press [ENTER]
If you don't want to print the Electronic Journal and want to go back to the home page. All you need to do is press [SUBTOTAL] [SUBTOTAL]
Most of the function keys are fairly important on the XA range, but in this example, we will be swapping the 'EXCHANGE' (which is used for currency conversion, as rarely used in the UK), but you could change another if required.
to do this
- Go to the menu and highlight SETTING [CASH]
- KEYBOARD SETTING [CASH]
- SET FUNCTION KEY [CASH]
- scroll down to TRAINING [CASH]
- Press the physical button on the keyboard where you want it.
- You will now notice a number where it used to say 0.
- escape out and back to registration
- Before a sale is entered, press the physical key - you will see a quick message stating 'to training mode'
- When the receipt comes out, you will see TRAINING Is at the top of the receipt
- Please note you need to press the 'TRAINING MODE' button before any sale you wish to process in training
- if you are using different clerks to log in and out, you will need to also update the relevant clerks permissions to allow them to do TRAINING. If you are not using different clerks then the default manager clerk can use training mode so no further setting changes are required.
If you want to change the settings home screen straight in registration mode and vice versa, you need to:
- Use the arrow buttons to highlight 'Settings.'
- Press [ENTER]
- Use the arrow buttons to highlight 'System settings.'
- Press [ENTER]
- Use arrow buttons to highlight 'System selection.'
- Press [ENTER]
- Use the arrow buttons to highlight which option you require.
Option 1: time and then a list of various options (ie settins, registration, reports)
Option 2: Will take you straight to registration mode
- Press [ENTER] on the highlighted option you have chosen, and it will save this for you.
- Keep pressing [SUBTOTAL/ESC] until you get back to the main settings page, which has registration mode on.
The next time you turn off and on, it will now go to the correct page.
Requirement
- Type: Micro SD Card
- Maximum capacity: 16GB
Saving to SD card:
- Highlight SETTINGS and press [CASH]
- Highlight ECR DATA TO SD-CARD and press [CASH]
- Highlight any of the options and press [CASH]
Restoring data to the ECR:
- Highlight SETTINGS and press [CASH]
- Highlight SD-CARD DATA TO ECR and press [CASH]
- Highlight any of the options and press [CASH]
Options:
- All Programming Data: saves or reloads all programming data such as PLUs, Departments, Cashiers and more.
- All data: saves or reloads all programming and sales data
- EJ 'Txt' Data: saves all Electronic Journal data to a text file, which can be read on a PC
- EJ 'Bin' Data: saves all Electronic Journal data to a bin file, not recommended.
To do this you need to:
- Press [ESC] this takes you to your main settings page
- Use the arrow buttons to Highlight ‘Settings’ Press [ENTER]
- Use the arrow buttons to highlight ‘Printer settings’ Press [ENTER]
- Use the arrow buttons to highlight ‘Set report’ Press [ENTER]
- Use the down arrow to highlight ‘Print grand total’ – Press [ENTER] (this needs be an ‘X’ if you don’t want it to be printed on the end of day report and ‘Y’ if you do)
- Press the [ESC] button until you get back to your main settings page
As default the XA137/138 has 6 physical department buttons on the keyboard. If you need a couple more department keys you do have the option of changing the functions of a existing button to a department if you wish (see other FAQ)
However as standard, you have the option of using the SHIFT key in conjuction with the departments. In simple terms, if you can shift the departments from 1-6 to 7-12 and 13-18. Department 1 becomes 7 and then 13.
To use for example selling 2 items into department 1 and then department 7.
- type price
- press [dept1] physical button
- type price
- press [shift]
- press [dept1] physical button
- add any further items
- press [subtotal] and then finish off the transaction.
By default, the keyboard has one discount button which is preset up as a monetary discount (i.e., an amount rather than a percentage)
However the machine within settings allows you to have upto two % increases and two % discounts. You can edit these in terms of changing the name and setting a % value to discount. Please note - you need need to assign these onto the keyboard by replacing an existing function with the relevant % button.
To do this:
- Press [ESC] to get to the main homepage
- Use the arrow buttons to go to 'settings'
- Press [ENTER]
- Use the arrow buttons to go to 'keyboard settings'
- Press [ENTER]
- Use the arrow buttons to go to 'set -%,+%'
- Press [ENTER]
- Highlight 'first -% key'
- Press [ENTER]
- Highlight 'name'
- Press [ENTER]
- Using the 0-9 keypad you can change the name
- Press [ENTER]
- Use the arrow button to highlight 'rate'
- Type in the percentage rate you want this MUST include a decimal point
Example: 20% = [2][0][.][0][0]
- Use the arrow buttons to highlight 'key:'
- Press [ENTER]
- Choose a function button - we recommend either:
Option1: [EXCHANGE] button
Option 2: [DISCOUNT] button
- Use the arrow button to Highlight 'save'
- Keep pressing [ESC] to go all the way back to the homepage
- Use arrow buttons to go to 'registration'
- Press [ENTER]
To discount a single item do the following:
- Type in a price which excludes the decimal point
- Press a department button
- Press your discount button
- Press [CASH]
To discount a whole sale:
- Type in a price which excludes the decimal point
- Press a department button
- Press [SUBTOTAL]
- Press your discount button
- Press [CASH]
If you have a receipt count of 1,000 this is the amount of transactions you have done. This would also include the voids as well as the refunds.
Below is how it looks in the PC tool and then Excel


It will not show a figure for any rates set at 0% though.
2) Press [Cash Total/Enter]
3) Pressing [Down page] go to 'Keyboard settings'
4) Press [Cash Total/Enter]
5) Pressing the [Down page] go to 'Set Function Keys'
6) Press [Cash Total/Enter]
7) Pressing the [Down page] till you get to 'Reduce Price'
8) Press [Cash Total/Enter]
9) Choose a blue function key (preferably a one you rarely use ie [Exchange]
10) Press [ESC] until you get back to the main settings page
11) Press [Down page] to go to 'Registration'
12) Press [Cash Total/Enter]
13) Type in a price and department. For example: [4][9][9][9] [Dept1]
14) Press [Subtotal]
15) Type the amount you want to take off. For example: [2][2][3][5]
16) Press the function button which you set the 'Reduce price' too. For example: [Exchange]
17) Press [Cash Total/Enter]
To adjust, please go to:
- SETTING
- COUNT RULES
- Allow Decimals (0-3) 2
- Round Method 4/5:
- Round Position The Third Decimal
The Electronic journal is a log of all transactions which can be printed and reset if required. Or if the data isn't required you can reset it. Please see the follow FAQ for further info 'XA137 / XA138 - Electronic Journal'
If you have enabled passwords you can either use the default passwords or go into the settings to either amend or turn off password.
The default passwords is PLEASE CONTACT US FOR THE PASSWORD
So you can either go to any mode and either type in default password to access as the manager or by type a clerk number then the password,
Ie
[2] [cash total / enter] [type password] [cash total / enter]
To turn off the passwords, please select
- SETTINGS [ENTER PASSWORD] [cash total / enter]
- AUTHORITY SETTINGS [cash total / enter]
- MANAGER [cash total / enter]
- No Pasw log in [cash total / enter] [ESC] [ESC] [ESC]
How to set up cashier passwords
- If you would like cashiers set up and to be used by the staff, you will need to set a password for the cashiers. To update the password for each cashier, go to SETTING > AUTHORITY SETTING > CASHIERS > select the cashier > update name > modify password > the existing password will be [contact us for the password] and then create new password, if you want to keep it simple, you could have password as the same number – ie cashier 1 could have a password of 1.
To amend the keyboard layout (we will add a new department key to the keyboard in this example)
- SETTINGS
- KEYBOARD SETTING
- SET FUNCTION KEYS
- scroll down to highlight the required FUNCTION KEY to add ie DEPARTMENT 19 then press CASH
- press the physical key of where you want to add it - ie EXCHANGE
- you will now see a number where there was a 0 previously identifying where it is.
You can either update these - or go to settings and delete DEPARTMENTS and delete PLU's
If you want to delete the EJ data without printing it, please go into SETTINGS > DELETE DATA > Del Flowing Record—this will wipe the journal without needing to print it.
- ENTER—To save and move to next page or toggle through choices
- SUB/ESC—To return to previous page
- EC—to delete/move back a space
- PLU—Price/Product look up
- SHIFT—moves between levels on the register (3 levels are available)
- 2H—Double Height
- Main Menu
- Settings
- Delete Data
- Delete ALL data
- The first thing you need to do in order to change the printer is to remove the cash drawer
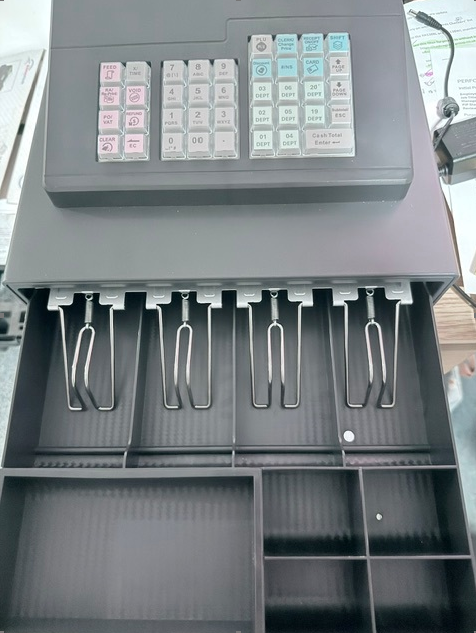
2. Make sure all cables are disconnected and the cash register is turned off on the side
3. Unscrew the screws which are inside but on top of the cash drawer (Please see photo below)

4. Open the printer latch, take the till roll out and using a small screw driver, unscrew the screw.

5. Tip the cash register upside down so that you have the mainboard and internal wires facing you.

6. Take the printer ribbon out of the slot

7. Unscrew the 4 screws in each of the corners. Gently lift and pull the grey plastic away from the printer slot.

8. You unscrew the 2 screws and replace the printer and put the screws back

9. Once you have put the printer back on. You are then putting all the parts back together again. Please go from step 8 backwards until you get back to step 1
- Unbox the screen (and relevant accessories)
- Plug the wifi antenna into the top of the screen(s)
- Fit batteries in remote
- Fix / attach the screen to where it will be located
- Turn on the screen(s)
- Press the 3 lines on the remote > go to 'network settings'
- locate your wifi network and then type in the password. once connected, if prompted install any updates
- Next go to the system mode and change to Networking
- scroll down and enter the username provided to you.
See other FAQ for programming and designing
- Go to the cloud on the following link - click here
- Ensure you amend the language to ENGLISH
- Log in using the provided login details
- Add marketing material by clicking on SOURCE at the top and uploading whatever is required - you can upload images, videos, or documents.
- You can create groups on the left-hand side if you have a lot of material to load, to make it easier to navigate
- To actually add the material, click on 'UPLOAD MATERIALS', select the files, and when the progress bar hits 100% (green) click OFF.
- Next, go to PROGRAM at the top > click on LCD on the left - and click on NEW PROGRAM - name the screen and ensure type selected is LCD and the width is 1920 and height of 1090. There is an option to select the number of screens as well - ie if you have a wall of screens displaying the whole advertising - in this example, we are just using a single screen
- Now you are in the design stage - at the top there is options to add different types of media, ie image, video, QR codes - even the time and weather if required.
- Select whatever is required and then scale the size
- Depending on the media selected, you will then have options on the right to either add that type of media - for example, if you select image and then add multiple images, the wall board will rotate the images
- There will be some settings below, depending on the type of media selected
- Repeat the process for additional media - i.e., add the media type, move and scale, and then select files.
- When finished hit 'SAVE' in the top right.
- If you want to create other wall displays repeat the process above.
- From the same page (program) tick the program you have just created and then press SEND
- The new screen will show you various screens on your account - click the relevant screen(s) and then press SEND - if the screens are off - you will get a message informing you.
To resolve this, the usual method is the pin hole reset.
- Remove the cover on the right (below the power button)
- Find the pin hole (above the SD Card slot)
- If you cannot see the SD Card slot, remove the additional plastic cover
- Poke a paperclip into the pin hole reset for 1 second
- Press the power button
Converting an item into stock:
Each item needs to be set up as a "stock" item, this is done by the following:
- Log in as a manager
- Go to the SETTINGS tab
- Open REG SETTINGS
- Open ITEM SETTINGS
- Find your item by scrolling, or scanning the item if you have a barcode scanner
- Press STOCK SETTINGS at the bottom right
- If it opens straight away, stock is already set up for this item
- If it gives a message, press OK to set up stock for this item
Adding stock to an item:
- Log in as a manager
- Go to the NOTE tab
- Open STOCK ENTER
- STOCK IN/OUT – add stock on to current amount
- STOCK OVERRIDE – change the stock to a specific level (good if you have negative items)
- STOCK WASTE – remove stock that has been stolen / out of date / broken etc.
- Select the correct item from the list on the left
- Type the amount into the QTY field at the top right
- Press SAVE
Printing / viewing stock:
- Log in as a manager
- Go to the NOTE tab
- Open STOCK REPORT
- Choose a report from the left and press ENTER to view it on the right
- Press PRINT if you want to print the list, however you cannot stop the printing once it's started
- Plug the printer via serial cable into COMM1 on the VR200. Also connect power to the printer and turn on
- On the VR200 epos software - login as SYSTEM profile
- SETTING > REG SETTING > DEVICE > PRINTER DEVICE SETTING
- This screen should search and locate a new printer > click on REGISTER then DETAIL
- Click on COMM1 on the left - then change the following
- model type = TM-T88V
- Connection type = COM (RS232C)
- Comm connection = COM1
- Baud rate = 19200
- Bit = 8 bit
- hit SAVE > CLOSE > CLOSE
- Next, go into PRINT TARGET - select RECEIPT on the left and change printer from IN PRINTER to COMM1 and save. Repeat process for the REPORT (on the left).
- CLOSE and RESTART the software and now this should print to the new external print
The only difference is when the software is loading it says it is debug software. This message only appears when its loading everything else works the same. You will get a warning - but the software can be used going forward.
VR ERA license
Product ID:EX999000000000
License code:53c0968560c77fa1
Installation key: DEBUG
CMO
Product ID: CMS99000000000
License code:a73f5e57775e65b9
Installation key: DEBUG
VR standard version
Product ID:EX999000000000
License Code:768c8e19a3c341d8
Installation key:DEBUG(Exclude VX-100)
Please note - we do not offer any support on any devices using this method
To connect the MSR reader to the VR200, you need to remove the black tape underneath the base which will reveal a blind connection

Once connected, turn the VR200 over and the reader sits in front of the printer (as below). You will find some screws in the box to secure. The metal plate is not needed on the VR200

• Log in as a manager
• Navigate to the SETTINGS tab
• Press CLERK SETTINGS
• Select the user you wish to add a password to
• On the right side of the screen, select the empty box next to “Password”
• Enter a password in the popup input box
• Press OK
• Press SAVE
Firstly please connect the scanner to Comm port 2 via the serial cable
Next go to registration mode and scan the set up sheet (sulux 616a configuration to any casio) – there are 11 barcodes, the last barcode is sometimes a bit tricky to scan and sometimes it times out rather than scans
Next sign on as a manager > setting tab > reg setting > cash register device settings
In the RS232C scanner setting > middle box should say HHS-18 & Compatible > next box should say connect to comm2
Please Renewal
Then back into cash register device settings > detail > scroll to the bottom and find HHS18
Check the setting are correct (to the details on the barcodes) on the right hand side, ie for example device – scanner, baud rate is 9600
Save > close > renewal > close > when it prompts to restart the application please select yes
Return to Reg mode and try and scan a barcode
- Remove the VR200 terminal and the cash drawer from their respective packaging
- Remove the black plastic cover from the back of the VR200 terminal, exposing the cables and sockets
- Unwrap the two black cables that are attached to the cash register, there should be:
- 1 short black cable with white connector (Only for additional drawer, not required)
- 1 long black cable with white connector and additional green cable with white connector
- Connect both parts (long black cable with green cable) to the connectors on the cash drawer
- Find the power adaptor supplied, and connect to the circular port on the back of the VR200 terminal
- Connect the plug to the power supply, and plug into the wall
- Press the small power button on the right side of the VR200 screen to turn on
- You may now tilt the screen using the button on the right side of the terminal base
Log in as the SYSTEM user, navigate to the INTERNET tab and select BROWSER(CASIO). The main Casio web page may not work, enter “google.com” into the address bar and ensure the page loads.
To amend what is printed as default
- Log in as a manager
- Navigate to the SETTINGS tab
- Select REG SETTINGS
- Select FEATURE tab
- Select GENERAL FEATURE tab
- Select REPORT on the left hand side
- Scroll down to find Z REPORT DEFAULT TARGET
- Click on the numbers on the right have side
- Tick / untick which data you want to print, usually FIXED TOTALS, DEPARTMENTS (or PLU) & FUNCTION KEYS are the most commonly required.
- To add more items you will need to:
- Log in as a manager
- Navigate to the SETTINGS tab
- Select REG SETTINGS
- Select ITEM SETTINGS
- Press NEW
- ITEM CODE – Press OK
- SELECT TEMPLATE – Press SKIP
- ITEM NAME – Type the new item name
- UNIT PRICE – Enter the price in pence
Now the item has been created, select the correct DEPARTMENT and TAX CODE on the right side of the screen
Press SAVE
This item will now appear automatically on the transaction screen
To add a new department you will need to:
- Log in as a manager
- Navigate to the SETTINGS tab
- Select REG SETTINGS
- Select ITEM DEPARTMENT
- Select the department you wish to rename, there are 28 default available
- Change the DEPARTMENT NAME on the right side
- Press SAVE
To set passwords on users, do the following:
- Log in as a manager
- Navigate to the SETTINGS tab
- Press CLERK SETTINGS
- Select the user you wish to add a password to
- On the right side of the screen, select the empty box next to “Password”
- Enter a password in the popup input box
- Press OK
- Press SAVE
Log in as a cashier and select the FUNCTIONS button at the bottom right of the transaction screen. Select the RECEIPT ON/OFF button, you will receive a confirmation message of whether the receipt has been turned on or off. Additionally, you will see either R-OFF or R-ON written on the black bar at the top of the screen.
You will be given the option to force a receipt to print after payment.
To enter transactions without affecting total, log in as the TRAINING user, under the SYSTEM tab. The bar at the top of the screen will flash red, indicating training mode.
At the end of the day, running a Z report will save and print the days totals, resetting ready for the next day. You must run this report each night by:
- Logging in as a manager
- Selecting the Z tab at the top of the screen
- Selecting the Z button
- Selecting the big blue button with todays date
During the transaction, select FUNCTIONS from the bottom of the screen.
Select REFUND, you will see RF appear at the top of the screen.
You may now select an item to refund.
To give discount, or add a premium to the whole order, select FUNCTIONS from the bottom of the screen.
Here you can choose fixed or percentage discounts or premiums.
Once selected, a popup will request you input an amount.
Select the item on the left of the screen to highlight it.
Press the same item again to reveal a popup menu.
Select void.
To give discount, or add a premium to single items, add the item to the transaction.
Select the item on the left side of the screen to highlight.
Select the item again to open a popup menu.
Here you can select fixed or percentage discounts or premiums.
Once selected, a popup will request you input an amount.
After logging in as a manager, you will be required to select REGISTRATION near the top left of the screen, this will take you to the transaction screen.
Before selecting the item, type the price on the left hand side. Do not include decimal places. If the keypad is not available, press the keypad button near the top left of the screen.
Log in as a cashier, this will take you to the transaction screen.
Select the items you wish to sell; these will appear on the left side of the screen.
Select payment at the bottom of the screen to move to the payment options.
Select a payment option.
Each morning, the trading day must be opened by a manager. This can be done by logging in as a manager and selecting the OPEN function. You will be presented with a big blue button with todays date, this will open the day for trading. You may now add float, using the RECEIVED button on the REGISTER tab, this is optional.
Some may have different icons for the Diagnostics
- From home page open tools
- Then diagnostics
- D4 has a shield
- D3 has dot with commas
- Find CASH BOX and for
- D4 press open cash box (if it does not open check port that it is in)
- D3 type 16 2 0 0 0 0 then press open cash box (if it does not open check port)
- If these open cash drawer go back to Loyverse settings for the printer – when entering the code as per the helpsheet you do not need to enter the commas – just NUMBERS
We cant attempt to remove the passcode remotely - however, this doesn't always work, and also the device needs to be connected to the internet.
Procedure
- Phone CRG with the serial number (we can only attempt this with devices purchased from us)
- We will log onto our iMIN device manager tool (device managment > remote control > look up the serial number > check state is 'online' > click 'MORE' > click 'clear lock passcode'
- Restart the device and see if it now logs on.
- Go to 'Settings'
- Go to 'System settings'
- Reset options
- Network reset
- Reconnect your Wifi with your Wifi password
If the Wifi still keeps dropping the internet, we would advise you to connect to your internet via ethernet as it is more reliable.
Please note that when you are connecting to your ethernet, your Wifi MUST be turned completely OFF for this option to work properly.
- Go to 'Settings' -> Wifi -> Toggle the option to 'Off'
To do a Factory reset:
- Go to settings (of the terminal, not the software)
- Go to 'Factory reset device' - this is often found towards the bottom, often in 'about device', but might be located in a separate section
- When the terminal restarts, go through the initial setup (internet, settings, etc)
- Re-download your software (please refer to the original setup guide)
However, every device is displayed slightly differently, but the process is the same.
- Make sure that the Sumup App is up to date and on the latest version
Make sure Google Chrome is up to date to check this:
- Open 'Google Play Store'
- In the search bar type in Chrome
- Press update (If applicable)
- Restart the device
- Carry on with the Sumup set up
If you have setup the printer - but used the wrong settings - please follow the below
- Delete the existing printer record (make a mental note of the printer name you've currently entered)
- add a new printer record but ensure you call it something different to the original wrong settings
- follow the below (this is the most common setup using the XPRINTERS XPS260 via USB)
POSB3 - Help Sheet.pdf
To print the bill / receipt you need to:
- Put in a transaction
- On the top right hand corner you will see “:”
- Press on the [:]
- Press [Custom Ticket]
- Press [Save]
- Bill will be printed
To pay for the open ticket:
- On the sales page, press [Open Ticket]
- Click on the ticket you want o open
- Press [Charge]
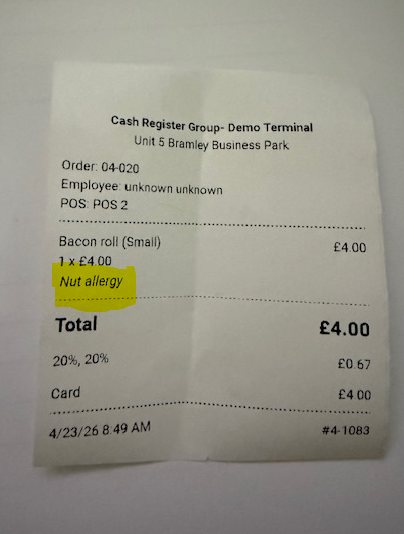
The photo above is a receipt order with the message (which is in yellow)
To have the messages show up on the order you need to do the following:
- On computer/ laptop, you need to go to you Loyverse Back Office
- Go to 'Settings'
- Go to 'Receipts'
You need to make the following is on:
- Show customer info
- Show comments
- Press 'Save'
As show below:

Key Features Available Offline:
- Sales transactions can be processed and recorded.
- Shifts can be managed without interruption.
Limitations While Offline:
1. Unsynced Receipts:
Receipts for offline sales are stored locally on your device and marked as "Unsynced" in the Receipts section.
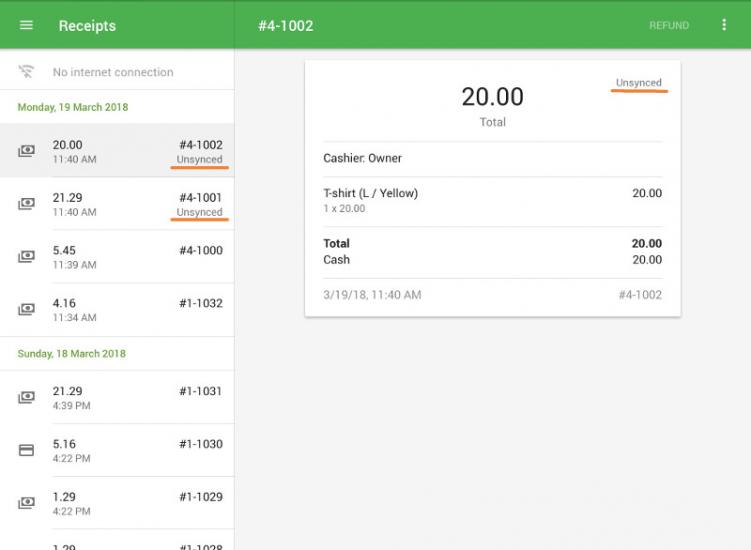
These receipts will automatically sync with the Back Office once the Internet connection is restored.
Alternatively, you can manually sync receipts by tapping the sync button in the three-dots menu. However, if you attempt this offline, you will see a "No internet connection" message.
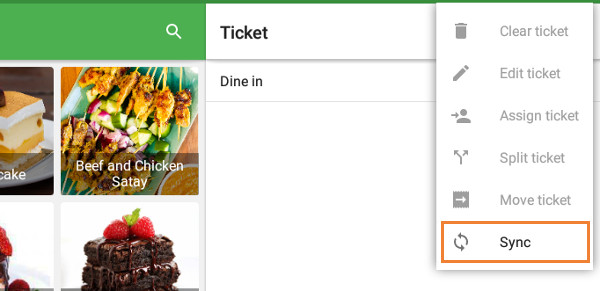
2. Logout Restrictions:
The system will not allow you to sign out of Loyverse POS while there are unsynced receipts on the device.
Before logging out, ensure all receipts have been transferred to the Back Office by connecting to the Internet.
3. Refunds:
The refund button is disabled in offline mode, so refunds cannot be processed.
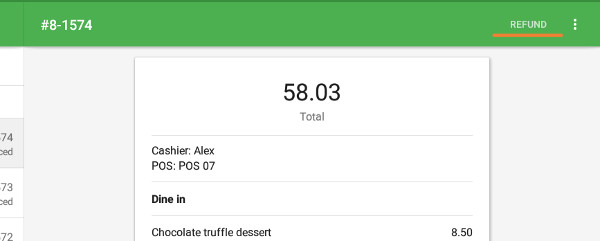
4. Customer Management:
New customer registration and editing of existing customer details are unavailable offline.
You can, however, add recently registered customers to a ticket.
5. Open Tickets:
Open tickets can be created and managed offline but will not sync with other devices until the Internet connection is restored.
6. Email Receipts:
Email receipts are queued and sent to customers only after the connection to the Internet is reestablished.
7. Integrated Card Terminals:
Integrated card processing terminals do not work offline.
8. Inventory Tracking:
Stock levels and negative stock alerts are not displayed offline, even if these features are enabled in the Back Office.
Important Notes:
- Reconnect to the Internet periodically to sync data with the Back Office.
- Plan for limited functionality when working offline, especially for tasks like making refunds, customer management, and inventory tracking.
Therefore, if you already have an integrated display and you wish to avoid this, please see:
We have developed a small application to allow you to turn this screen off or display up to 5 rotating images for advertising purposes.
Download the APK install file here: Download Link
For Loyverse - if you wish to utilize the customer display properly - the customer display should be run on a seperate independant device. Please see here for more info. You can run the CDS (customer display) on any Android device we sell (Android 5 and above) or IOS device
If you use one model printer USB and a different model USB this will work because... 1) The model of the printer is different and 2) the unique device number will be different too despite using the same interface ie USB
However, you can also print to the receipt printer of the loyverse system via installing a free app called RAWBT. Therefore from the touch screen terminal its possible to print labels to your receipt printer.
To set up and print label,s please see this GUIDE
Loyverse can integrate with the following payment methods in the UK
- Sumup*
- Teya*
- Zettle*
Sumup - Requires Android 10 or above
Guide Here
Teya - Requires Android 7 or above
Guide Here
Zettle - Requires Android 7 or above
Guide Here
Loyverse also supports CASH as a payment method and then allows any manual payment to be added, such as BACS, paypal, voucher etc. If you have a different card reader, you can either set up another payment button of CARD (or alterative name you want)
please see below link.
CLICK HERE
- Press menu (3 little lines top left)
- At the bottom of the menu screen in small grey writing is your version number
Generally speaking, to sell a voucher, most customers create a category called vouchers and then create products within it - ie £5 voucher, £10 voucher, etc. Therefore, this allows you sell the vouchers in the first place and track what's been sold.
To Redeem - you can either create a payment type of VOUCHER, or potentially you can create a discount button. Either works very similarly
If you do have vouchers of your own to give out and need to discount it at the end of the bill
- Go to Loyverse
- Settings
- Items
- Discounts
- Add discount
- Name the discount ie Valentine's Day Voucher
- Click the 'Amount' - Enter the amount or leave blank for an open price
- Save
- Go to 'Sales
- Click on the items you want to add to the basket
- Go to the drop-down of all items
- Click on discounts
- Click on the discount you want ie, vouchers
- Type in the value you want regarding the voucher
- Okay
- Charge the customer amount they have left to spend if any.
https://loyverse.com/marketplace
For example there is a Shopify plugin as well as Xero, WooCommerce.
Please note these are supported by thirdparties and they provide the billing and support.
INNERPRINTER
INNER
or the name of the printer record
click on the name to continue.
Our most common setup involves a terminal with an external printer—often the XPRINTER XPS260—connected via USB.
- First delete the existing printer record (MENU > SETTINGS > PRINTER) by opening up the existing record and scrolling to the bottom and hitting delete printer
- Add a new record - ensuring you name it as something different to the one you deleted.
- add the printer as per below

- For cancelling a receipt, you need to be in back office – click on reports then receipts then click on the receipt you want to cancel, and the receipt will appear on the right-hand side for you – there are 3 dots at the top and you can cancel it there. When you cancel a receipt, it will not be accounted in the reports, and all items will be returned to stock. Check the tutorial for more details: https://help.loyverse.com/help/how-cancel-receipts
If you want the drawer to kick on all payment types (receipt must be printed though)
In the advanced setting > initial ESC/POS commands please enter
1B,70,00,19,FA
Click here
Regarding the premium service of Advanced inventory, this will allow you to do a few more extra advances which the free version doesn't allow.
Some of these premium features are:
- Purchase Orders — Create and save product supply orders, send them to suppliers, receive products, and store supplier information in the system.
- Transfer Orders — Distribute items between stores. Ideal for multi-store owners who need to manage stock across locations.
- Stock Adjustments — Modify stock quantities for individual items and record the reason for each adjustment.
- Inventory History — View a complete log of all inventory changes, including transfers, purchase orders, and adjustments.
- Inventory ValuationReport — Get a clear picture of the total cost of your current inventory and the potential profit from selling it.
- Inventory Count — Reconcile expected and actual inventory for all or selected items, identify shortages or surpluses, and maintain records for each count.
- Printing Labels — Print labels for items directly from the Items list. Each label can include the item name, SKU, price, and barcode. Barcoded labels enable scanning to add items to a ticket.
- Production — Track the inventory of produced items separately from their components. This is particularly useful for items prepared in advance rather than made to order — for example, baked goods in a bakery. Produced items can be moved between stores using inventory adjustments and inventory counts.
- Click the 3 lines in the top left for the menu
- settings
- printers
- Click on your printer on the right side to open its settings
- Then, on the option that says 'automatically print receipts', turn this off, and then
- click SAVE in the top right.
to do this - two stages
Back office
- log into your back office.
- go to SETTINGS
- go to sub section SOFTWARE SETUP
- Go to customer display setting and turn ON.
- You are now presented with a few options for uploading a logo, colours etc. Make any changes or leave as default then press UPDATE at the bottom
- Top left menu
- SETTINGS
- software customization
- Turn on 'DUAL DISPLAY'
- Restart the APP, login to the registration screen and take a look at the customer display
CLICK HERE
Information on pricing for advanced inventory
CLICK HERE
SalesPlay currently works on a one-way product sync model with Shopify:
-Products sync from SalesPlay → Shopify
-Products do not sync from Shopify → SalesPlay
Because of this:
Products that already existed in Shopify are not guaranteed to appear correctly in SalesPlay
If product names, SKUs, or IDs differ between the two systems, orders and products may not map correctly
Product images are not auto-pulled from Shopify and must be added manually in SalesPlay
The correct and fastest way to setup up products
To get your system fully operational and stable, the solution is to make SalesPlay the master product system and rebuild the product list cleanly. The steps are:
-Bulk upload all products into SalesPlay using our Excel template
-Using the same SKUs / product codes as Shopify
-Add product images manually (this is required)
The only optional paid plans are for two features
Employee Management - this allows you create multiple users which specific permissions, timekeeping, login alerts and also sales by employee.
Advanced Inventory - this allows creation of purchase orders, goods reciept, inventory history reports and advanced stock management
For further details and price info - please click HERE
Saleplay pricing
The KOT/BOT application typically includes essential details such as the KOT /BOT Number, table number, items ordered, modifiers, quantity, and any additional comments or specifications.
Moreover, SalesPlay POS offers a convenient barcode option, allowing you to search and sell products quickly and efficiently. This feature saves valuable time and helps to avoid waiting queues, as you can easily scan barcodes to identify and process products without delays.
It's important to note that while using the app offline, you won't have real-time access to online data in Backoffice. Some functions within the POS App may require an internet connection to operate fully.
It also enables you to adjust settings and manage your SalesPlay POS accounts. This portal serves as an analytical tool, allowing you to view data from your mobile phone, computer, tablet, or laptop even when you are not physically present at your business location.
Access the SalesPlay POS App settings and input the provided distributor code (HR2345) in the software customization page.
- Exit the Register application
- settings
- apps
- Register
- advanced
- set Draw Over Other Apps to Yes
- launch the Register application
- update data.
Steps to take
- Set up the printer with PROFILES > HARDWARE > SECONDARY PRINTER. Most likely, via EscPOS, Width 48 (for an 80mm printer), fill in the IP address
- On any products you wish for them to also print to the secondary printer - within the STOCK > PRODUCTS > edit a product > ensure on the field 'print order receipt' is changed from NONE to SECONDARY. You can do this in bulk by exporting the data and then changing then importing.
Please note the printer is required to be on the same network as the EPOS terminal
To Edit or Delete the Time Scheduled Price List
| Step | Instruction | Operation |
|---|---|---|
| 1 | Click Config in the Menu Bar |  |
| 2 | Click Stores |  |
| 3 | Click the Edit Icon |  |
| 4 | Click Select Time Slots |  |
| 5 | Make the necessary changes | |
| 6 | Click Done |  |
| 7 | Click Save |  |
Clicking into a time slot that has been previously selected (Green Box), will deselect or remove the time slot.
Clicking the Clear Selected Time Slots will remove all currently selected time slots.
It is a feature planned on the development roadmap for Register, although there is no confirmed timeframe for its release yet.
At the moment, we don’t offer EPOS systems with Mix & Match promotions, but we’re happy to discuss your requirements and keep you updated as new features become available.
Example of a mix and match offer:
3 items for £10.00
Please check the storage of the devide and delete any applications not being used.
After this - if you are still short on space, android updates often leave behind lots of used memory - the easiest way to free this up is to perform a factory reset of the device, re-install the software, and continue as normal.
Please contact support for further guidance and help.
Open the Register Portal https://portal.smartvolution.com
Press the CONFIG dropdown and select PROFILE
Press the

Open the HARDWARE section
In the BARCODE SCANNER dropdown, select ZEBRA USB SCANNER
Press SAVE
Sync the changes
Open the Register App on your terminal
Press ⋮ at the top right and select SETTINGS
Press FULL SYNC
Configure the scanner
Plug the scanner in to the screen
Scan the following barcodes in order

Factory Defaults

USB HID Keyboard

OPOS
1. Power on
Unbox the EPOS system, connect the power cable, and power on the device.
Connect any other devices, such as cash drawer or scanner.
2. WiFi Required
Run through the initial setup, this can vary depending on model. Ensure WiFi is set up during this step.
Sign up requests can be skipped
3. Open the App
Find the blue "REGISTER" application on the home screen, press to open.
App may be on second home screen (swipe left)
4. Enrolment Code
The Cash Register Group email, subject "REGISTER SETUP" will state your enrolment codes.
Input the enrolment code here and press "ENROL". Each enrolment code can only be used once
5. Sign in
You may now sign in as Supervisor (9876) or User (1234).
Change the pin when prompted.
Config > Staff
Add and edit epos users here. If you have multiple sites, you can make active in each site.
There are two types of profiles, Supervisor (manager with permissions) and POS user (standard user). By default supervisors have certain permissions, including being able to manage products locally on the terminal.
Config > Taxes
Many different tax rates can be set up here.
It is recommended to set up tax rates before beginning product creation.
Config > Stores
If you are operating across multiple sites and or areas of your business, different stores can be sup up.
Multiple stores allow stock to be allocated to different sites and transfered between.
Staff can also be assigned to specific stores, enabling the sign in screen of the epos to remain uncluttered.
Combining this with profiles you can make a very powerful customised system for different areas of the business.
Config > Profiles
Profiles hold the majority of the system settings and options. If you have multiple sites/tills you can make multiple profiles to customise the system down to the exact requirement, such as which products to display, different hardware configurations, and branding.
Stock > Departments
Departments are grouping for products, it is recommended to set up departments before adding products.
Departments allow for products to be filtered in the epos sales screen, and can be reported on directly.
Stock > Products
Products can be added and updated here. Please note there are 2 main product types available:
- Regular: Products pre-set with a name and price
- Manual: Epos will prompt you for a price and name
The terminal will sort the items alphabetically, so if you want to fix some items to the top of the list, you can achieve this by putting a underscore before the item: '_Pepsi'.
In order to re-enrol the POS device:
- Open back office portal https://portal.smartvolution.com
- Go to Devices
- Disable the device with the error
- Enable the device with the error
- Open the Register application and press ENROL
The below video demonstrates this process in further detail.
CLICK HEREChange this to all 'ALL POS USERS' and then try again.
our application to align with the latest security standards and technologies.
Effective March 1, 2025, our application will no longer support devices running Android versions below 5.0 (Lollipop).
Why Is This Change Necessary?
Older Android versions rely on TLS 1.0 for secure connections. However, TLS 1.0,
released in 1999, is now outdated and no longer considered secure due to the
following issues:
• Vulnerability to Modern Threats: TLS 1.0 is susceptible to attacks like BEAST and POODLE, which can compromise the
confidentiality and integrity of data during transmission.
• Lack of Support for Stronger Encryption: TLS 1.0 does not support modern cryptographic algorithms such as Elliptic Curve
Cryptography (ECC) or SHA-256, making it inherently weaker.
• Compliance with Industry Standards: Many organizations and standards bodies, including PCI DSS, have mandated the
discontinuation of TLS 1.0 to ensure secure communication.
• Performance Improvements: Modern versions of TLS (1.2 and 1.3) provide enhanced security and better performance,
ensuring a faster and safer experience for users.
Continuing to support devices that rely on TLS 1.0 would expose user data to unnecessary
risk and prevent us from maintaining the high-security standards our users
expect.
What Does This Mean for You?
• If your device is running Android 5.0 or later,
you will not be affected by this change.
• If your device is running Android 4.x or earlier, you will no longer be able to use or update our application after March
1, 2025.
What Should You Do?
We recommend updating your device to a supported Android version if possible - however please note the vast majority of EPOS terminals cannot be updated. If your device cannot be updated, consider purchasing modern hardware.
To manage gift vouchers through the Register, you are correct in setting up a manual product to sell a voucher and a tender type to redeem them
Gift voucherproduct: create a Manual product called Gift Voucher which will prompt the merchant to enter the amount when they select the product for sale.
Tender Type to redeem voucher: To create a Tender Type please follow these steps: Config > Tender Types > New Tender Type > Fill in the necessary field types > save.

To issue a voucher for a remaining balance: if a transaction is processed for £25 and the customer pays with a £50 gift voucher, the merchant will need to use the gift voucher tender option to finalize the sale and save the gift voucher number in the tender note section that appears on the screen.

Next, sell a voucher for the remaining £25 balance and add a note to the product using the rename option for reporting purposes, then tap save
Then use the gift voucher tender to finalize the transaction.
Terminology
- Container Product - this is the master product that holds the stock. This product is never sold.
- Fixed measure - the product(s) which you sell and then deduct stock from the container
- Create a new (container) item
- Product type - select CONTAINER
- Enter Name and then any other fields required - such as barcode, sku, supplier.
- Please select a Department
- In the Equal to - populate the type of measurement it is - for example, it might be PINTS, and each container holds 88 (pints). Or it could be a spirit bottle holding 1000 ML
- Optional - but recommended - towards the bottom of the screen is an option for 'hide on device' - you can hide select Yes to hide it from sales screens.
- Set up Fixed Measures
- Create new item
- Product type - select FIXED MEASURE
- Before entering the name in the search container products, search for your container and select Yes to populate the fields.
- Enter Name and then any other fields required - such as barcode, sku, supplier.
- Please select a Department
- in the 'price per' enter the quantity to be consumed. For example, for a Pint it would be 1 or half pint 0.5
- Enter the Price field and then any other relevant fields.
Stores – these are different physical locations (ie different staff, stock levels and potentially products and prices). Please note you can transfer stock, make staff available in different stores and either have same or different pricing. If for example you have a till in reception and one in a bar – we would suggest 1 store and potentially 2 profiles.
Devices – these are individual terminals / handhelds used to run the software. Upon the device set up – you can assign the profile and store as required.
The 2-line display uses the serial COM connection for communication, but it also needs power from the COM port. This setting is changed in the Aptio BIOS.
How to enable 5V power on COM Port 3
- Turn the Sapphire terminal off.
- Connect a USB keyboard to the terminal.
- Turn the terminal back on and repeatedly press F12 as it starts up.
On some models, you may need to use DEL or F2 instead to enter the BIOS setup. - From the boot/startup menu, choose the option for Setup, Enter Setup, System Setup, or System Options.
- Once inside the Aptio BIOS, go to the Advanced tab.
- Look for a menu similar to one of the following:
- F81216 Second Super IO Configuration
- Super IO Configuration
- Serial Port Configuration
- COM Port Configuration
- F81216 Second Super IO Configuration
- Select Serial Port 3 Configuration or COM 3.
- Make sure COM Port 3 is Enabled.
- Find the power setting for the port. This may be labelled as:
- Mode
- Powered
- RI/Voltage
- COM Power
- Mode
- Change the setting from None or RI to 5V.
- Important: Do not select 12V or you will damage the display
- Press F10 to Save & Exit.
- Confirm the save, then allow the terminal to restart.
Once Windows has loaded again, the 2-line customer display should power on. If it still does not work, check that the display cable is connected to COM Port 3 and that the EPOS software is also configured to use the correct COM port.
The quickest and easiest solution for this is to do a factory reset.
To do a Factory reset:
- Go to settings
- Go to 'Factory reset device'
- Re-download your software
- Login into your software
- Carry on as normal
(However, every device is displayed slightly differently but the process is the same)
- Go to settings
- Go to 'Factory reset device'
- Re-download your software
- Login into your software
- Carry on as normal
(However, every device is displayed slightly differently but the process is the same).
- Close any open apps
- Open SETTINGS from the home screen
- Go to BACKUP AND RESET
- Go to FACTORY RESET
- Press RESET TABLET
- Wording may vary between D2MINI and D2S
- Tablet will run through reset process, including resetting up language, WiFi and auto downloading Register application
Bfl‑s1 is a European reaction-to-fire classification for floor coverings under EN 13501‑1.
How is a Bfl‑s1 rating verified?
The manufacturer or supplier should provide a valid EN 13501‑1 classification report, test certificate or Declaration of Performance covering the exact product and installation conditions.
What does “Bfl” mean?
“B” indicates that the flooring makes a limited contribution to fire. “fl” means the classification specifically applies to flooring.
What does “s1” mean?
“s1” is the best smoke classification in this system, indicating low smoke production during the specified fire tests
The vast majority of our devices come with the Google Play Store pre-installed, so options are
a) install apps from the Play Store
b) install apps via an APK file
Please note, this does not mean every app will work - a lot of apps have pre-defined Android version requirements, so although it might download/install, it doesn't mean 100% compatibility. For example - even if a app says needs a minimum version of android 11 for example - there are literally hundreds of different builds of it - so it could work on some Android 11 devices and some not!
If in doubt, please contact us and share the APK file, and we can test it on a device to check it installs and opens
- Check that the issue is the power supply by either purchasing a replacement - click here for power supply
or if you have 2 of the same terminals swap the power supply to see if it works on the terminal which isn't working.
- If the issue persists and you are out of warranty, you need to purchase a new terminal. The one we recommend is the Zonerich A606
The RZ302 actually has 2 ethernet ports – the one on the stand (ETH1) and then one directly behind the screen – at the bottom of the screen if you are looking directly at it (ETH0) – these ports are actually behind a thin plastic strip that needs removing.
So tilt the screen backwards on it self, remove the plastic strip and then plug in the ethernet cable (and USB devices if required) into these ports.
Then within the settings of the terminal
- ETHERNET
- ETHERNET CONFIGURATION
- SELECT CORRECT PORT (ETH1 / ETH0)
- TURN ETHERNET OFF AND THEN BACK ON.
**PLEASE NOTE ALMOST EVERY CUSTOMER SAYS THEY CANT FIND THE PLASTIC STRIP BUT ITS DEFINETLY THERE**

If you do not have the OPERA browser this means you have either deleted it or performed a factory reset.
Please see the download links to download the OPERA app. Ideally you should download this on a pc/laptop - save it to a USB stick and then plug into the RZE302 and install it again
DOWNLOAD LINKS
If it doesn't work, you may need to invest in a new terminal. Please see link below:
A606 Terminal
If for some reason you have decided to factory reset the terminal you will need to follow a few steps to get the machine back to the place it was originally was.
Language
- Go to the settings of the Terminal (Cog)
- within the section called PRIVAT – click on ‘sprak og inndata’ (this is language and input)
- then click on ‘sprat’ – find English (united kingdom in the list)
Ethernet
- Please plug in an active working ethernet cable (or wifi bridge / access point if ordered)
- The top setting is ETHERNET – please turn on – you should see two screens in the top right corner – if they are green you are connected to the internet
Date and Time
- Go into the date and time section
- The time should have automatically updated after you connected the internet, but it will be out by 1 hour
- Unclick the ‘automatic time zone’ then below in select time zone – change it to London
- Then turn back on automatic time zone and ensure the automatic date and time is also ticked.
Restoring Apps
Opera
If you open the default browser and go to this link
https://www.apkmirror.com/apk/opera-software-asa/opera/opera-58-1-2878-53288-release/
down the bottom are a few different versions, look for the one that works with android 4.4
once it downloads – in the top left will be a down arrow, pull that down and install opera app. Once its installed please check its working as expected, and generally we delete off the original browser (optional) but when prompted make opera the default browser.
If the link has expired - do an search for - opera apk android 4.4 and download and install a version compatible with android 4.4
Loyverse
Next open up the opera browser and search for
LOYVERSE APK 2.21.5
Locate a site such as APK mirror which has the version, and download and install the application.
HARDWARE
Cash Drawer
Firstly, unpack the cash drawer and put it into position. The drawer is powered/triggered by the printer and communicates via the cable with the drawer. You do have approx. 1m of cable which allows the drawer to be potentially stored underneath the counter if required. The cable connects to the printer in the slot next to the power cable NOT the ethernet one in the middle of the printer
Printer
To connect the printer to the EPOS terminal you use the USB cable (the serial cable is not required). Also, plug in the mains power
Terminal
Place the USB cable from the printer into one of the USB slots on the terminal and then power on the terminal. The sharp RZE302 does not have Wi-Fi so If you require an internet connection you will need to either plug in an ethernet cable or use a Wi-Fi bridge (these cost around £20 and are available on our website – search for WIFI BRIDGE. You only really need internet when you are using multiple devices and syncing data (i.e., either downloading program changes or sending sales data to the website portal – once you have set up the terminal and downloading the programming – you can potentially just run the terminal offline if required).
SOFTWARE
Next you need to register your software, this is highly recommended to be done on a computer.
please go to https://loyverse.com/ and create an account.
Once registered you can begin to program in some data and settings – we recommend beginning with is complete the store settings and begin with a selection of your categories and products.
Once you have finished, go back to the terminal (it will need to be connected to the internet if required take the terminal to an internet point and plug in – you do not need to worry about the printer or cash drawer) and click on the LOYVERSE app – sign in using your email and password.
The first-time login should download the data so far but if not in the top right hand is 3 dots – click on this and SYNC data – this will download all data.
You could disconnect from the internet if required.
Now the terminal has some data, and you could start to serve customers.
You only now need to reconnect to the internet for future downloads of data or for sending your sales data back to the portal.
Within the software there is a button to take you to the back office – if you use this link, please use the opera browser rather than the one called browser
Printer & cash drawer set up
Within the Loyverse app on the terminal please go to settings and printer set up. Name the printer, then in printer model select ‘other model’ and interface of USB. Next is the USB printer – you will see all the USB ports, basically you just need to select one at a time (usually its USB:8137-8214) and hit print test – when you find the one that works – hit save in the top corner.
You can also change the settings here for automatic printing etc.
Scanner (if ordered)
If you have ordered a scanner with the package, please use the usb cable – the scanner should be pre-configured to literally plug and play – however if for any reason when you attempt to scan a barcode but does not read it then the scanner might have factory reset and it just needs to reconfigure by scanning a set up sheet – please contact us for this and we can email it through for you.
External Customer Display (if ordered)
Please see the following link for the up to date set up and configuration of the external customer display https://help.loyverse.com/help/customer-display-system
Kitchen Display (if ordered)
Please see the following link for the up to date set up and configuration of the interactive kitchen display.
https://help.loyverse.com/help/kitchen-display-system
Tablets (if ordered)
Once you have set up your tablet (including wifi) please open the default browser and search for loyverse Downloads and go to the following website https://loyverse.town/files/ you require the Loyverse POS app.
scroll down to 'ABOUT TABLET' > STATUS and then scroll down to IP address
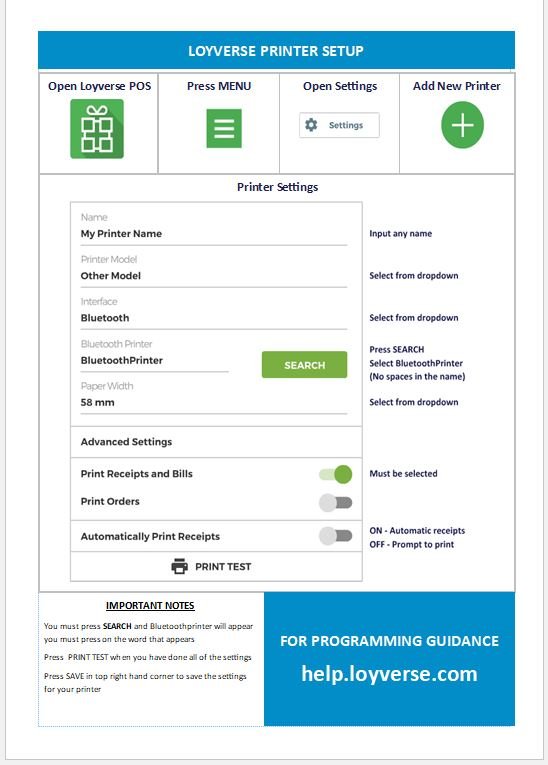
To factory reset the device, power off the device.
- Press and hold the volume up and power button (large) for around 10 seconds. The device will boot up to ‘boot mode’
- Select the ‘RECOVERY MODE’
- Select ‘wipe data / factory reset’
- Some setting will need changing after a factory reset, date, timezone, language etc
Alternatively,
Turn off the device and disconnect the power supply. Next remove the internal battery.
- Reconnect power supply
- Press and hold the volume up and power button (large) for around 10 seconds. The device will boot up to ‘boot mode’
- XP58II – Same size paper, nice small printer, but doesn’t auto cut.
- XPS260M – Larger paper required, but DOES auto cut
- Swipe the screen up to expose the app tray
- Open the SystemUpdate App
- Press CHECK to search for an update
- If a new update is available, press the UPDATE button
- Wait for the device to download the update
- Update will auto install and reboot
- Do not turn the device off or unplug during this process.
Printers that should work without issue are
TP80C
XP58A
Depending on the age of the printer - some XPRINTERS XPS260 might need to be updated with a new printer.
Either remove the ethernet cable to use wifi, or continue to use just the ethernet cable.
- small roundhead screwdriver
- 14" spanner / adjustable spanner (not essential but makes it easier)
PLEASE ENSURE YOU TURN OFF THE POWER TO THE DEVICE AND UNPLUG THE POWER SUPPLY
Step 1 - remove the cover from the stand
Undo the 2 screws from the stand of the device. once these are undone, the cover will pop off.

Step 2 - replace component
See the attached image, showing the on/off button and where it plugs into the mainboard.
If doing a test, just pull out the connection to the main board - plug in the new on/off - restore power, and then attempt to turnit back on. If successful - remove the power supply and continue.
You may notice some red glue on connections - if it is there, its best to carefully break the glue with a knife, to allow you to remove the part. The on/off part may require a spanner to get the washer moving, but once it starts, you need to remove the washer completely so you can take the part out.

Step 3 - fit new part
Fit in new part, tighten washer by hand, and connect the cable to the main board.
Step 4 - replace cover and done
If the firmware on the A606 is set at V1.04.00, you are likely to require updating the firmware on the terminal to the latest version (as of May 2026, it is V1.08.00).
There is another FAQ on instructions on how to update the firmware, or you can send the terminal to ourselves to action.
- SETTINGS (of the device - not settings of software)
- System
- languages and input
- languages
- click on 'add a language' select 'English' then United Kingdom
- Now you will have english US and english UK - click on 3 dots in top right - remove > tick English US and hit the BIN.
- SETTING (of device)
- SYSTEM
- DATE AND TIME
- check the timezone is correct.
- SETTINGS of terminal
- SYSTEM
- ADVANCED
- RESET OPTIONS
- DELETE ALL DATA (factory reset)
- ERASE ALL DATA
- Using a pin or paper clip to hold the RESET button in (it's a small button inside the headphone jack)
- Turning on the device by the power button
- Release the reset button once the boot screen appears (black screen with yellow and blue writing)
- If, for some reason, you get an icon on screen followed by 'no command' you might need to attempt to the do reset via a PC/Laptop - please see other FAQ on this
- Press the reset button 8 times until WIPE DATA/FACTORY RESET is highlighted
- Press the power button to confirm
- Press the reset button 1 time until FACTORY DATA RESET is highlighted
- Press the power button to confirm
- The bottom of the screen should say DATA WIPE COMPLETE.
- Press the power button to reboot
- SETTINGS
- SYSTEM
- ADVANCED
- RESET OPTIONS
- RESET WIFI / MOBILE & BLUETOOTH
- the A606 terminal
- a dual-headed USB cable
- windows pc/laptop
- 3 files and instructions from CRG.
The instructions are attached below for reference and you can contact CRG to request the latest files.
System Upgrade Operation Instructions.pdf
- Click on the settings COG on the homescreen
- Click on [i] - it's a grey box which is the system - this is the second last in the list.
- Click on the Globe symbol, which has 'Android AOSP written underneath it
- Click on [X A], which is the first option in the list
- Press the + and scroll down to English, then select UK
- On the right hand side, there are 2 lines, drag English into poisiton 1.
- Optional - press the 3 dots in the top right, tick the Chinese option, and hit the bin symbol to remove
- Click on the Settings COG
- Click on [i] System
- Click on Date and Time
- Click on TimeZone
- Click on Region
- Search for United Kingdom and click it to adjust the timezone
Updating the firmware is NOT a requirement, however it comes with a couple of QoL features, such as:
- Print config page by triple tapping FEED button
- Automatic print of new IP address if IP address changes
- Print a config page by:
- Triple tapping FEED button
- If this doesn't work, switch device OFF, hold FEED, switch ON, release FEED after the device beeps
- Check the config printout for version number
- If the version starts with 7.0 and ends with the letters PR0G, this firmware can be applied.
Note: Update firmware at your own risk. Risk of bricking device if mismatched hardware, or instructions not followed exactly.
In order to distinguish between the wifi and non wifi version of the XPS260M, turn the printer over and check the grey label on the bottom.
XPS260M (No wifi) - The Interface section of the label will read: USB+RS232+LAN
XPS260MW (Wifi) - The Interface section of the label will read: USB+RS232+LAN+WIFI
Checking Firmware Version
In order to find the firmware version of the device, you will need to print a config page, there is a different method for different firmwares, try each of these to print the config page.
- Tap the FEED button 3 times.
- If the config page doesn't print out, try step 2.
- Switch the device OFF, hold FEED and switch the device ON, keep holding FEED until config prints out.
- If the config page doesn't print out after 15 seconds of holding, try step 3.
- Switch the device OFF, hold FEED and switch the device ON, release FEED once the printer has beeped. Wait up to 10 seconds for print out.
Current supported versions are 7.029PR0G and 7.043PR0G
- You are using the correct and good quality paper
- The till roll is round the correct way (this is the most common reason)
If you have checked the above you the need to do a configuration report
To do this you need to:
- Flick the power button on the printer to 'OFF'
- Hold down [FEED]
- Keep pushing down on the [FEED] button and press the power button on the printer to 'ON'
- Keep holding down [feed] and Wait a few seconds for the printer to print the configuration report
- Lift your finger off feed once finished printing
- if the paper comes out but blank, then either the paper is wrong or wrong way around or the printer has failed.
8401-28679
To print out the settings - turn the printer off - press and hold FEED and turn it on - after around 3 seconds release the feed button. After a few moments, it will print out a receipt with the settings. You are looking for the feed IP ADDRESS. If it shows 192.168.123.100 - then this means its not connected to the internet currently. One reason might be that the setting of DHCP is disabled - if it shows disabled on the printout - we need to first enable it.
DHCP allows the printer to automatically receive an IP address from your router or network, which is useful when connecting the printer to your network via Ethernet.
Note: XPS260M purchased from our website have DHCP enabled by default.
What you will need
Before starting, make sure you have:
- An Android EPOS device
- The XPS260M printer
- A USB cable to connect the printer to the Android device
- The Xtest app installed from the Google Play Store
We recommend unplugging any other USB devices from the Android EPOS device before starting. This helps make sure you select the correct USB device in the app.
Step-by-step instructions
- Download and install Xtest from the Google Play Store.
- Connect the XPS260M printer to your Android EPOS device using USB.
- Make sure the printer is switched on.
- Open the Xtest app.
- Press Receipt Printer.
- Press USB Connection.
- Select the USB device path shown on screen.
This will usually look similar to:/dev/bus/usb/001/XXXThe final part is usually a 3-digit number.
- Before changing any settings, confirm you have selected the correct device.
- Press Print Test Function.
- Press Self Test Printing Page.
- If the printer prints a configuration page, you have selected the correct printer.
- Press the Back Arrow to return to the previous menu.
- If the printer does not print, you may have selected the wrong USB device. Go back and try again, making sure other USB devices are unplugged if possible.
- Press Interface Class Function.
- Press Network Port Settings.
- Under DHCP, press Turn On.
- The printer should beep and restart.
How do I check DHCP is enabled?
Once the printer has restarted, print a configuration report from the printer.
The configuration report should show that DHCP is now enabled and should also display the network information assigned to the printer.
To print a configuration report:
- Triple tap the FEED button
- If this doesn't work, switch device OFF, hold FEED, switch ON, release FEED after the device beeps
What happens after DHCP is turned on?
After DHCP is enabled, the printer will restart and request an IP address automatically from your network.
You can confirm the assigned IP address by printing a configuration report.
Note: If your software requires a SERIAL printer, you will probably not need to install the drivers. You will need to speak to your software provider and provide them with connection protocols: 19200,n,8,1
Prepping the hardware
- Unbox the printer
- Insert paper and close lid firmly
- Connect the power cable
- Connect the USB from your Windows device, to the printer
- Switch on the printer using the power switch at the front
Install the driver utility
- Download the Windows Install File above
- Unzip the downloaded file
- Open the XPrinter Driver Setup V7.77 file to begin install
- Read through the license agreement, accept and click NEXT
- Leave the install directory as it is and click NEXT
- Tick Create A Desktop Shortcut if you'd like, click NEXT
- Click the INSTALL button
- Tick Launch XPrinter Driver v7.77 and click FINISH
- The driver install utility should launch automatically
Install the printer
- Select your Windows operating System
- If you have Windows 11, choose Windows 10
- Select Printer Interface as USB
- Select the Printer Series as XP-80C
- Click INSTALL NOW
- A popup should appear saying Success! Click YES to print a test page.
You should now have a printer on your Windows device called XP-80C.
Note: If your software requires a SERIAL printer, you will probably not need to install the drivers. You will need to speak to your software provider and provide them with connection protocols: 19200,n,8,1
Prepping the hardware
- Unbox the printer
- Insert paper and close lid firmly
- Connect the power cable
- Connect an ethernet cable from your router, to the printer
- Print the printer configuration
- Hold the FEED button and switch on the printer
- Wait for a beep and release the FEED button
- Wait for the configuration printout
- Note the IP address for later
Install the driver utility
- Download the Windows Install File above
- Unzip the downloaded file
- Open the XPrinter Driver Setup V7.77 file to begin install
- Read through the license agreement, accept and click NEXT
- Leave the install directory as it is and click NEXT
- Tick Create A Desktop Shortcut if you'd like, click NEXT
- Click the INSTALL button
- Tick Launch XPrinter Driver v7.77 and click FINISH
- The driver install utility should launch automatically
Install the printer
- Select your Windows operating System
- If you have Windows 11, choose Windows 10
- Select Printer Interface as OTHER
- Select the Printer Series as XP-80C
- Click INSTALL NOW
- A popup should appear saying Success! Click YES to open the printer configuration.
- A new window should open called XP-80C Properties
Configure the printer settings
- Select the tab called PORTS
- Click on ADD PORT...
- Select STANDARD TCP/IP PORT and press NEW PORT...
- When the wizard opens, press NEXT
- Input the printer IP address from the config report, press NEXT
- Windows will try to detect the device and fail
- On the Additional Port Information Required page, leave all fields default and click NEXT
- Click FINISH to close the wizard
- CLOSE the Printer Ports popup
- Press APPLY on the XP-80C Properties
- Open the GENERAL tab and attempt a PRINT TEST
The printer should now be installed as XP-80C, all windows can be closed and printer can be used as normal.
Solid Pink = Bluetooth Connected
Red = Error
1. Hardware Preparation
- Insert Paper: Insert 80mm thermal paper with the shiny side facing you.
- Connect Power: Connect the power cable to the printer and plug it in.
- Switch On: Flip the switch to turn the printer on.
2. Accessing Settings
- Connect to Wifi: Using a laptop, phone, or tablet, open your Wifi settings and connect to the network named “printer”.
- Load Settings Page: Open your web browser and navigate to: 10.10.100.254
- Security Warning: You may see a warning that the connection is not secure. This is normal; please skip/ignore this message and proceed.
- Sign In: Enter the following details:
- User: admin
- Password: admin
3. Configuring the Printer (STA Mode)
Once logged in, follow these steps to connect the printer to your own Wifi network:
Step A: Select Work Mode
- Select the Work Mode option from the menu on the left.
- Set the Mode to: STA MODE.
- Press the Save button.
Step B: STA Settings
- Select the STA Settings option from the menu on the left.
- Press the SCAN button and wait for the list of networks to appear.
- Tick the box next to your Wifi network.
- Press the OK button.
- Type your Wifi password into the PASSWORD box.
- Change "Obtain IP address automatically" to ENABLE.
- Press the Save button.
Step C: Restart Device
- Select the Restart option from the menu on the left.
- Press the OK button.
- Note: The device will reboot and will no longer be accessible via 10.10.100.254.
4. How to find the new Printer IP
Once the printer has restarted, you need to find its new IP address to use it.
- Switch OFF the printer.
- Hold down the FEED button and switch the printer back ON.
- Wait until the device beeps before releasing the FEED button.
- A self-test receipt will print. Look for WIFI IP on the printout.
You can use this IP address in your browser to access printer settings or to configure your EPOS software.
- Switch the device OFF at the front.
- Hold the FEED button
- Switch device back ON.
- Keep hold of the FEED button.
- A long config print out should print, followed by a small reset printout.
- Once the small reset printout (can be English or Chinese) has finished, release the FEED button.
- Check the small printout:
- If it lists 4 options, tap the FEED button 4 times in quick succession to factory reset.
- If it lists 5 options, tap the FEED button 5 times in quick succession to factory reset.
- Wait for the device to beep twice, the reset is complete
- This can be checked by pressing FEED, if paper comes out it has finished, if no paper comes out it is still resetting.
Factory reset
- Switch the device OFF at the front.
- Hold the FEED button
- Switch device back ON.
- Keep hold of the FEED button.
- A long config print out should print, followed by a small reset printout.
- Once the small reset printout (can be English or Chinese) has finished, release the FEED button.
- Check the small printout:
- If it lists 4 options, tap the FEED button 4 times in quick succession to factory reset.
- If it lists 5 options, tap the FEED button 5 times in quick succession to factory reset.
- Wait for the device to beep twice, the reset is complete
- This can be checked by pressing FEED, if paper comes out it has finished, if no paper comes out it is still resetting.
Connect to new wifi
- Follow the section "Connecting to wifi for the first time".
- It is 0.99% per transactions
- There are no monthly fees
What Is POS Offline Mode?
From debit to credit card payments, your point-of-sale system allows you to quickly accept card payments at your store, ensuring greater speed of service and higher customer satisfaction. But when your internet is down, this means frustration and loss of sales. Enter POS offline mode.
In short, it is a way for merchants in the UK to accept card payments on their POS device even without internet connectivity.
Wondering if your device offers this function? If you have any of the following smart or classic myPOS devices, you’re good to go:
- Smart POS:
- myPOS Carbon
- myPOS Ultra
- myPOS Pro
- myPOS Slim
- Classic POS:
- myPOS Go
- myPOS Go 2
If you’re ready to accept payments through a robust offline mode functionality, myPOS Offline is for you. The offline POS software allows you to accept offline transactions even when your POS system is offline.
So, how does POS offline mode work? It’s really simple. It operates through data synchronization once your POS is back online.
Here’s the breakdown of the process:
- Activate or deactivate Offline Mode on your myPOS terminal. You will see a visual indicator when this mode is active.
- Your offline payment sessions or transactions will be securely stored locally on the POS until they can be cleared.
- You will have access to a special menu that will allow you to access your list of offline transactions. From here, you will have the option to delete them if you choose. In addition, a warning screen will appear to periodically remind you about pending offline transactions that need to be cleared.
- A great feature of myPOS Offline Mode is that your POS device will periodically check for internet connectivity and attempt to clear the stored transactions automatically.
- However, you can also manually trigger a connectivity check and initiate clearing.
- Once the transaction clearing procedure is completed, the POS screen will display a message indicating the number of offline transactions successfully cleared.
- If there is a connectivity issue and no transactions are cleared, a notification on the screen of your POS device will notify you of this status.
That’s it. It’s that simple. With sophisticated cloud-based POS systems at your fingertips, you can process transactions, better manage inventory and enhance your retail operations even if you lose internet connectivity.
Merchant Risks of Offline Payments
Offline debit and credit card processing requires some effort before being put to good use at your business when you process sales transactions. Without clearing your transaction data, you may end up losing out. That’s why it’s important to ensure your business operations run as smoothly as possible without incurring any of the associated risks.
For example, by choosing to use offline mode, the liability for the transactions falls on you, the merchant. That’s because it’s possible that once your point of sale (POS) reconnects to the internet and attempts to process a stored transaction, the payment may be declined. This is especially true for vouchers. When an Offline Mode payment with a voucher is made, it is possible for the payment to first be approved but later denied. To make sure that you don’t lose out on such payments, it’s vital that you double check the card you are accepting.
Some of the reasons for a declined payment relate to:
- Insufficient funds
- Card restrictions on the card issuer side
- Customer has exceeded their spending limits and the transaction is declined
- The payment is declined for some reason by the card scheme or credit card processing company
- The customer’s card is blocked
- The customer’s card has expired
- You have accepted payment with a voucher, which Offline Mode will later reject
- And others
While Offline mode facilitates smoother and uninterrupted payment processing, the onus is on you to double-check the customer’s card before accepting it for payment. You also need to be aware that there are risks involved in processing sensitive data offline
further information can be found here
You need to:
- Go into 'google play'
- search 'google chrome'
- update google chrome
Once updated sign back into your sumup account
Offline Payments - Standalone.pdf

The diagram above shows what exactly you need to do in order to take payments from your Sumup Solo Lite or your Sumup Air.
1) Make sure you have your software and Sumup App downloaded onto your terminal from your Play Store App BEFORE you do anything else. (Check this first if need be).
The POS puts the transaction through to the SUMUP SOLO LITE / SUMUP AIR (These have to be connected to the POS system via BLUETOOTH for it to be bale to work.
2) The SUMUP SOLO LITE /SUMUP AI; You take the card payment and the transaction goes back to the POS as well as the SUMUP APP. (You must have the SUMUP APP already installed as this runs in the background).
3) The POS and the SUMUP APP MUST be connected to the INTERNET for the payment to go through. This will also say on the POS if the transaction has gone through or not.
If your Sumup App keeps asking you for codes you need to:
- Make sure that the Sumup App is up to date and on the latest version
Make sure Google Chrome is up to date to check this:
- Open 'Google Play Store'
- In the search bar type in Chrome
- Press update (If applicable)
- Restart the device
- Carry on with the Sumup set up
You can find a full list of accepted cards and schemes here:
- Visa
- Visa Electron
- V Pay
- Mastercard
- Maestro
- American Express
- Union Pay
- Diners Club
- Discover
- Apple Pay
- Google Pay
If your payment integration has stopped working between Loyverse and Sumup, this is usually down to one of the apps recently having an update which has broken the connection. Usually, the solution is to backdate the relevant app.
Step 1
- Firstly, go to the Google playstore and check for any updates to Sumup and Loyverse - if there is, download and install and reattempt the payment. If still an issue, continue on
- Check the version number of Sumup - to go this either open the Sumup app > support > more. At the bottom of the screen will be the version, for example, 2.127.0
- If we have advised that this needs to be backdated, move on
- Go to the settings of the terminal
- Locate app/applications
- locate the SumUp app and delete the APP
- Open Google Play Store - click on your profile in the top right
- Settings > Network Preferences> Auto-update Apps - change this setting to 'don't auto update apps.
- From the Google Play Store homescreen - search for APKMIRROR - it's an orange icon with AA written on it - download and install this app.
- While this is installing, check the browser is up to date in the Play Store - ie, search for Chrome and update if required
- Open up your browser (usually Chrome)
- In the website address bar, type in https://www.cashregistergroup.co.uk/sumuplink
- Click on the 'CLICK HERE' - this guide is for version 2.125.0
- On the black button, click on the DOWNLOAD APK BUNDLE
- Sometimes you get a AD which pops up, once you dismiss it - the file will start downloading
- When this file and the APKMIRROR app are both installed move on
- Open APKMIRROR
- Click on 'browse files'
- This opens your DOWNLOADS - locate the Sumup file we have downloaded in step 6 and click on it
- press 'install package' (in orange towards the button right)
- press 'watch and install app' (in orange towards the button right)
- Usually, you will get a 30-second ad. In the top right will be a countdown timer. When it reaches zero, you can click the 'reward granted'
- SumUp will begin installation
- Once installed, click on the OPEN APP
- Sign back into your Sumup App
- Open Loyverse
- Add an item to your basket for over £1
- press charge
- Select the Sumup payment type
- Re-pair your Sumup Air Reader
- Payment should be transferred to the Air reader as expected
- Press the button on the side of the reader to cancel the sale
to do this
- Open the Sumup App
- Click Support
- Click More
- At the bottom you will see the System Version and the Sumup version - for example 2.125.0
CLICK HERE
This setup is using the Sumup Air reader and requires a compatible version of Android or IOS.
- Go to your 'Sumup App'
- Click on the man icon with the shoulders in the bottom left hand corner
- Go to 'Payments'
- Click on 'Card'
- Click on the wording that says 'Change/Swap card reader'
- Follow the instructions on the screen
- Go back to your 'Loyverse POS'
- Put a sale through
- Press 'Charge'
- Select 'Sumup'
- Does the card reader show the payment on the screen?
- If yes, the Sumup card reader is connected
Teya is one of the fastest-growing payment providers in the UK, and we’re proud to be an official partner. Whether you need a simple standalone card machine to pair with your existing cash register or EPOS, or you’re looking for deeper integration, Teya delivers a flexible and reliable payment experience.
We already support seamless integration with Loyverse Software, allowing businesses to take payments effortlessly at the till. And there’s more on the way — full integration with REGISTER is planned for 2026, bringing even greater connectivity between your CRG system and Teya’s payment technology.
Fast, secure, and built for modern businesses, Teya makes taking payments easier than ever.
Loyvere+ Teya Onboarding step-by-step guide (1).pdf
Please see link below:
https://help.teya.com/hc/en-gb/articles/42877051313681-Set-up-and-accept-Pay-by-Link-payments
If your Safescan is showing an E05 error, the first thing to check is the selected currency.
An E05 error can appear when you are scanning a different currency to the one currently selected on the machine.
For example, if the detector is set to EUR and you try to scan a GBP note, the machine may show E05.
How do I check and change the currency?
- Turn the machine on.
- Press and hold the MENU button until the currency starts flashing.
- Use the arrow button to cycle through the available currencies.
- When the correct currency is shown, stop pressing buttons.
- After around 3 seconds, the flashing will stop and the setting will be saved.
What should I do if I get E05?
Before assuming there is a fault with the note or the machine, make sure the selected currency matches the notes you are trying to scan.
If the currency is already correct and the error still appears, then the note may be damaged, worn, or failing one of the machine’s checks.
Tare – is the weight of the container used for holding a product – the Tare key subtracts the weight of the container. You can set a one-time tare for different containers or a successive tare for same weight of container.
Platter – top part of machine where weighing occurs.
PLU – Price look-up.
ASC11 code – table to give alphabetic code for adding letters, words, headers and PLU’s – High order number first – move across top then down to find relevant letter or number. C is used to move to next letter in the word.
Calibration – the setting of the scales to ensure accurate measure
(* ) (– Function key, PLU restore and key to press to see total amount (multiple functions)
Scales with Scoop
With the scoop version, the manufacturer uses the original flat plate and bolts the cradle on to the plate, which the scoop sits in. please note the grey plastic on the flat plate is removable.
A preset tare allows the scale to automatically deduct the weight of a container, tray, or packaging whenever a specific PLU is used.
Setting a preset tare
- Press MENU to open the menu.
- Press [1] for PLU.
- Press [2] for NEW/EDIT.
- Press the ↓ arrow until PLU NUMBER is highlighted.
- Enter the PLU number you would like to edit, then press [PRINT] to open it.
- Use the ↓ arrow to scroll down to TARE. This is usually found on page 5/9.
- Enter the required tare weight, then press [PRINT] to confirm it.
- If the scale gives a double beep and does not accept the tare, see the setting error information below.
- Press [SAVE] to save your changes.
- Press [ESC] three times to return to normal weighing mode.
Tare setting error / double beep
The tare weight must match the scale’s weighing increment. You can find this information on the metal rating plate on the side of the scale.
For example:
- If the label shows e=d=2/5g, the tare entered must be a multiple of 2g.
- If the label shows e=d=5/10g, the tare entered must be a multiple of 5g.
If the tare does not match the scale increment, the CN1 will give a double beep and will not save the value.
For example:
On a 15kg weighing scale, you can only tare up to 6kg
If you would like to tare items above 6kg, you will need to get a weighing scale which can measure more weight.
6kg scale can tare up to 2.995kg
15kg scale can tare up to 5.9995kg
30kg scale can tare up to 14.9995kg
You will find this information on the metal plate on the scales. (This is usually found down the side of the scales)

PDN Connection PDF

If you have the Cas ER Plus scales and your screen is showing the same or similar issue as what is show in photo . You need to do and check the following:
- Check that wiring isn't pinched
- Check if the wiring is loose
- Check if the wiring is caught
If you have checked all of the above and your screen is still showing as what is shown is photo 1, we may need to receive the item back to be looked over.

If you get the above message: This is the error which comes up when the scales can't see zero.
Please make sure you do the following first:
- Remove the rubber bungs from underneath metal cross on the scales
- Turn off at the plug and switch back on (This should reset the scales and go back to normal)
If you are still having the error message show up. Please do the following:
- Check if anything is dislodged underneath the scales
- Make sure you do not EXCEED (go over) the amount that the scales can hold
- Does it settle when you remove the plate?
If you have answered and done all of the above please contact us.

- Class III Approved: The required accuracy level for retail trade applications in the UK and EU.
- M Marked: Bears the M symbol along with the notified body number and year of verification – proof that the scale is individually calibrated and verified for use in trade.
- Certificate of EU Conformity: Supplied with each unit, confirming compliance with EU Directive 2014/31/EU (Non-Automatic Weighing Instruments).
To use the count function:
- Press [M] [M] until "P=0" is shown on the screen
- If you're using a container, put the empty container on the scale and press [>T<], skip step if no container
- Select your sample size by pressing [>0<] until either 10, 20, 50, 100,200, or 500 is selected
- If your sample size is 10, put 10 of your item on the scale, press [>T<] to confirm weight
- Now put all of the items you wish to count on the scale, the quantity will be displayed
- Once you've finished, remove all items (and containers) from the scale, and press [>T<] to exit.

- Type in the unit price
- Press and hold the * button for a few seconds until PLU nU appears on screen
- press the M button required (ie M1)
- press [T] (tare)
- repeat from step 1 if required
ER Junior Re-Calibration of Scale
6KG VERSION
Hold the CALIBRATION button (underneath the scale) and turn on
Press the zero button until it displays C-3 (cal3)
Press T
empty plate - press T
load = 2Kg press T (WAIT FOR COUNTER TO FINISH)
Load = 6kg press T (WAIT FOR COUNTER TO FINISH)
Load = 2kg press T CAL end. (WAIT FOR COUNTER TO FINISH)
Turn off and on
15KG VERSION
Hold in CALIBRATION button (underneath the scale) and turn on
Press the zero button until it displays C-3 (cal3)
Press T
empty plate - press T
load = 5Kg press T (WAIT FOR COUNTER TO FINISH)
Load = 15kg press T (WAIT FOR COUNTER TO FINISH)
Load = 5kg press T CAL end. (WAIT FOR COUNTER TO FINISH)
Turn off and on
The light is always on when the scale is plugged in, whether the battery is fully charged or not.
Step 1
Turn the scales off and switch off at the plug. Make sure the plate is flat and that you are using the scales on a flat surface and plug the scales back in and switch them on.
If unsuccessful
Step 2
Turn off the scale. Remove the flat plate and turn on. If the machine starts up correctly, then put the flat plate on and press T(TARE)
If unsuccessful and the scale has just arrived
Step 3
Turn the scales off and switch off at the plug. Leave it unplugged for a couple hours mimimum for the scale to settle. make sure the plate is flat and the scales on a flat surface. Put the plug back in the socket and switch the scales on
If that still doesn't clear the error please contact our customer support
This can be caused by a few common issues:
- overloading the scale
- sometimes happens in transport
- If the scale is dropped
Please contact us for further help
- Type the price per KG
- No decimal places. £2.00 would be input as 200
- Press the icon
- Press a memory / PLU button
- M1 - M7, or any of the 36 blank buttons on the PLU version
- Press
- Press
- Input the item name (skip this if you do not want or need to update the name, but you do need to complete step 7 to save the price)
- Screen only has space for 6 characters and the first two are hidden, it is recommended to add 2 spaces to the start of the name and not exceed 6 characters
- The table for inputting characters is below.
- Find the character you wish to input, press the button from the top row first, then the number from the left column, followed by the [C] button. Repeat for each character.
- Ex) “APPLE” is “41 C, 50 C, 50 C, 4 C, 45 C”
- Press the >T< button
- Saves the changes and exits.
| 2 | 3 | 4 | 5 | 6 | 7 | |
| 0 | SP | 0 | @ | P | ‘ | p |
| 1 | ! | 1 | A | Q | a | q |
| 2 | ˝ | 2 | B | R | b | r |
| 3 | # | 3 | C | S | c | s |
| 4 | $ | 4 | D | T | d | t |
| 5 | % | 5 | E | U | e | u |
| 6 | & | 6 | F | V | f | v |
| 7 | ´ | 7 | G | W | g | w |
| 8 | ( | 8 | H | X | h | x |
| 9 | ) | 9 | I | Y | i | y |
| M6 | * | : | J | Z | j | z |
| 100g | + | ; | K | [ | k | |
| , | < | L | ¥ | l | ||
| M7 | - | = | M | ] | m | |
| * | . | > | N | ^ | n | |
| / | ? | O | _ | o |
Click Here
- MENU
- [9]
- enter password (default is 011) PRINT
- [1] [3]
Items must share the same "code" and "price" in both systems. This will allow Loyverse to interpret the barcodes printed by the Cas CN1, looking up the code and passing the weight across.
Create Loyverse Compatible Weight Embedded Barcode Format:
- [MENU] Open the PROGRAM MODE
- [2] Go to PLU DATA TABLE 1
- [6] Go to BARCODE
- [1] Go to NEW/EDIT
- [1] Input 1 under BARCODE NO
- [v] Move to DESCRIPTION
- <type name> Input a name, for this example WEIGHT EMBEDDED
- [v] Move to TYPE
- [1] Input 1 for EAN-13
- [v] Move to FORM
- [v] Move to next input box showing DDIIIIPPPPPC
- [2][0] Input the number 20, which will replace DD
- [I][I][I][I][I] Input the letter I x 5, which will replace IIIII
- [W][W][W][W][W] Input the letter W x 5, which will replace PPPPP
- [V] Input the letter V, which will replace C
- [SAVE] Save the new barcode format
- [ESC] Press to go back, press multiple times to reach main screen
Set New Barcode as Default Global:
- [MENU] Open the PROGRAM MENU
- [5] Go to GLOBAL SETTING
- [2] Go to BARCODE
- [1] Change
USE GLOBAL BARCODE to Y - [v] Move down to PLU WEIGHT BARCODE NO.
- [1] Change PLU WEIGHT BARCODE NO. to 1
- [SAVE] Save the new global barcode settings
- [ESC] Press to go back, press multiple times to reach main screen
Add Item with New Barcode Format:
- [MENU] Open the PROGRAM MENU
- [1] Go to PLU
- [2] Go to NEW/EDIT
- <number> Input the DEPARTMENT NO. (1 by default)
- [v] Move down to PLU NO.
- <number> Input the PLU NO.
- [SAVE] Open the PLU NO. for editing
- PLU TYPE 1
- NAME <matches Loyverse name>
- ITEMCODE <matches Loyverse SKU>
- PRICE <matches Loyverse price>
- All others optional
- [SAVE] Save the changes to the PLU
- [ESC] Press to go back, press multiple times to reach main screen
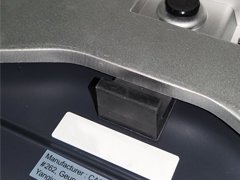
• Press [MENU] [5] [1]
• Press [1] [PRINT] to ensure Y is selected
• Type the number of the label you require, shown on the below.
• Press [SAVE]
58 x 40 PRINTED LABELS
10 - Name & Name 2
11 - Name & Ingredients
12 - Name only
58 x 60 PRINTED LABELS
22 - Name & Name 2 & Ingredients
23 - Name & Ingredients
See pages 194 in the manual onwards for templates
As shown in the photo below:

• Press [MENU] [1] [2] [PRINT]
• Type the PLU number to be set up followed by [PRINT]
Numbers 1-8 are on the top row, 9-16 on the next row, etc.
• PLU TYPE - Enter a number 1-3, followed by [PRINT]
1 = By Weight | 2 = By Count | 3 = By Pieces
• NAME - Enter the name of the item using the A - Z keyboard.
• Press [PLU] (down arrow) to move down to PRICE (7 presses)
• Input the price without using decimal place. Example £1.20 = [1][2][0]
• Press [SAVE]
• Type date as DDMMYY
• Press [PRINT]
• Type time as HHMMSS
• Press [PRINT]
• Press [SAVE]
- MENU
- 1
- 1
- DOWN TO PLU NUMBER
- ENTER PLU > PRINT
- ENTER NEW PRICE > PRINT
- REPEAT FROM STEP 3
- Press [MENU]
- Press [1] to open PLU SETTINGS
- Press [2] to open NEW / EDIT
- Press [↓] to highlight PLU NUMBER
- Type in the <PLU NUMBER> you wish to edit
- Press [PRINT] to confirm
- Press [↓] until you reach SELL BY DATE
- Input the <NUMBER OF DAYS> the item is good for
- Press [SAVE] to save the changes
- Press [ESC] [ESC] [ESC] to go back to the operation screen
This product will now generate a sell by date when printed. This filled the field on the label names USE BY.
In order to enable this feature, follow this sequence:
- Press [MENU] [8] [7]
- Input the password (default is 011) and press [PRINT]
- Press [3] to open SALE SETUP
- Press the down arrow to select the option SHIFT KEY INSTEAD OF RETURN KEY
- Press [1] to change N to Y
- Press [SAVE] to confirm the change
- [ESC] [ESC] [ESC] to exit
MISC:
MISC by Weight:
- Put item on scale
- [MISC by Weight]
- <input price>
- [PRINT]
MISC by Count:
- <number of items>
- [MISC BY COUNT]
- <input price>
- [PRINT]
If you have a lot of sets of ingredients to set up, using the CAS CL Works tool will massively speed up the data entry.
Please refer to the manual for full details - but a quick summary is:
Page 64 - 2.3.1.1
Here you set up free text for ingredient numbers (you might want these numbers to match the PLU number - ie PLU01 uses ingredient 01). You can create up to 1000 sets of ingredients.
Page 35 - 16
In the ingredient No. field - enter the number which is relevant
Page - 194
Please ensure you are using a template that includes ingredients
Prepack:
Press [PREPACK] followed by <item>:
Weighted item: Will auto print when item put on scale
By PCS / Count: Will allow [PRINT] to be pressed multiple times in a row.
Press [PREPACK] followed by [ADD] to enable summation mode
- Press [PIG TEETH]
- <weigh item> <grab label>
- <weigh item> <grab label>
- <weigh item> <grab label>
- Press [SUB TOTAL] [PRINT] (There is no price on this label)
- Press [DONKEY STEAK]
- <weigh item> <grab label>
- <weigh item> <grab label>
- Press [SUB TOTAL] [PRINT] (There is no price on this label)
Press [SUB TOTAL] [PRINT] for the absolute final price, there is still no price on this label.
- To get a printout of the price on this label, you must create a new label on the PC software, with the field “(TOTAL)Total Price” present on the label.
Multiple pieces:
- press Item > OVERRIDE > FOR > #
- Alternatively, use “by count” instead of “by pieces”, this will allow more simple method:
- Press Item > #
Set up network settings:
Connect SCALE to ROUTER using ethernet cable
[MENU] Open the main menu
[9] Open Network Setting
[0][1][1] [MENU] Input the password
[2] Select DHCP
[1] Change DHCP from N to Y
[SAVE] Save the change
[ESC] [ESC] [ESC] Return to the main screen
Set up Windows program:
Install CL-Works Pro by running setup.exe
Open CL-Works Pro program
Press SCALE at the top of the screen
Select TCP/IP and press SCAN, this should populate the empty table with the scale information, the first 3 cells should be:
IP Address <varies>
TCP Port 20304
Model CN1
Press SAVE
CAS PDN Settings For PrintNode 4.28.16+
Cas PDN must be connected directly to serial port, compatibility with USB to Serial converters not confirmed.
The required settings for the CAS PDN to communicate with PrintNode are as follows:
- Hold [>0<] while switching on device
- Press [>0<] to move to TYP select
- Press [>T<] until screen says “TYP 2”
- Press [>0<] to move to the next option
- Press [>T<] until screen says “r ECr”
- Press [>0<] to move to next option
- Press [>T<] until screen says “TYP 5”
- Press [>0<] to move to next option
- Press [>0<] to save and reboot
PrintNode setup information for serial scales can be found on the PrintNode website. The version must be 4.28.16 or newer. CAS PDN is a selectable scale mode.
Subject: Urgent Product Recall – CAS PD2 / PDII Scales (Serial Numbers Beginning 2411)
Dear Customer,
Cash Register Group is writing to inform you of an urgent product recall affecting specific units of the CAS PDII scale that may have been supplied to your organisation.
Following a compliance review, it has been identified that a batch of CAS PDN scales—specifically those with serial numbers beginning with 2411—were issued with a conformity certificate that was one month out of date. As a result, these units are considered incorrectly conformity assessed and cannot be used in trade-approved or legal-for-trade environments.
We sincerely apologise for any inconvenience this may cause. To ensure full compliance and minimise disruption, Cash Register Group is taking the following actions:
We will contact you individually to confirm whether your scale is part of the affected batch.
A replacement PDN scale, complete with a valid and current certificate, will be dispatched to you as a priority at no cost.
Once the replacement has been delivered, we will arrange collection of the recalled scale at your convenience.
Your safety, compliance, and uninterrupted operation remain our highest priority. We greatly appreciate your cooperation and understanding as we work to resolve this matter promptly.
If you have any questions or require further assistance, please contact our support team on 0800 161 5622 or speak to us via live chat.Kind regards,
Cash Register Group
If for any reason you have changed the configuration of the device or it stopped working, on the Dongle are two barcodes
Factory Reset
Pairing Mode
Scan these two in order and re-scan a barcode.

Scan the following barcodes in order:
Factory Defaults

Scan Mode

Set Suffix

Enter
Scan the following barcodes in order:
Factory Defaults
Scan Mode
Set Suffix
Enter
Open the Register Portal https://portal.smartvolution.com
Press the CONFIG dropdown and select PROFILE
Press the
Open the HARDWARE section
In the BARCODE SCANNER dropdown, select ZEBRA USB SCANNER
Press SAVE
Sync the changes
Open the Register App on your terminal
Press ⋮ at the top right and select SETTINGS
Press FULL SYNC
Configure the scanner
Plug the scanner in to the screen
Scan the following barcodes in order
Factory Defaults
USB HID Keyboard
OPOS
Auto Detect.docx
Scanners do often come with configuration manuals - the settings do not need updating - however up you have adjusted any of the scanner settings and now the scanner doesn't scan (or more likely scans but fails) please reset the scanner back to default.
See the attached manual - just scan the DEFAULT barcode. Unplug the scanner, plug it back in, and try again
XB-2055.pdf
However, if you were a past customer and purchased any of the 300KG or 350KG shelving ranges, we should be able to help! Please send a email to [email protected] with as much information as possible.
For this reason, we’re unable to recommend or supply castors for use with these shelving systems.
Uneven or concentrated loading can reduce the stability of the shelving and may cause damage to the shelves or supporting structure. For safe use, always ensure that weight is distributed as evenly as possible across each shelf and does not exceed the stated UDL capacity.
For this reason, all of our shelving and racking have been independently tested to determine their max loading per shelf and per unit.
The amount of deflection can vary depending on the weight, how the load is distributed and the width of the shelving bay. Heavy or concentrated point-loading can increase deflection and may damage the shelving.
For safe use, always ensure loads are distributed evenly, do not exceed the stated weight capacity, and avoid placing exceptionally heavy items in a single concentrated area.
Most cash registers have specific replacement keys that can be found in the spare part section of the register.
For keys related to a standalone drawer, please first take a look at the barrel of the lock - there is usually a 3 or 4-digit number which is the barrel number, and this should then correspond to the key number. First step is to do a search on our website for this number to see if the key comes up.
Failing that, please contact us with the barrel number and details of your order, and we will have a look for you.